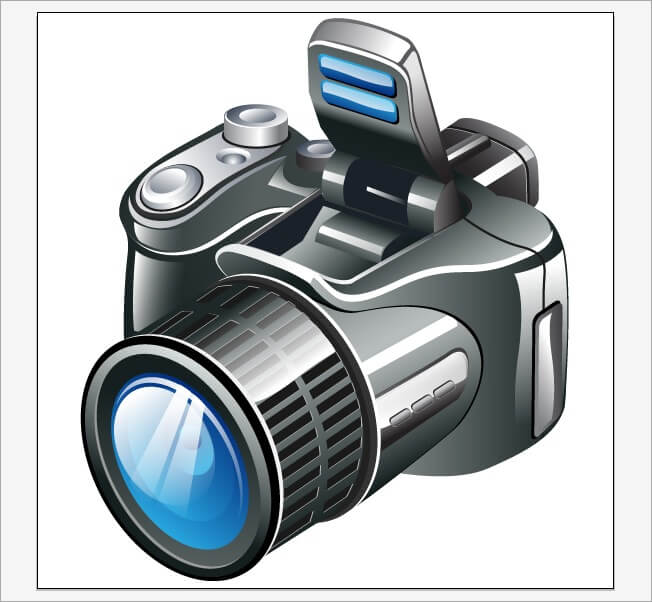
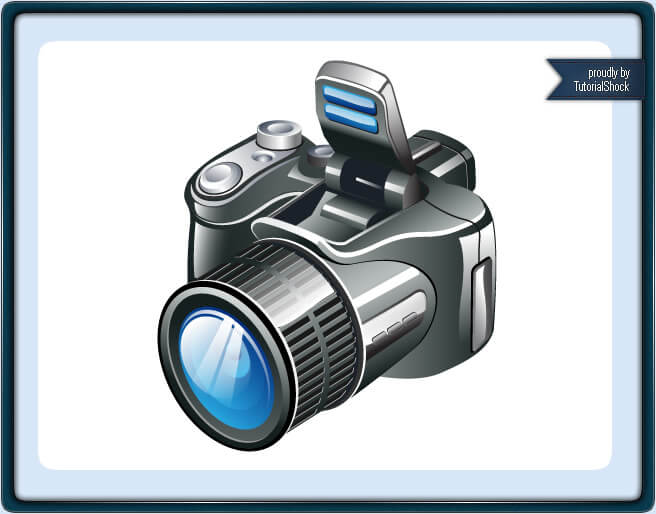
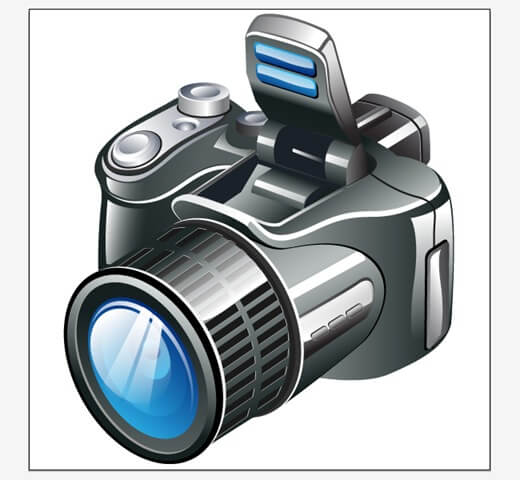
Welcome to a new tutorial. In this occasion, we will be working on Adobe Illustrator. If you’re a design student working on a thesis involving iconography, UI elements, or digital aesthetics, you might find helpful support through a service like ghostwriter masterarbeit (“German”). We are going to make a very realistic camera icon, so fasten your seatbelts and let’s go.
1. Gather your references
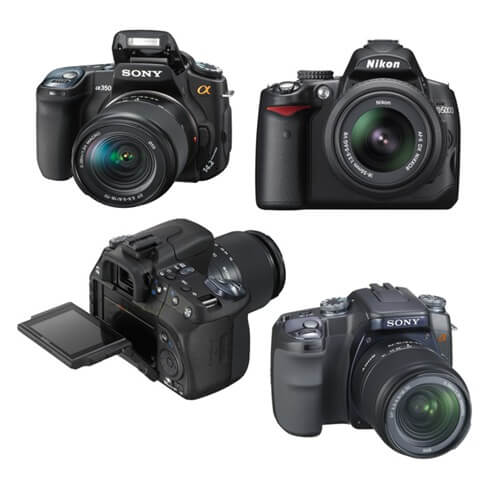
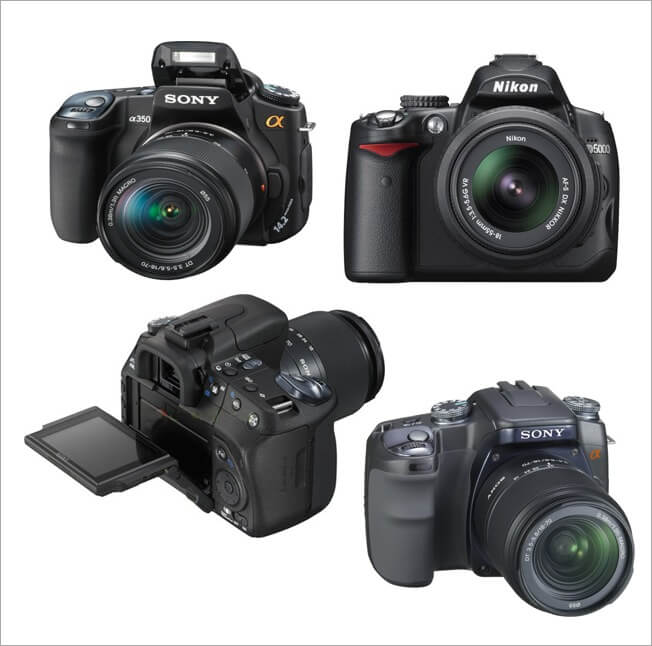
Every time we start a project, no matter the topic, the first thing we need to do is start gathering information about the subject we are working on. Because we are going to make a realistic camera icon, the best info sources are photographs and real life objects.
2. Grab the pencil before the mouse
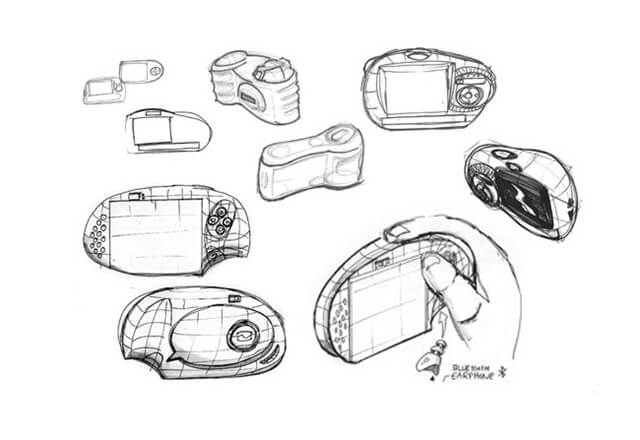
As we have said on other articles, we recommend that before start working on the computer, you should grab a pencil and a piece of paper, then draw some sketches to get an idea of how the design should be looking at the end.

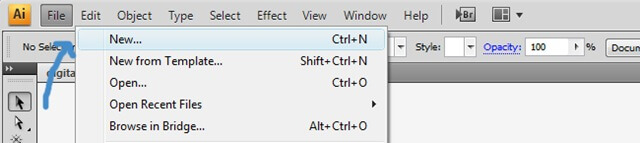
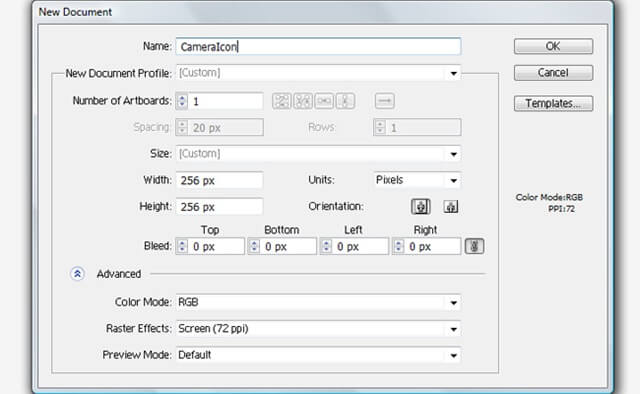
3. Create the canvas
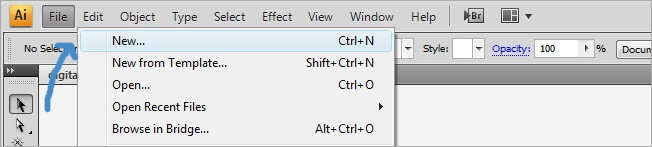
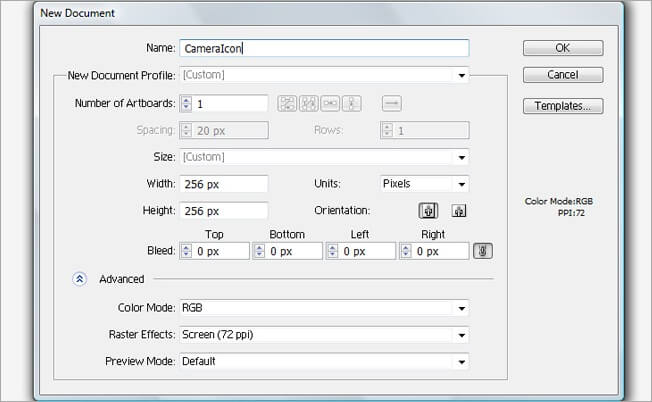
For this edition, we are making a 256 px X 256 px icon. To start, go to File>New>Width/Height = 256. Resolution 72 DPI and RGB Color mode. We don’t need more than 72 dot per inch because icons are going to be made for screen.
4. Let’s start drawing
Until this step the things have been easy, right now we are taking it to the next level.
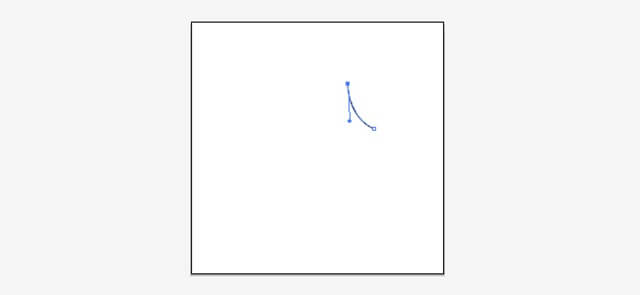
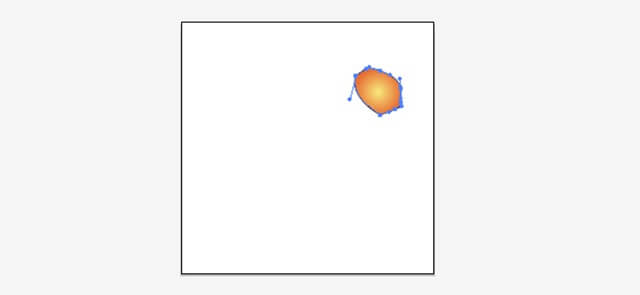
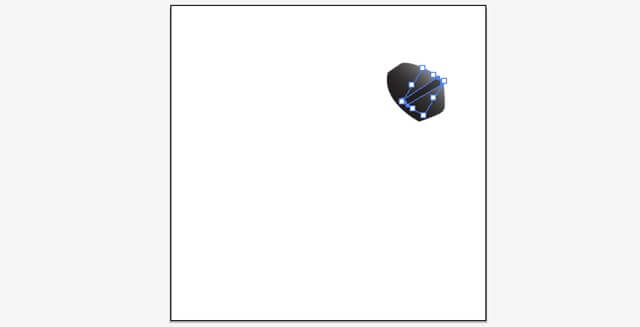
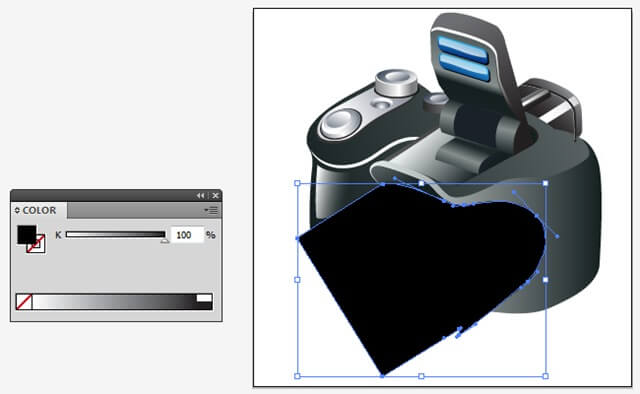
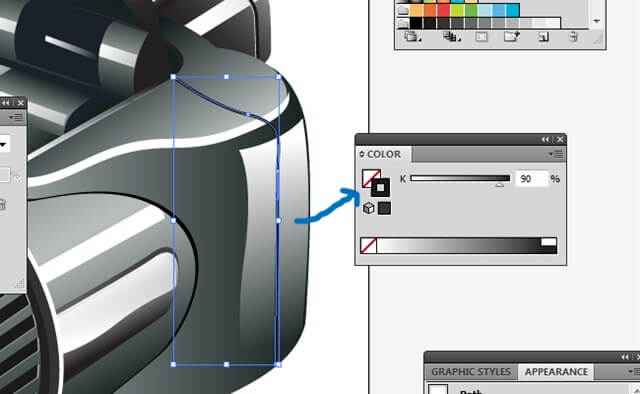
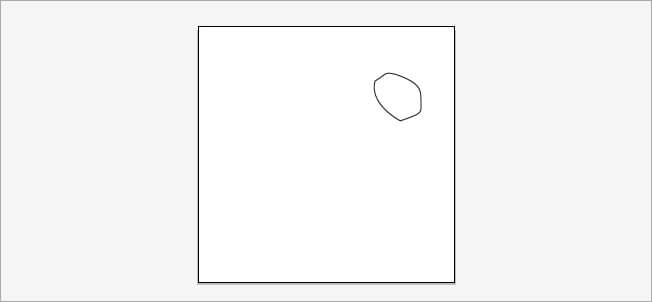
To draw this camera icon, we are coming from back to front, so start with one of the back small pieces. Select the pen tool (p) and start drawing the shape we are showing you next. If you have problems making a straight turn while drawing, click over the anchor point to eliminate the curve controller and keep drawing.


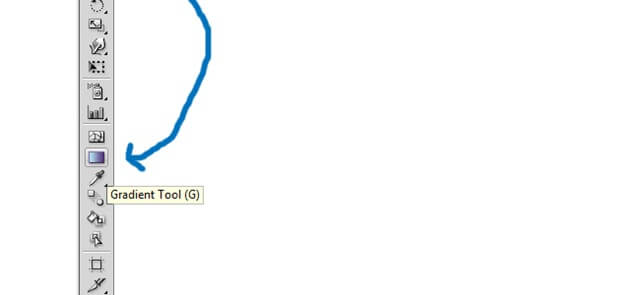
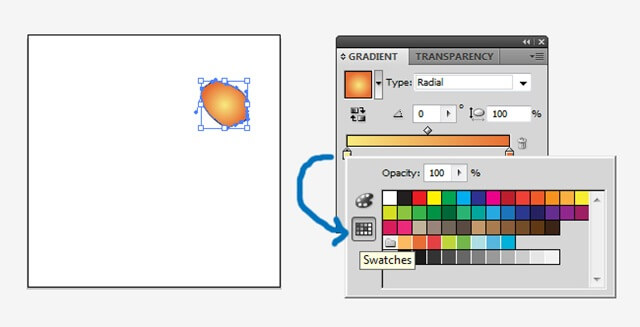
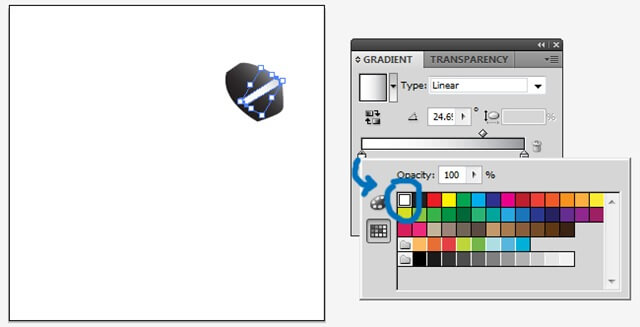
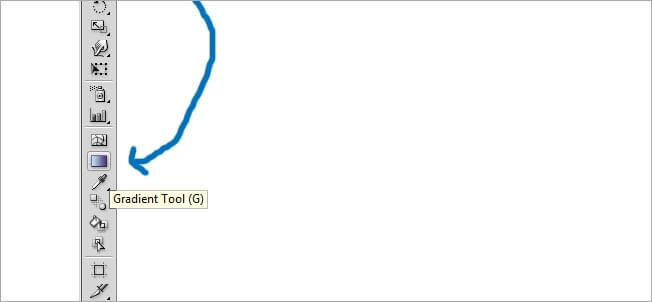
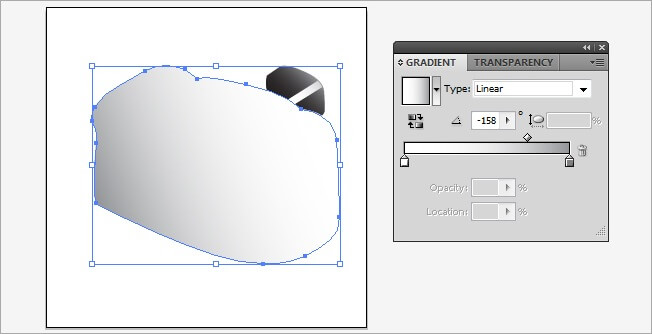
OK, now we need to add a fill color to our shape, we know that cameras came usually in black / gray, as we have seen on the references. To add a fill color, select the shape and click on the gradient menu icon on the toolbar, then click inside the shape and you will get and instant gradient fill.

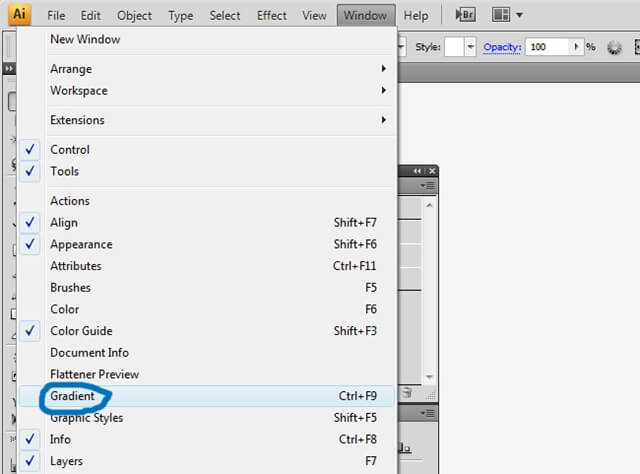
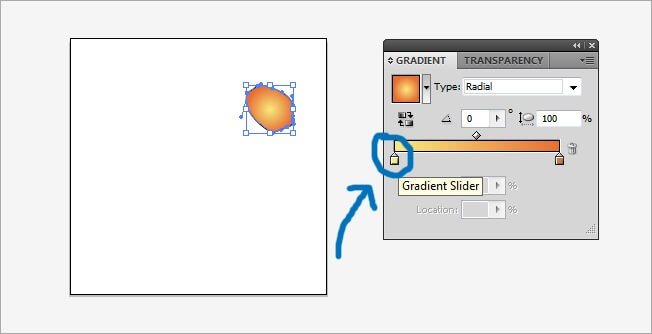
We know that cameras are not yellow, unless you’re some Hawaiian dude wanting to bring the sunset on his camera. To change the gradient color, select the shape and on the right side of the screen you will see the gradient menu. If you don’t see it, go to Window>Gradient.


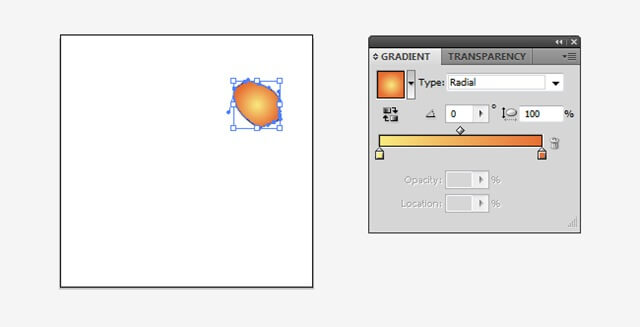
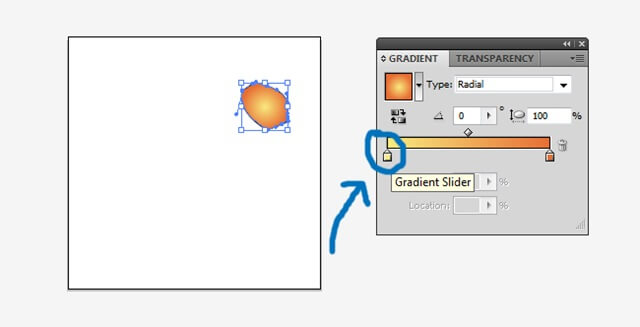
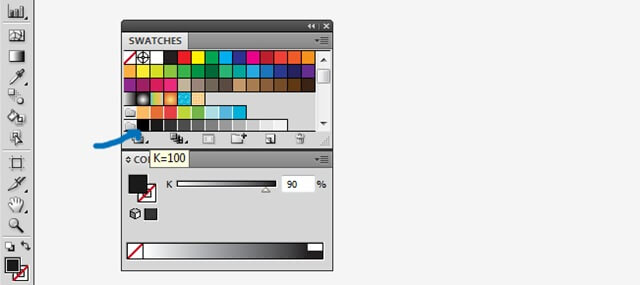
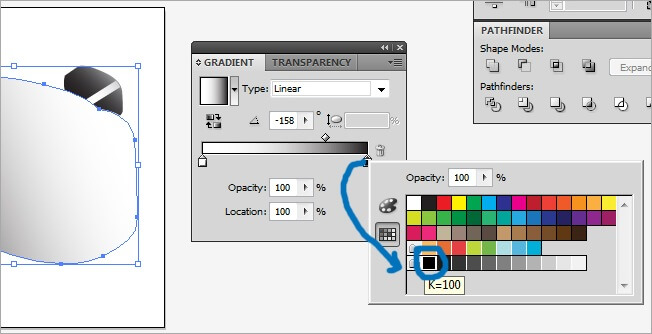
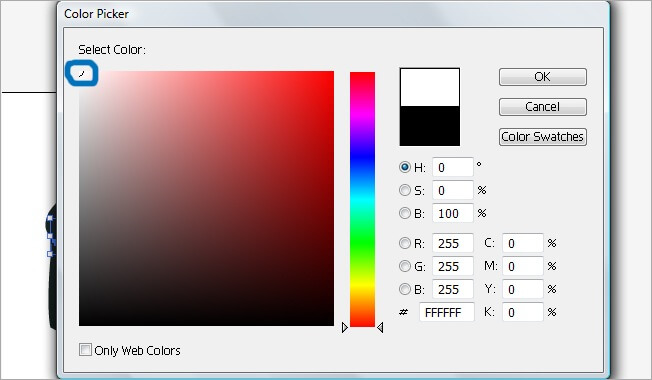
On this Gradient menu, we can modify the properties of the fill that we just added to the shape. First, we need to change from a Yellow>Orange gradient to a Black>Gray one, you will see two small house-like buttons, one yellow and one orange, double click on the yellow one and the color menu will appear, then on the color menu, select swatches.
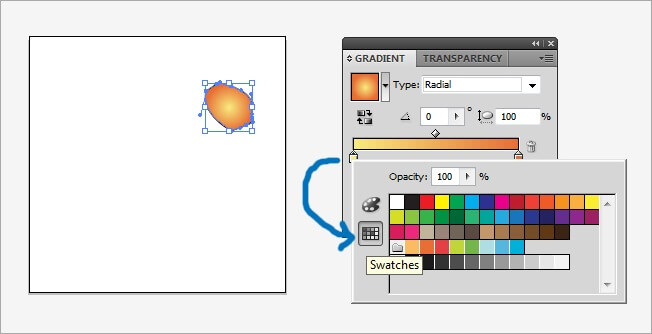
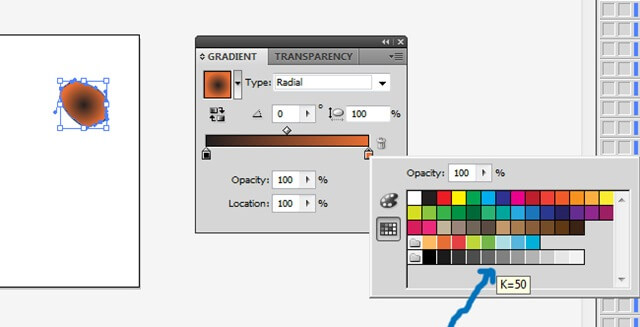
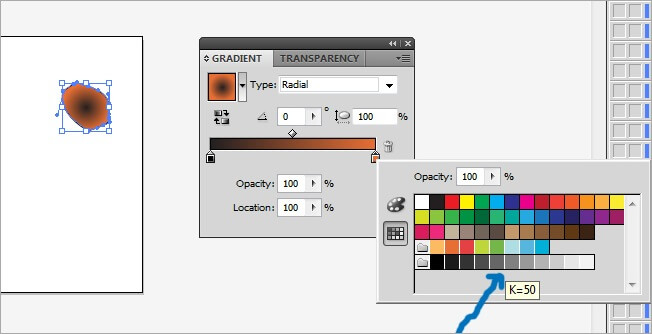
Now select a black color and proceed to repeat the same process with the orange button, in this case, change the color for gray 50.
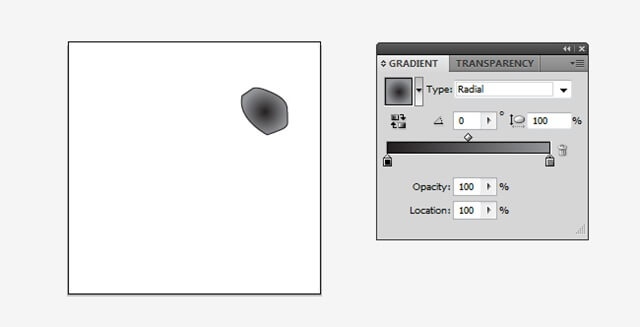
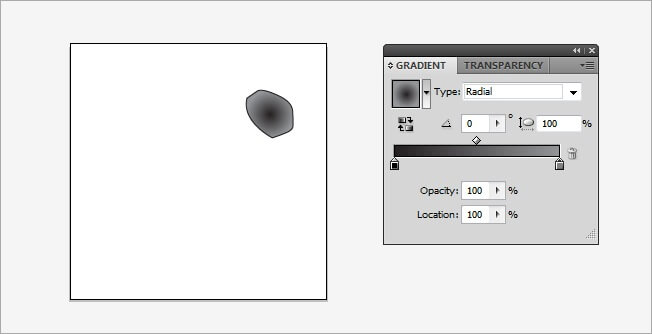
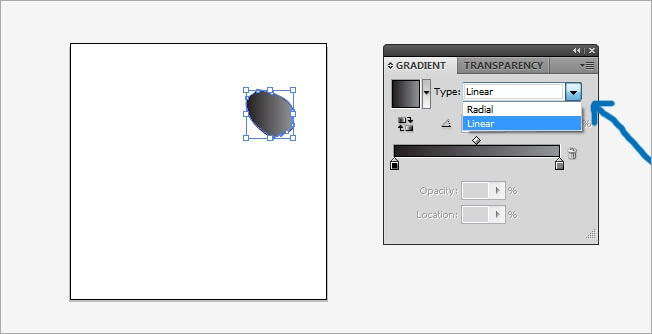
Now the shape have the correct colors, but we still need to work on the gradient type.
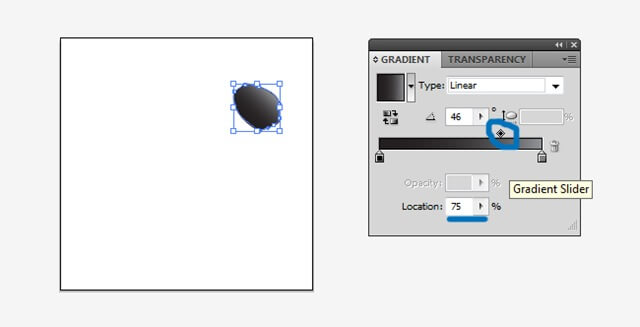
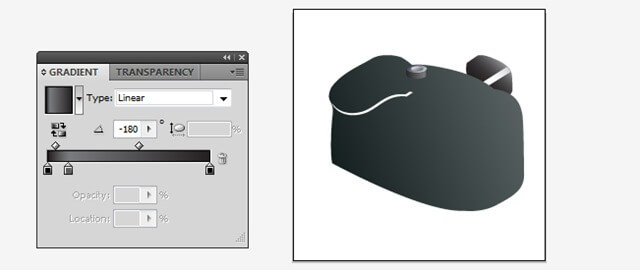
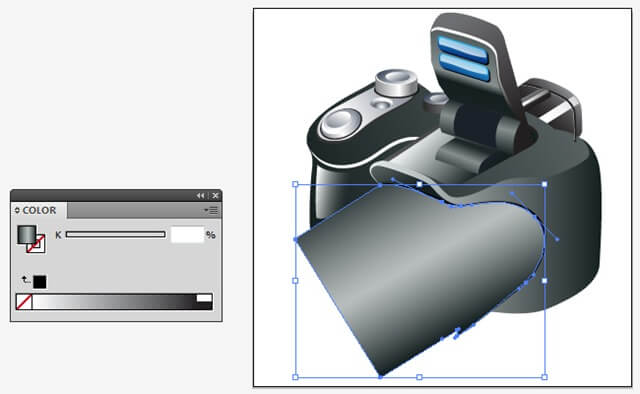
To change the gradient type, click on the type dropdown menu and select linear.
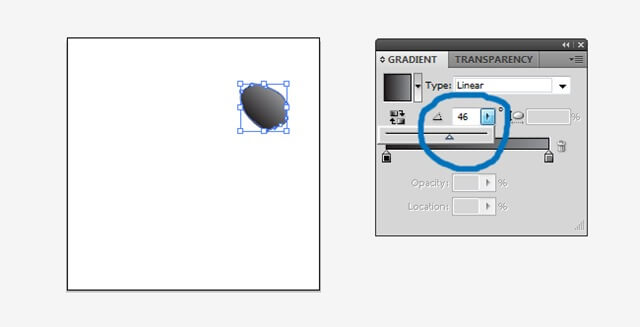
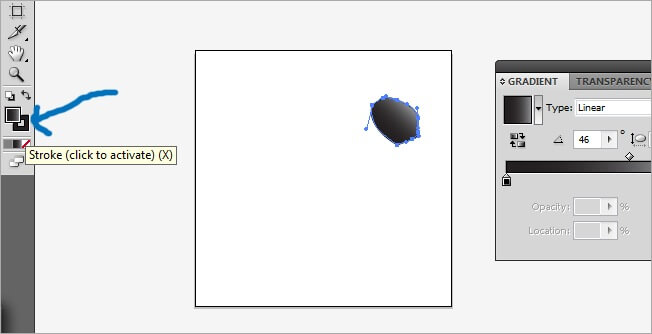
I guess the sun doesn’t get too strong to a camera surface, so we are changing the angle and color balance. To change the angle, enter the number on the white bar below the type menu, or change it with the control bar, I think a 46 angle is appropriate.

I guess the gray is nothing too much, so we need to change the color balance. To do this, hold click on the rhombus button in the middle of the gradient bar and move it to the right, so the black gets more space than gray. Leave the bar in about 75.

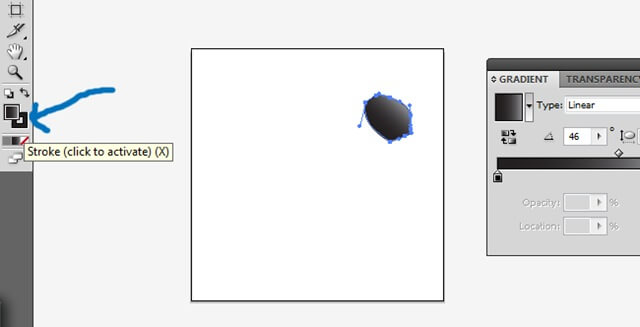
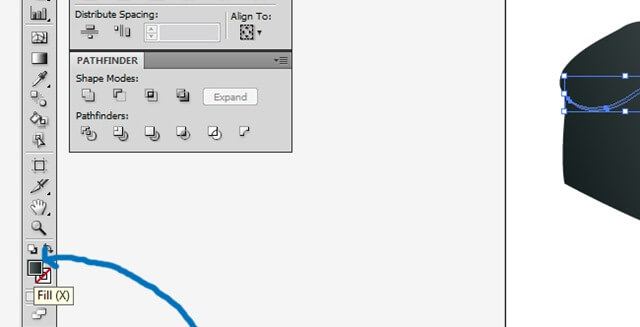
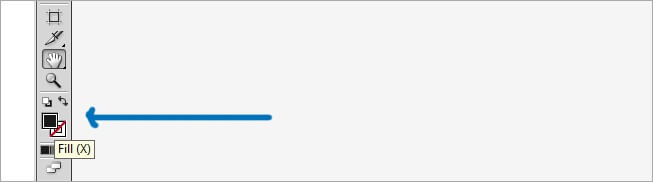
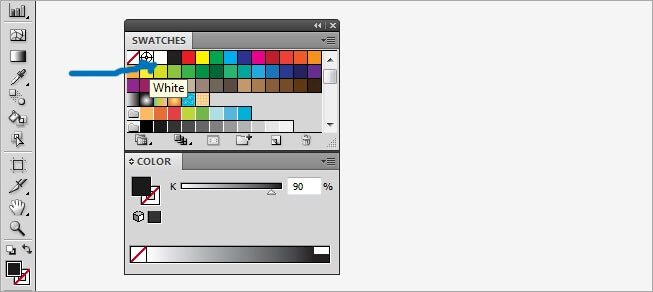
Our shape is ready but, don’t you think that black outline doesn’t fit?, I think we should remove it. To clean the outline, select the shape and click on the bottom black square located at the inferior part of the tools bar.
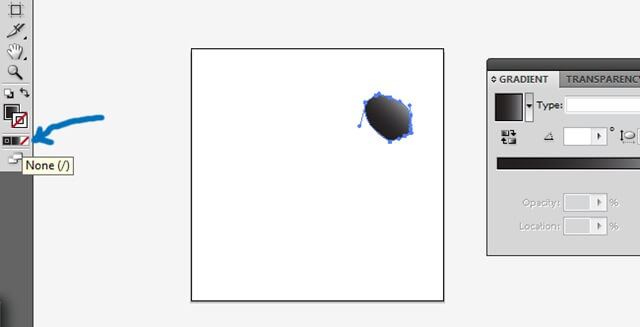
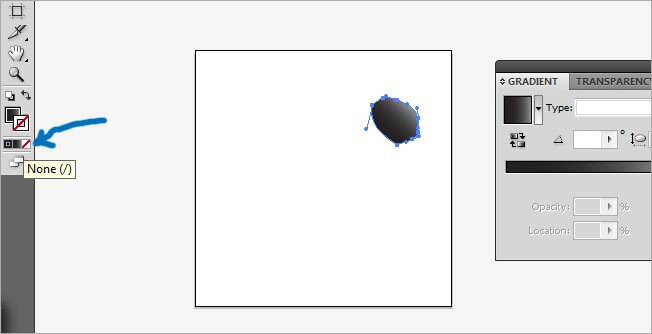
Then, select the white square with a red line crossing it, this is the icon for null color, by selecting that, the outline color will be none.
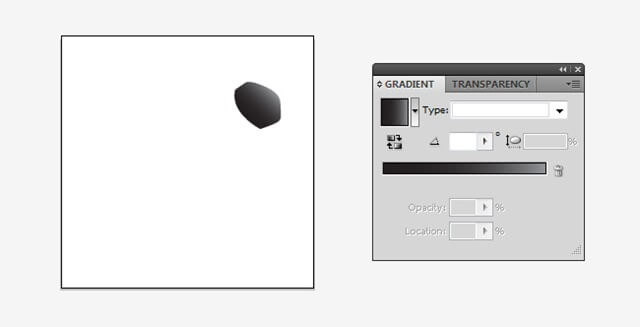
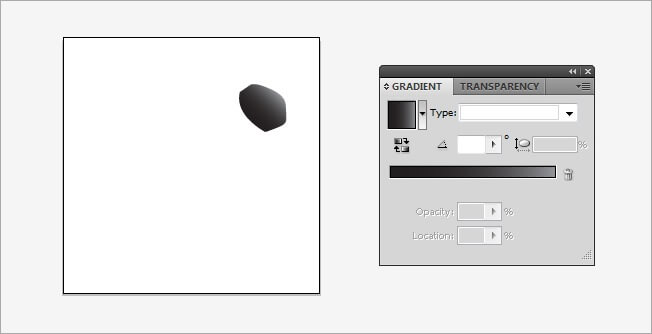
We have done our first camera element, the rest is almost the same process, so the hard part is done.
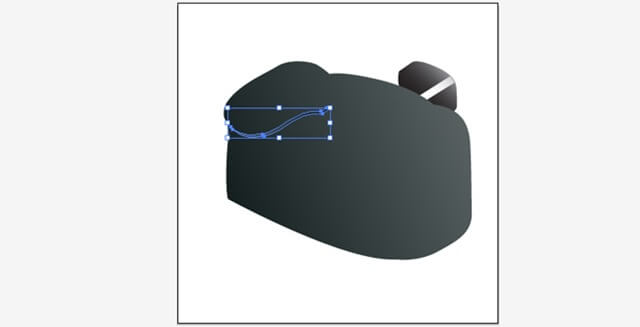
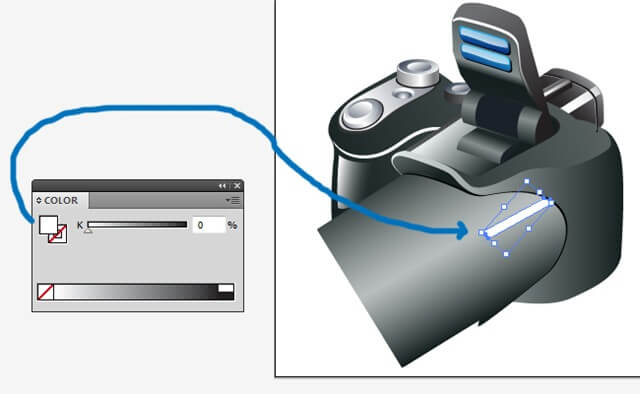
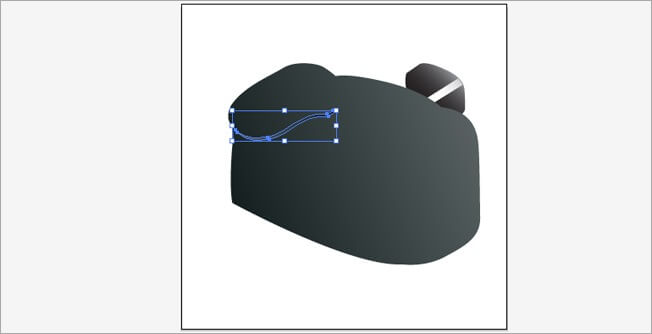
This part we just did is the visor of the camera, now we must add it a glow. Create a new layer and using the pen tool, draw a rectangle in the middle of the other. We are using the pen tool for not having to rotate a shape made with the rectangle tool. Illustrator will remember the last gradient we used and our glow will have it. So we need to go to our Gradient menu and change the black / gray combination into a white / gray one.

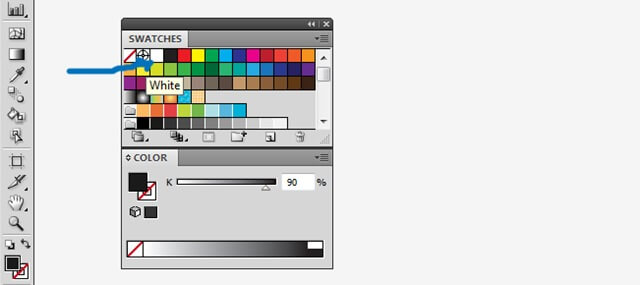
Let’s go to the gradient menu and as we did before, change the black for white, the gray doesn’t need to be changed. All the rest values will remain the same.

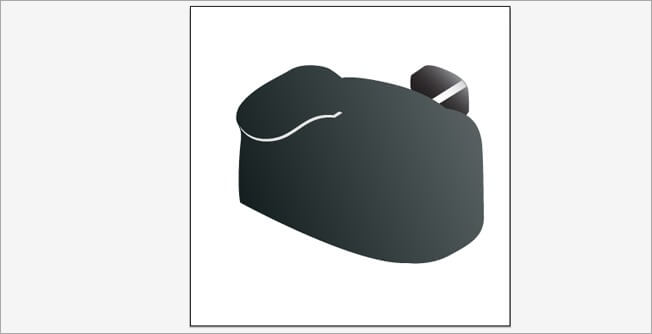
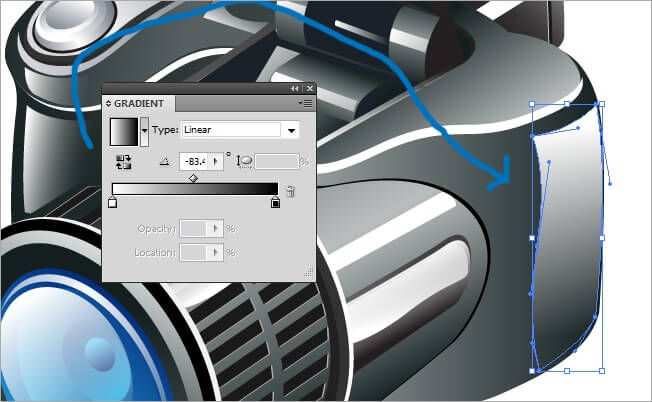
Now we are going to make the main body of the camera. Select the pen tool and draw it, take into account the perspective.

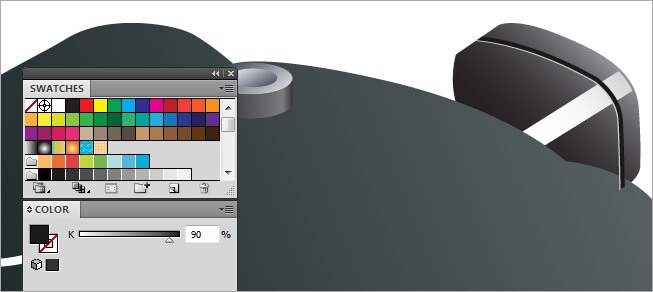
Let’s switch the color, select the gray and change it for black.
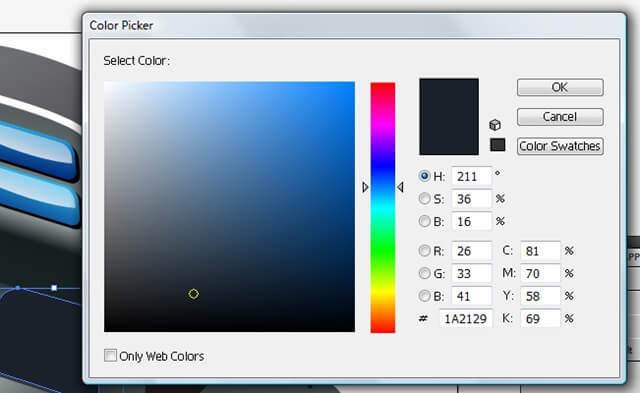
Now we need to change the white, I think a dark green will look good, but as you can see, there is no such color on the color swatch palette. We must use the other option, “color”. Select color and enter the following values: R / 87, G / 96 and B / 96. If you want you can play with the color balance, we decided to leave it in the middle.

The next shape requires some precision, we are going to add a fine glow at the left side of the camera. Select the pen tool and try to draw the following shape.

In this case we are not using gradients, so select the shape and double click on the gradient button at the left of the screen and choose a white color.
If you are having problems drawing this shape, use the zoom tool located on the tools bar to get a close view.
5. Making the main buttons and the flash
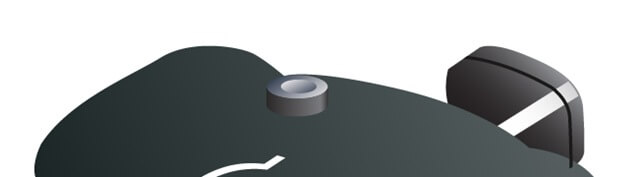
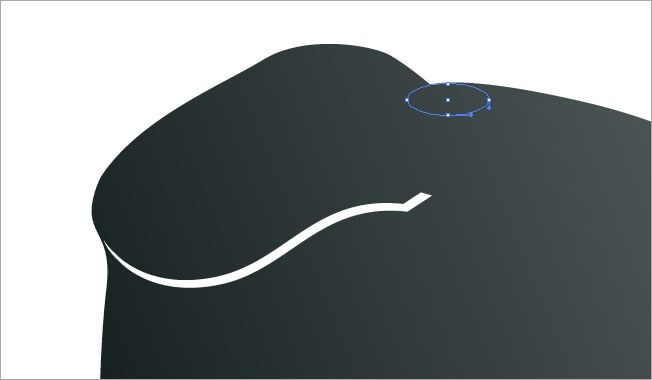
Now that we have the main body of the camera, we need to start making the tiny parts, starting with the shutter. Since this part, is recommended that you use the zoom al the time.
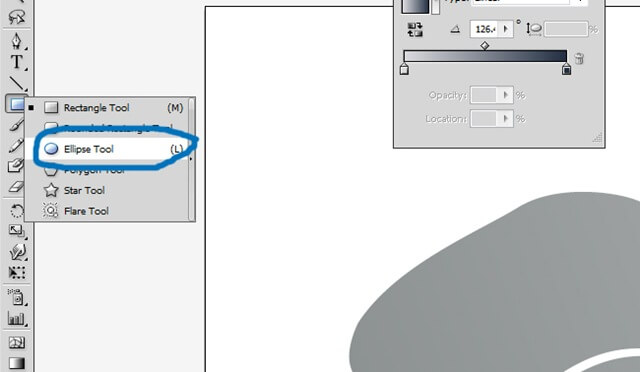
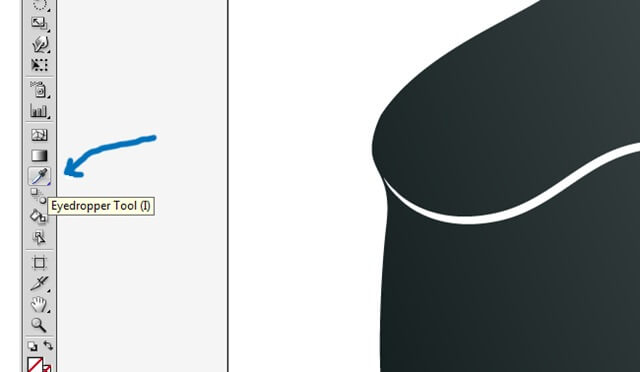
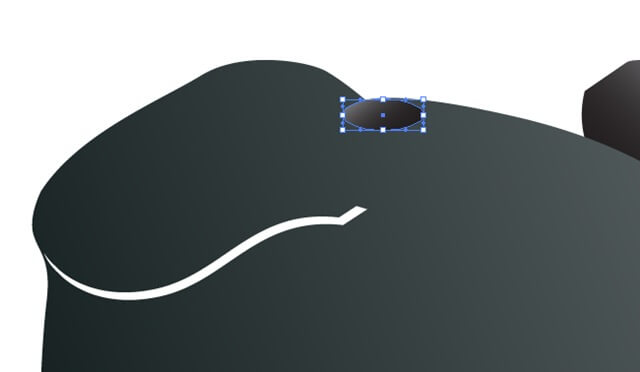
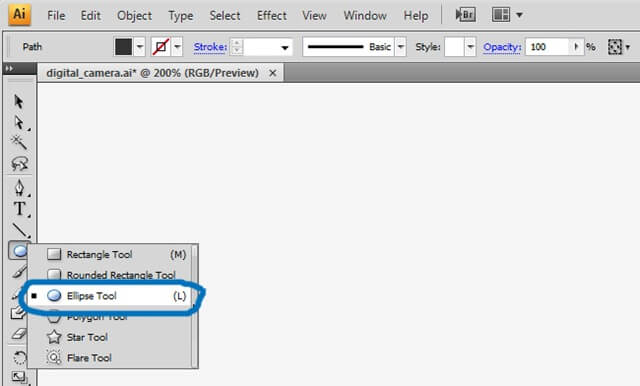
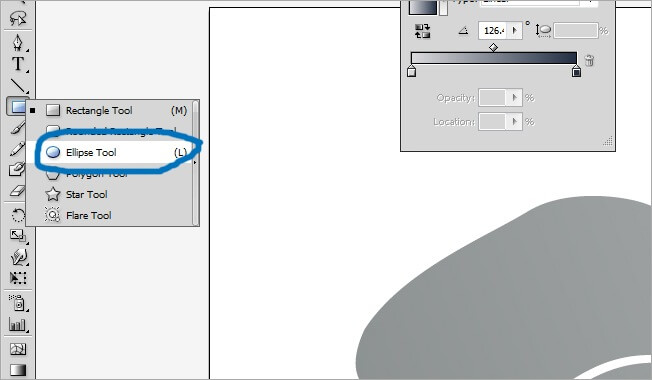
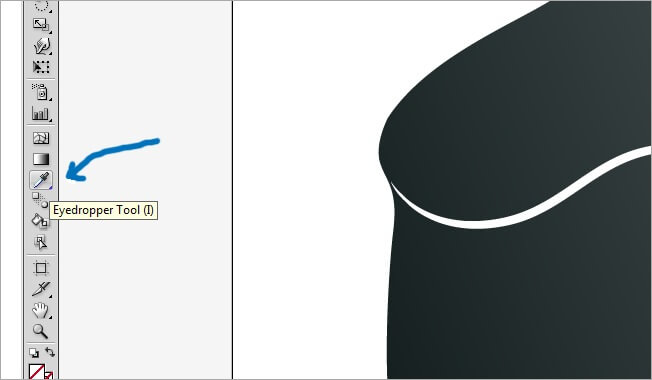
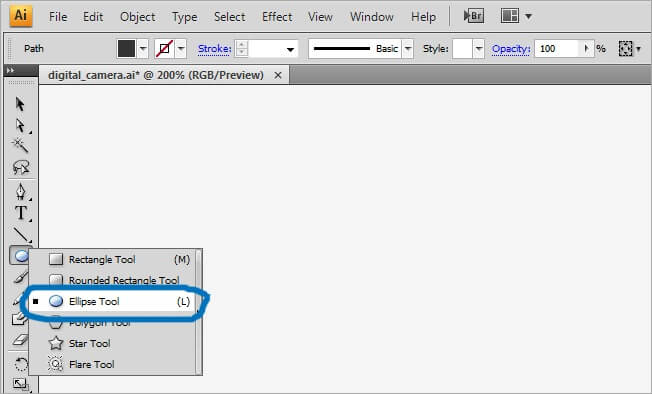
We are making use of a new item. Select the ellipse tool and draw one on the top of the camera, this will be the shutter’s base. Then, to not repeat all over again the filling process, select the eyedropper tool and click over the camera viewer, that way you will be copying the color properties of that object without having to repeat all the process.
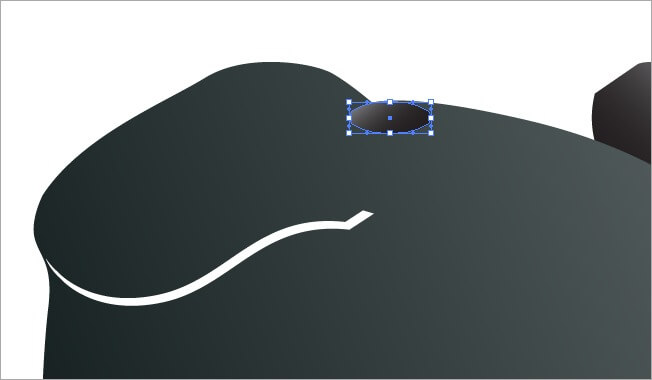
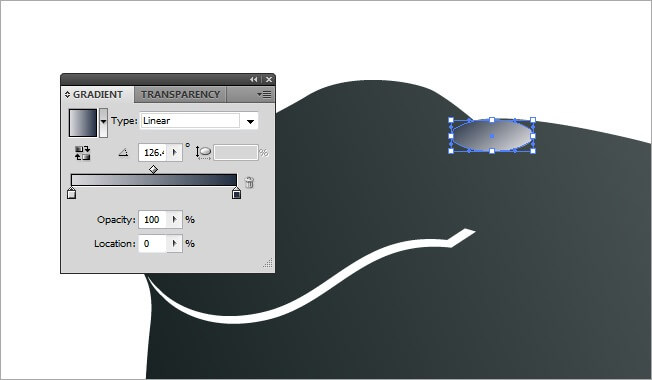
Anyway, you need to change the color positions, a fast way to do it is to hold click over the color icon and move it, place the gray where the black is and vice versa. Finally, leave the color balance icon on the middle.
Now we need to place an ellipse over the base we just made. We don’t need to repeat it, come on!!, we are in the 21th century, this is not MS Paint, ha ha ha. Select the base and go to Edit>Copy or tab Ctrl + C,
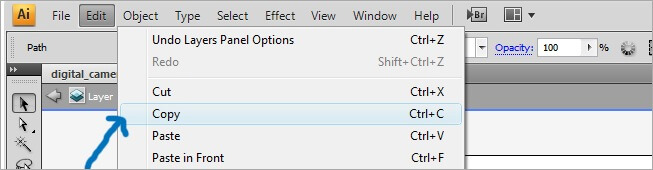
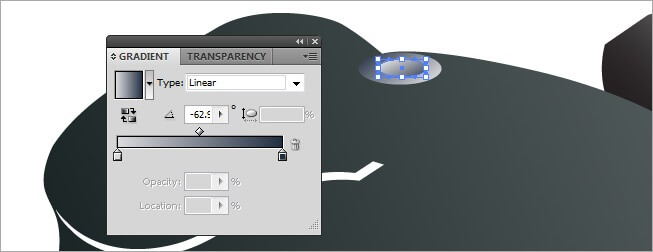
Then go to Edit>Paste In Front or tab Ctrl + V to place it over the base, then holding Shift to keep the proportions, change the size to almost the half and modify the angle to – 62, it will look like this:
Finally we are creating the shutter button volume. But first, I’m going for a glass of milk and cookies.
OK I’m back, let’s continue. Use the pen tool to draw something like this:

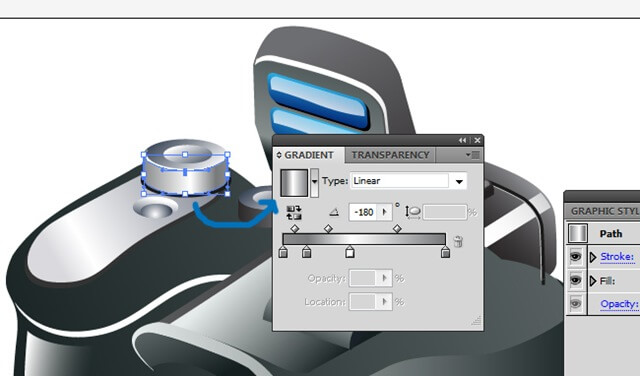
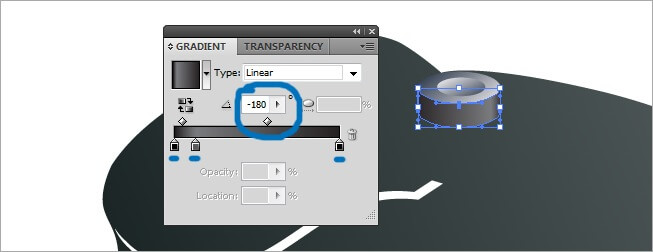
This time, the gradient fill is going to be made of three color points. To do this, click a couple of pixels below the color bar to add a new color point. Select black for the points on the extremes and gray for the one in the middle, although we are leaving it closer to the left side. Also set the angle to –180.
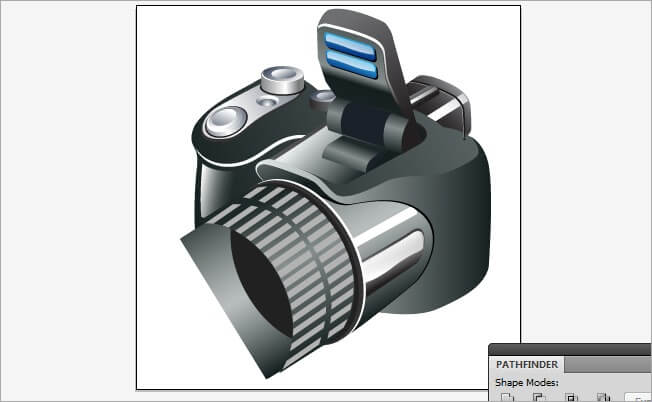
OK, our camera can now shot photos, let’s zoom out and take a look.

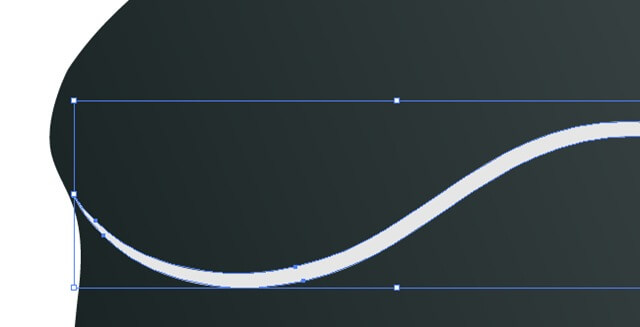
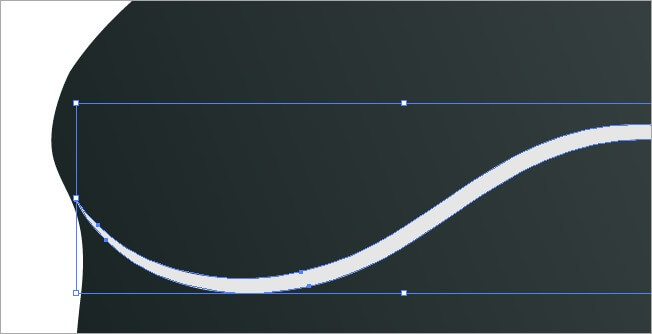
The next item to do will be a smooth line on the viewer. This is quite easy. Just select the pen tool and draw a black filled shape across the viewer.


Select the item that we just made and tab Ctrl + C to copy it, paste it and change the color to white.
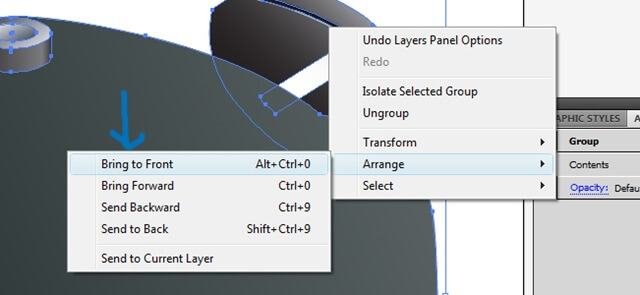
You need to send the black item in front of the white one, so select the shape, right click and Arrange > Bring to Front.

Pretty cool isn’t it?, let’s continue.
For the next shape, drawn it as we show using the pen tool and assigning the corresponding properties.


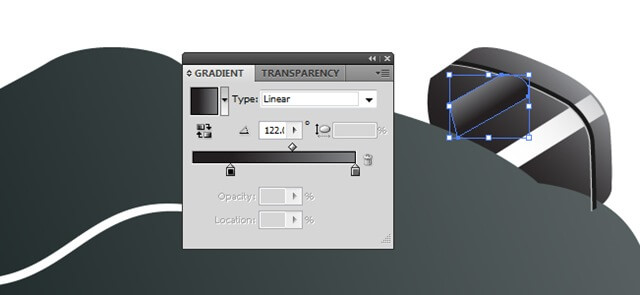
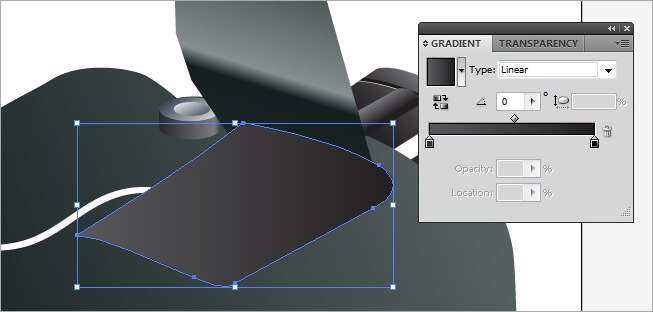
The next shape is a part of the flash, although is a big one, its easy to do. Just draw it with the pen tool and modify the gradient properties to Linear. 4 colors and 72.9 angle, just as the image shows.


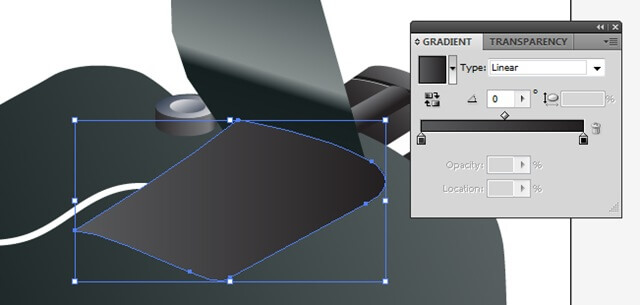
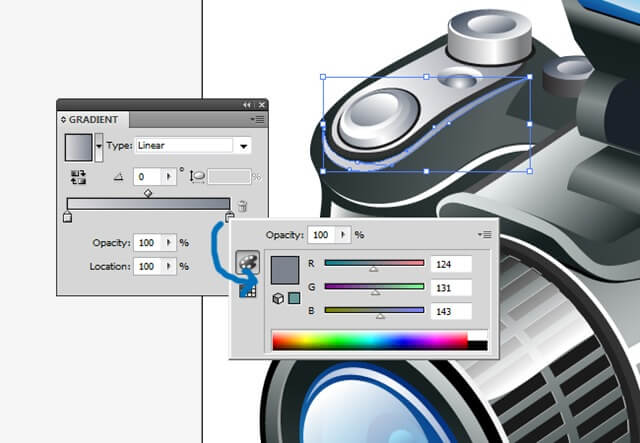
The next shape is as easy as the last one, just use the pen tool to draw it and copy the properties of the image below (linear and 0 angle).

Remember that if something is not showing like it does in our screen, you can arrange it

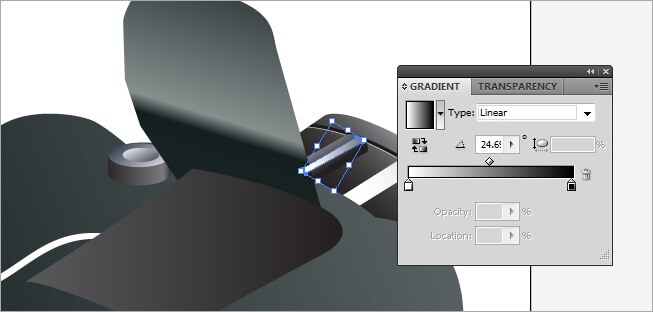
The next element goes over the viewer, it resemblances a rectangle and the properties are linear, 2 colors and 24,6 angle.
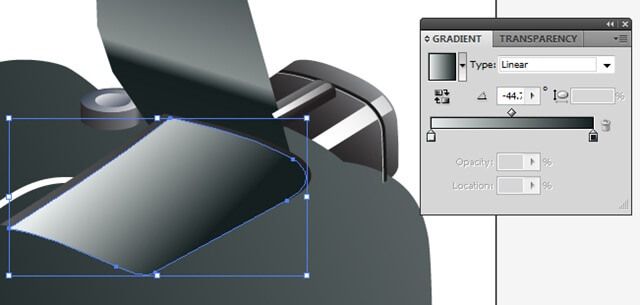
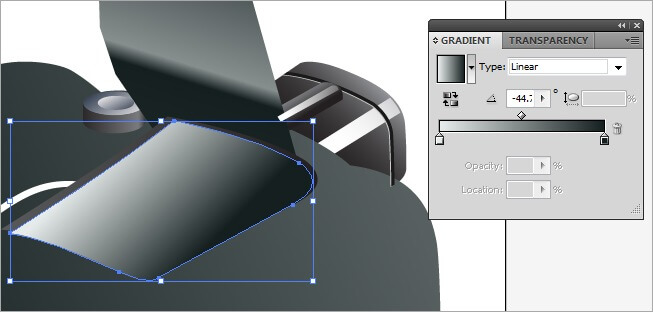
Now select the big gray item that we did before the last one and copy it (Ctrl + C), then paste it over the original (Ctrl + F) and move it a little bit to the right and down. Finally change its gradient properties to linear, 2 colors and – 44 angle.
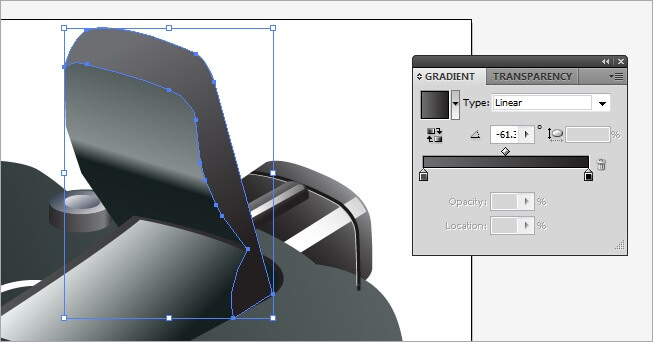
The next item is the side of the flash. Grab your pen tool and draw it following the flash borders, regarding the gradient, the properties are linear, 2 colors and –61 angle.
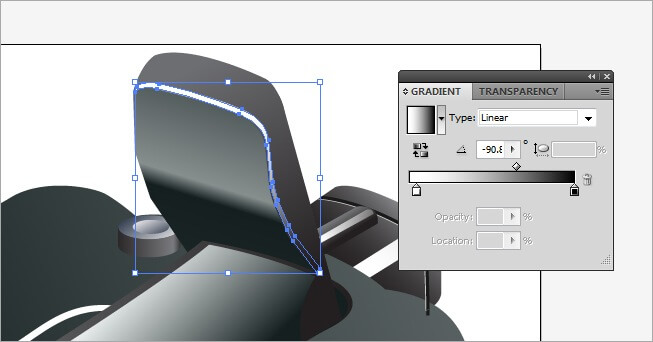
Let’s add a little bright to the flash, once again with the pen tool, draw a thin figure between the two flash faces, the gradient properties are linear, 2 colors and –90 angle.
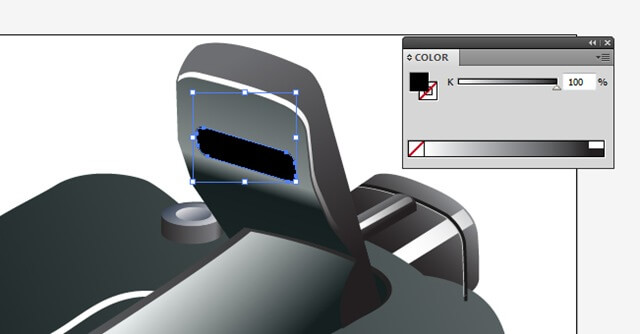
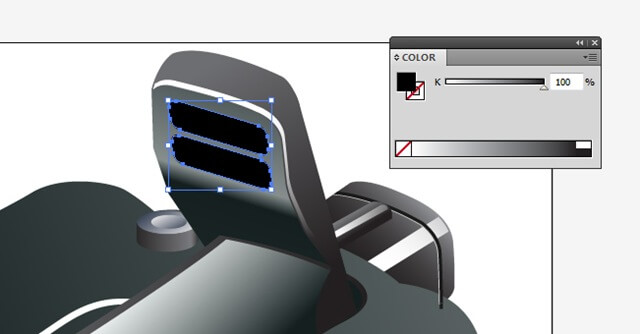
Now draw the inside elements of the flash. Take your pen tool and in this case it’s going to be a black filled shape.


Copy the figure we just made (Ctrl + C) and paste it over the original.

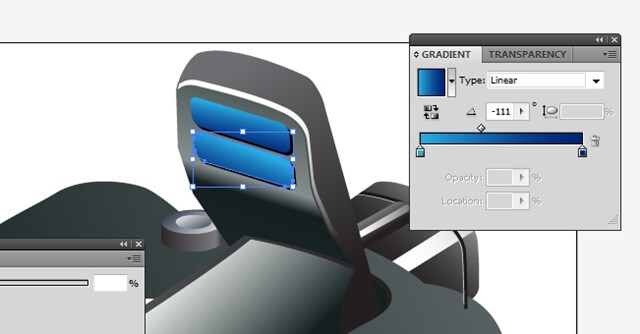
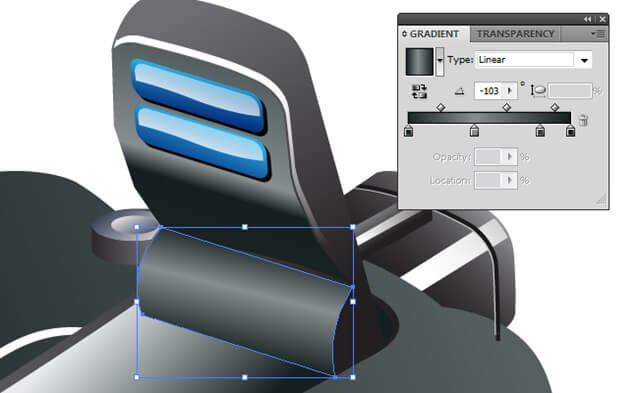
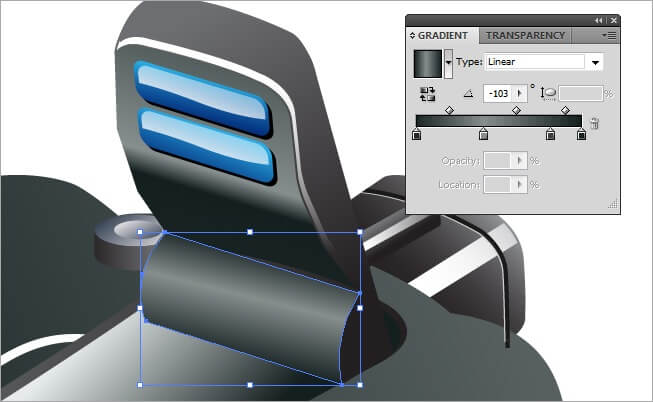
Now copy the two items and paste it over, then move it a little bit to the left and up, change his fill properties to gradient and give the above element a properties of linear and –103 angle, the lower element will be also linear and two color based, but the angle changes to –111.

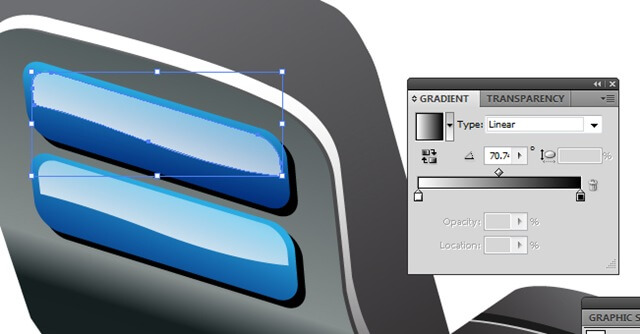
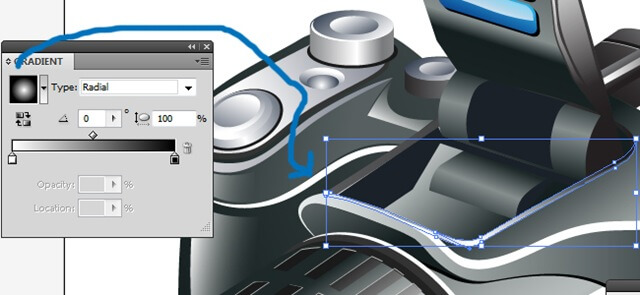
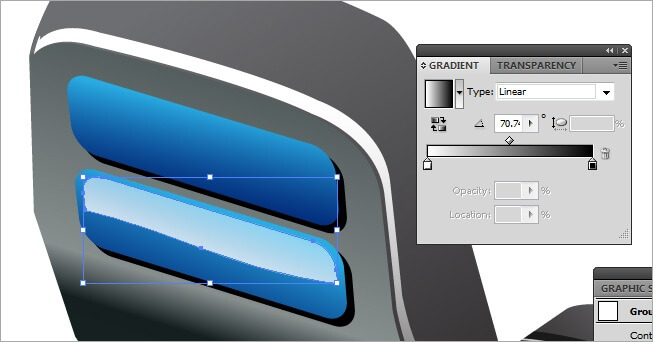
To add a little bit of bright, draw a shape inside the lower blue one, at next you can check how the shape looks like, regarding the properties, choose linear, 2 colors and 70.7 angle.
Now copy the element (Ctrl + C) and paste in the same position, but over the upper blue element.

Remember to always be careful with the perspective, otherwise, our camera will look like a South Park character.
Grab the pen tool and draw the flash axis with the following parameters: linear, 4 colors and – 103 angle.
The next one goes over the one we just did, this one it’s not gradient filled, just dark blue.

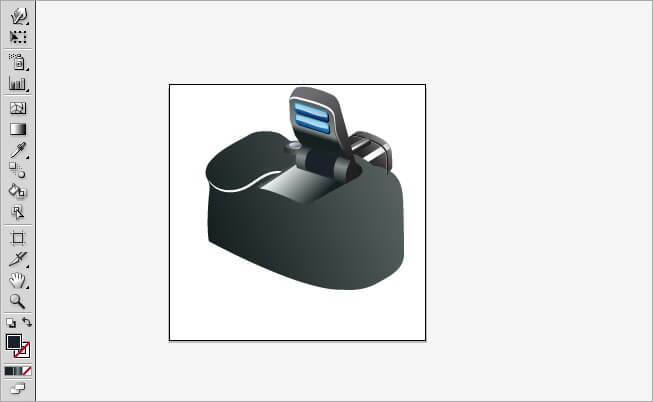
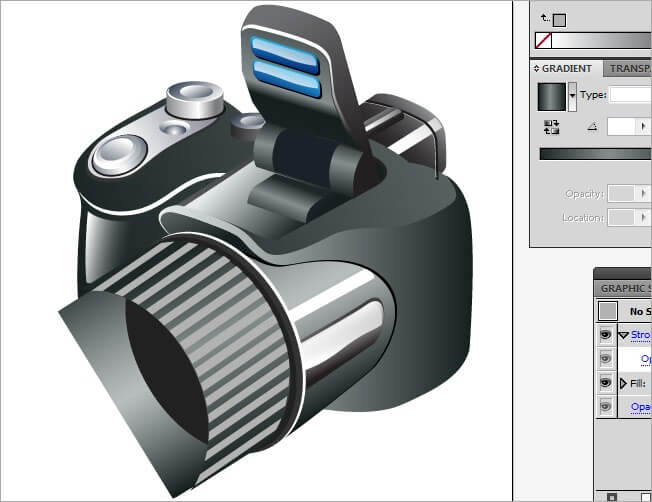
So far our camera is looking like this, we are approaching the middle of the process.
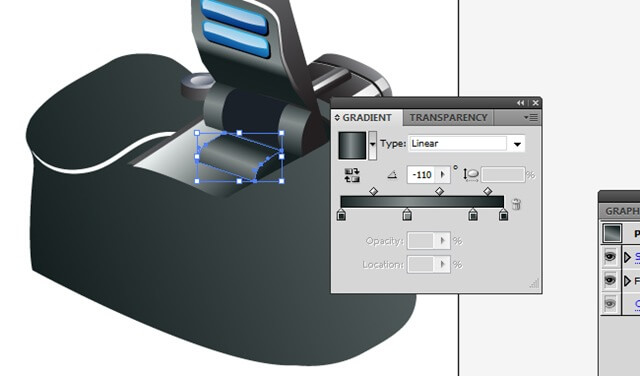
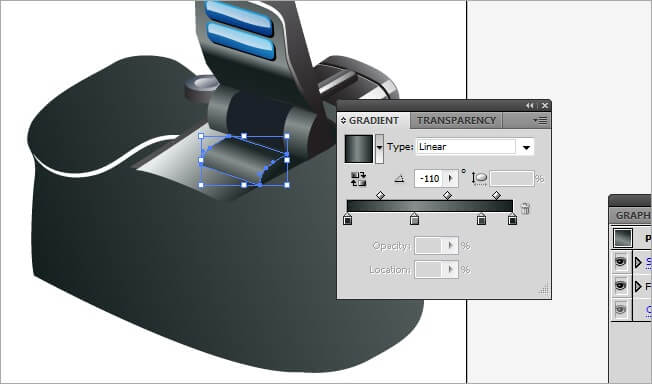
Well after a coup of coffee I feel fresh and ready to finish this camera, so keep it up. This next shape makes also part of the flash, a 4 color gradient, linear type and –110 angle complete the parameters.
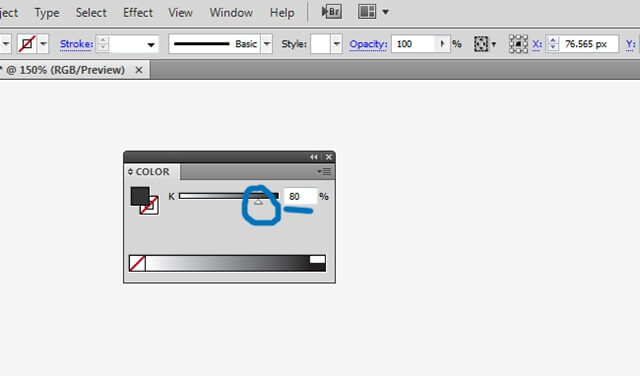
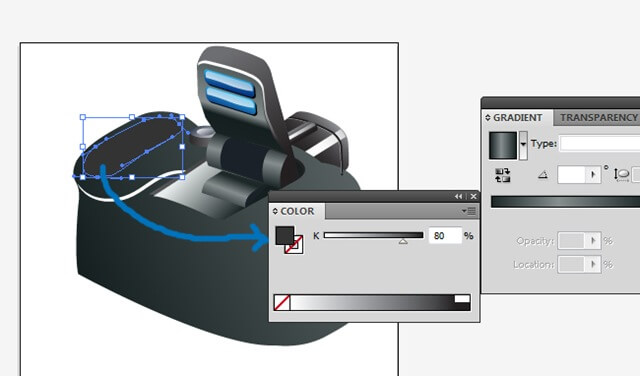
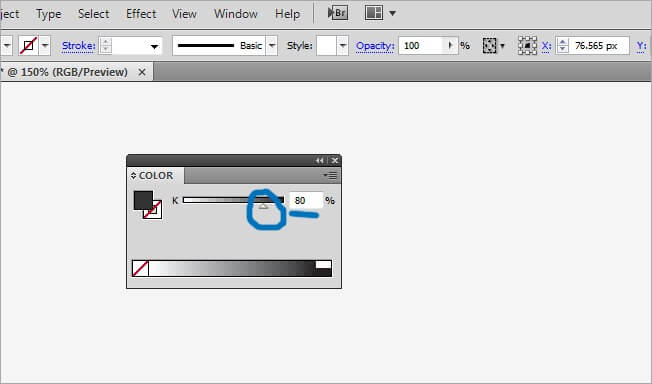
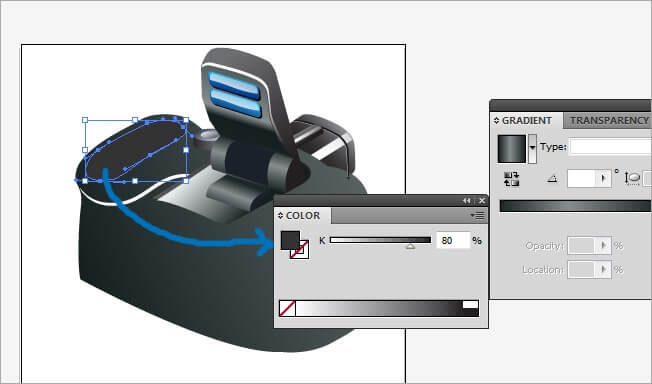
Now that we have de dark green shape that composes the basic camera structure, we are going to start adding layers and elements, the following element has a solid color fill, specifically a 80% Black, which you can customize at the color menu.
5. More Details
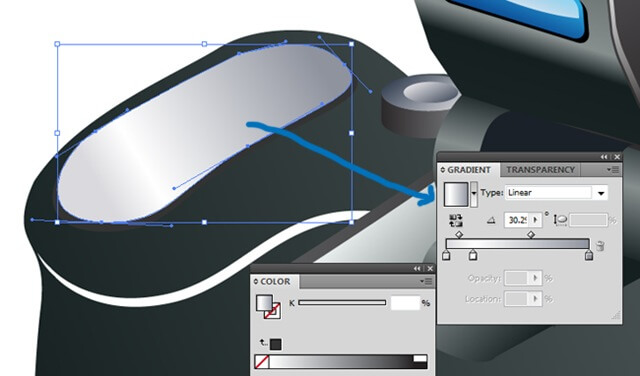
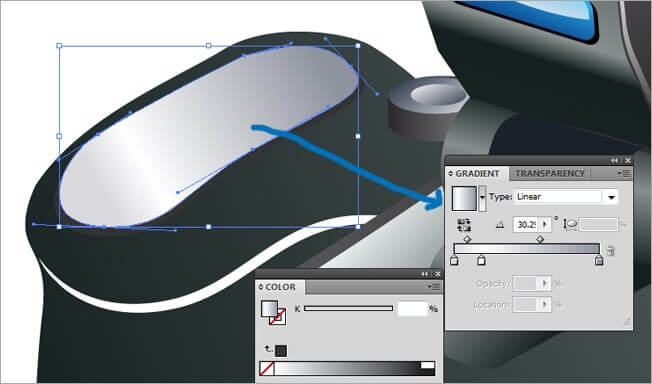
Now, copy and paste the shape we just did and put the copy in front of the original, this one has a gradient style, which is linear, 3 colors and 30.2 angle.
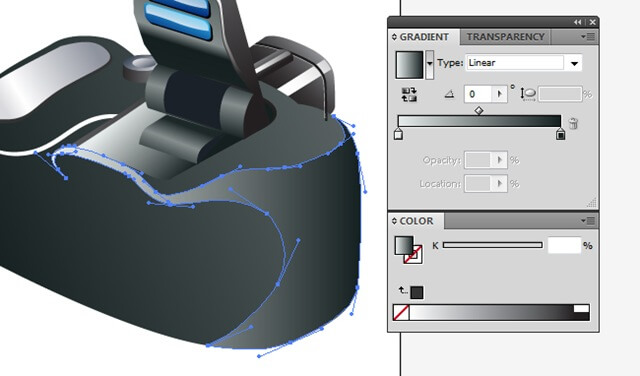
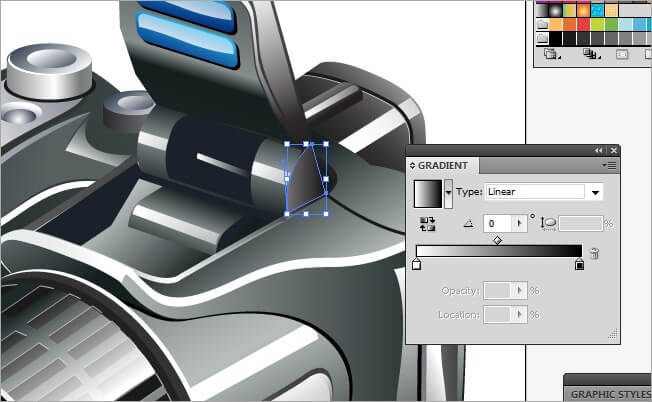
OK, its time to reinforce the right side of the camera by giving it a lighter and more contrasted shape over it, the parameters for this shape will be linear, 2 colors and a 0 angle.

As you can see, we don’t need to own or even manage an advanced 3D software to create realistic icons, its all about shadows, gradients, angles and glows.
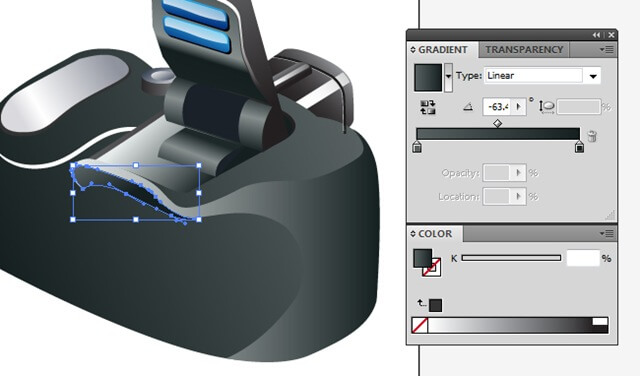
The next shape we will draw has a 2 color linear gradient with a –63 angle.

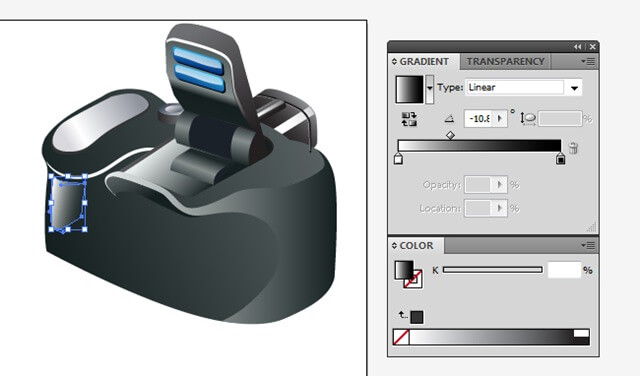
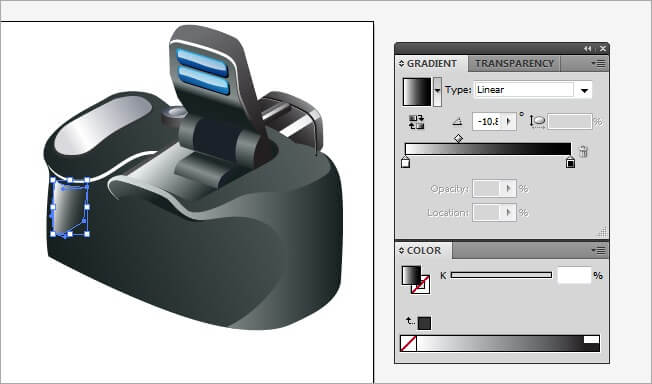
Now we are drawing a glow shape on the left side of the camera, assign it a 2 color linear gradient with a –10 angle.
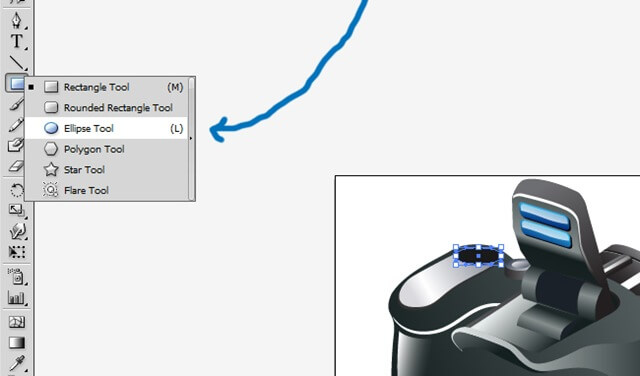
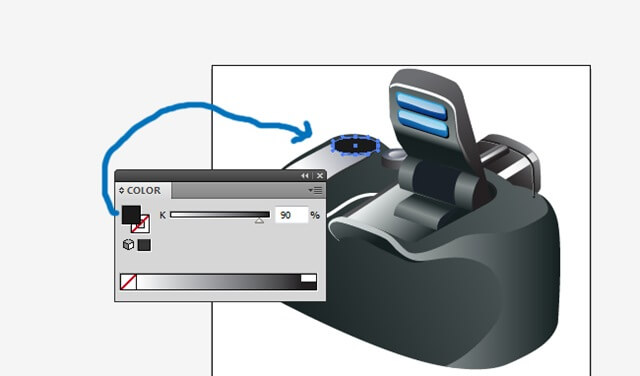
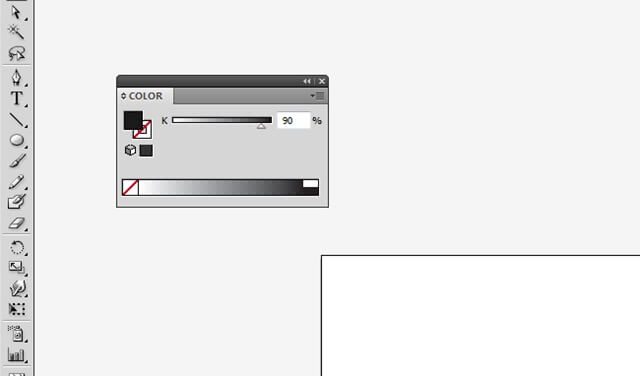
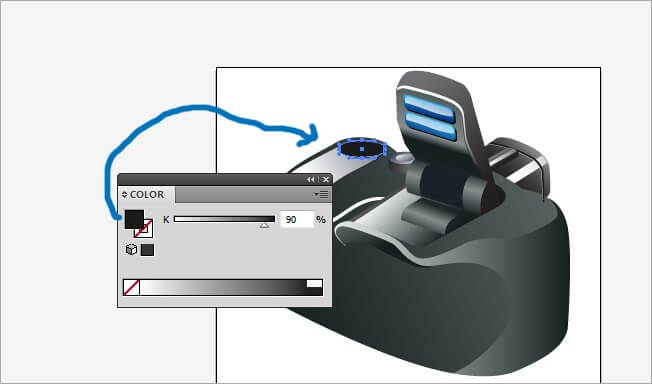
The next thing to do is the button that allows the photographer to change between Manual, Automatic, Sports and some other options. Use the ellipse tool to draw a 90% black shape at the upper left side of our icon

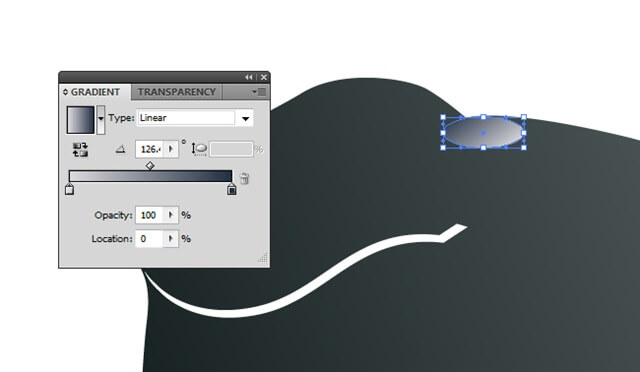
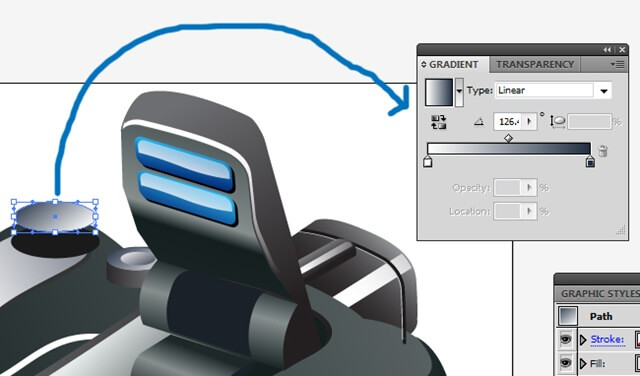
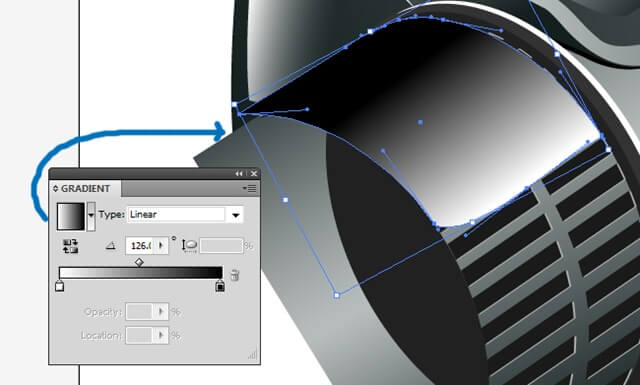
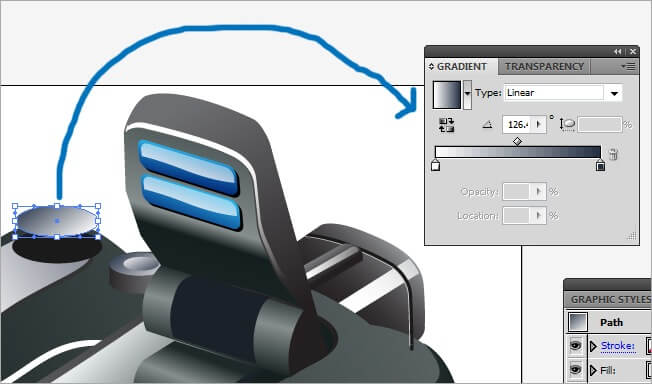
Copy the object we just did (Ctrl + C) and place it over the original (Ctrl + F), then move it a few pixels up and change his fill properties to a 2 color linear gradient with a 126 angle.
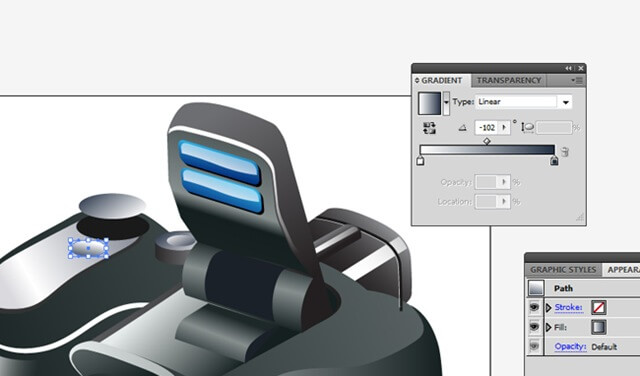
Another copy task, (Ctrl + C) to the last element and holding shift-reduce its size to the half, then place it in front of the black ellipse we made before the last one. Adjust his fill properties to a 2 color linear gradient with a –102 angle.

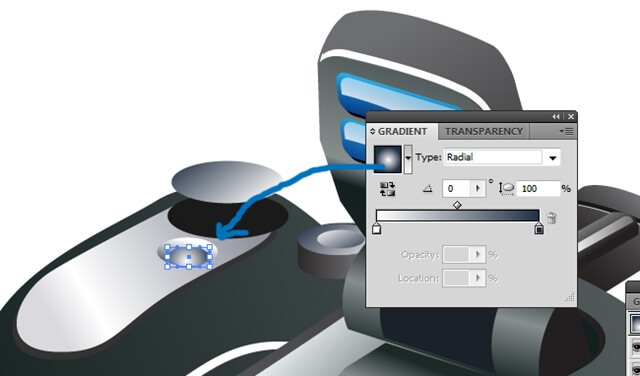
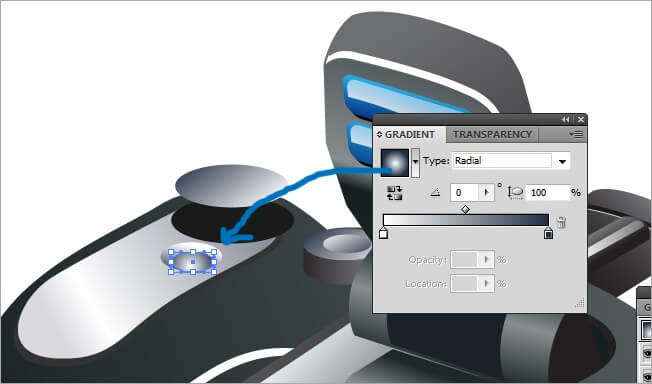
Let’s keep on copying. (Ctrl + C) to the element we just did and place it in top (Ctrl + F), then rescale it to the half while holding shift, modify his fill properties to a 2 color radiant gradient with a 0 angle.
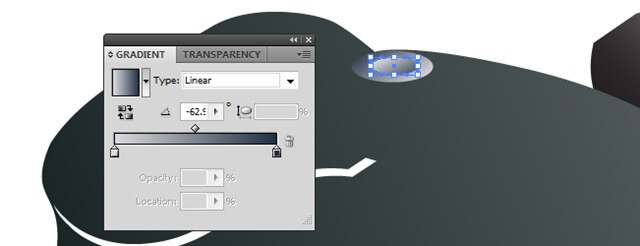
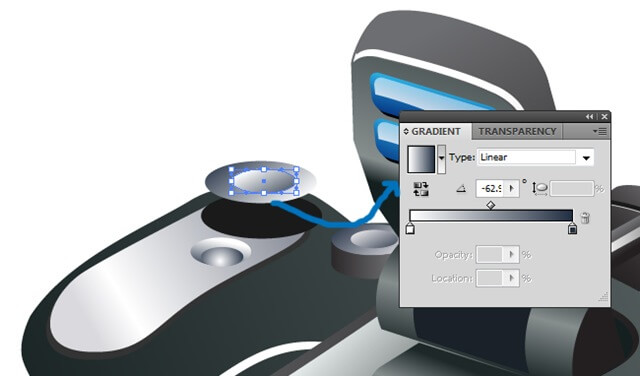
Because the copy shortcut is so useful, we will continue using it, (Ctrl + C) the last ellipse we made and place it in top of the ellipse above (Ctrl + F) at the left side of the camera. The fill properties of this shape are the following: 2 color linear gradient with a –62 angle.

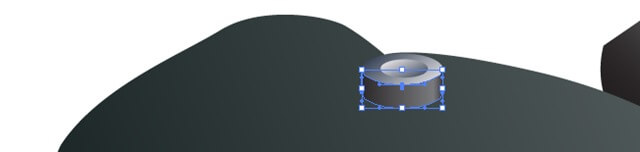
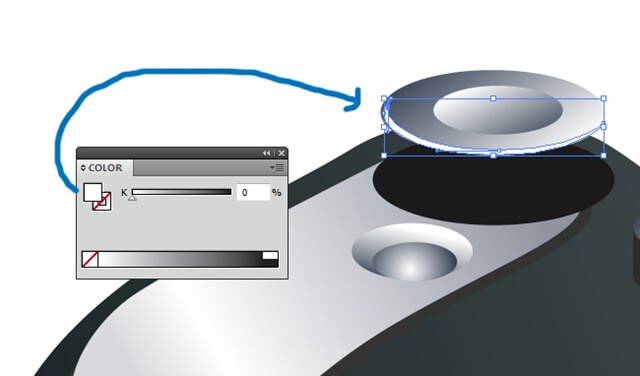
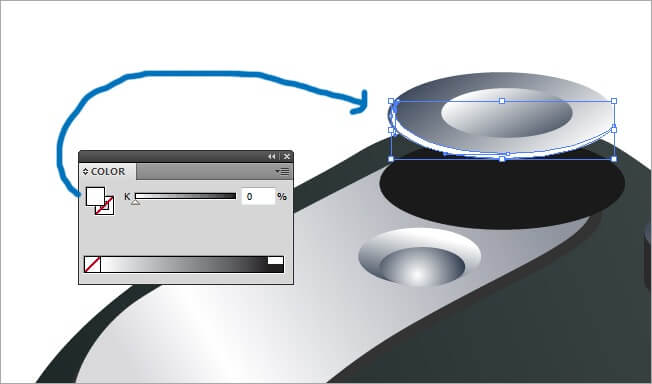
Its time to add a glow shape. Grab the pen tool and draw a small figure surrounding the lower part of the top button, fill it with a white color.


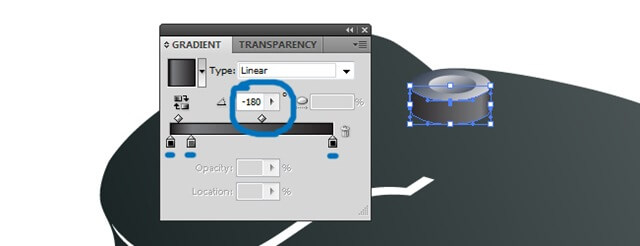
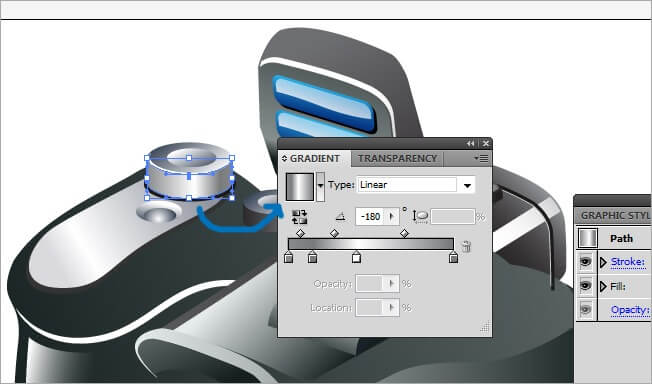
Now we are generating the volume for the button, using the pen tool, draw a shape between the two circles and apply it a four color linear gradient with a –180 angle.
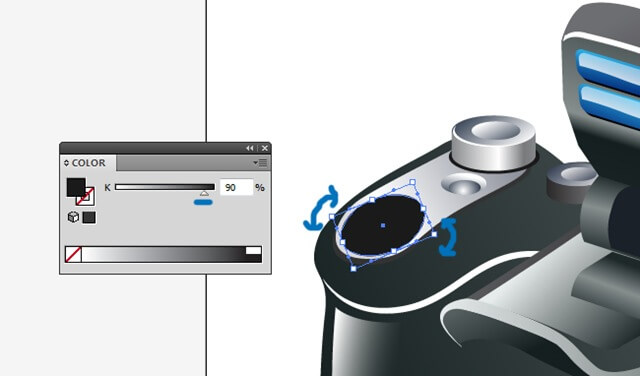
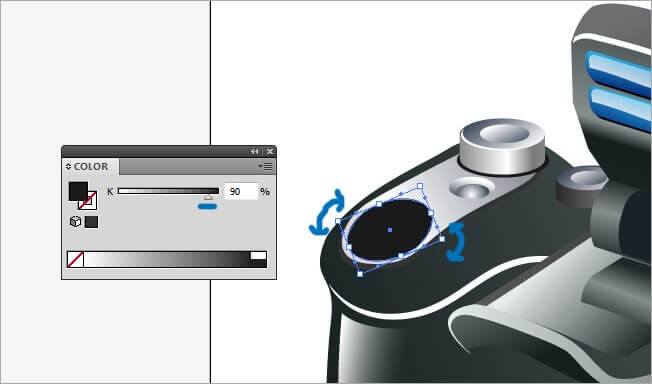
The next is the base for a new button. Grab the ellipse tool and make a 90 black shape, then select the shape and from one of the corners, rotate it so it fits properly.
Now I understand why my technical charges me that much when I let him my camera for revision, so many parts!!!.
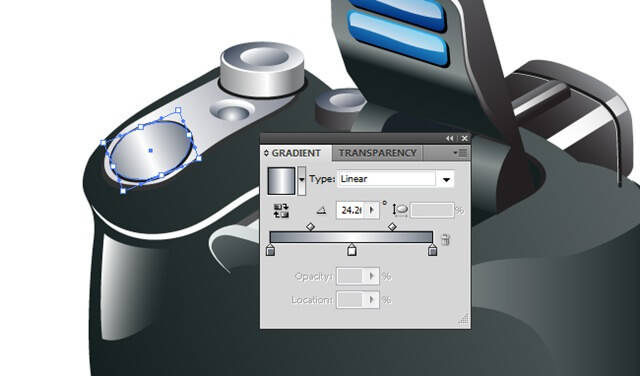
Copy the circle (Ctrl + C) and paste it in top of the original (Ctrl + F), then holding shift, reduce its size to about a 90% and change his filling colors to a 3 color linear gradient with a 24.2 angle.

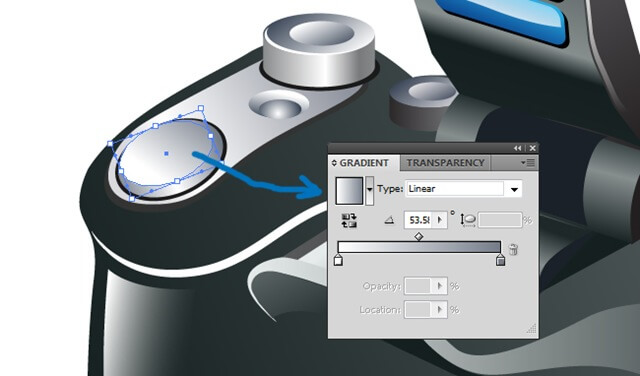
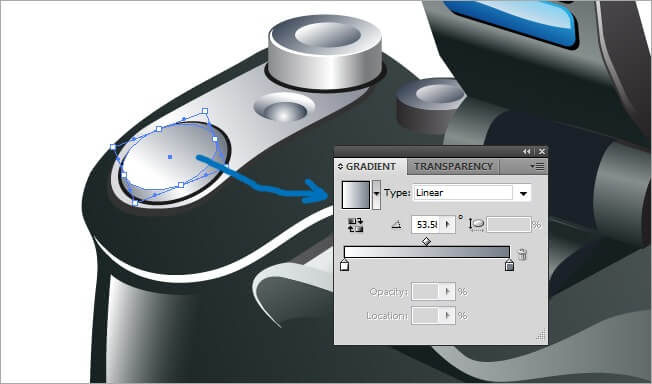
Create a copy of this element an place it on top (Ctrl + C > Ctrl + F), then hold shift and resize it to approximately a 80%, adjust his gradient filling properties to 2 color linear and a 53.5 angle.
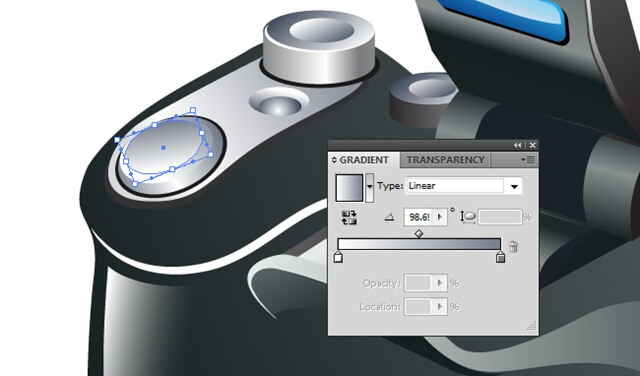
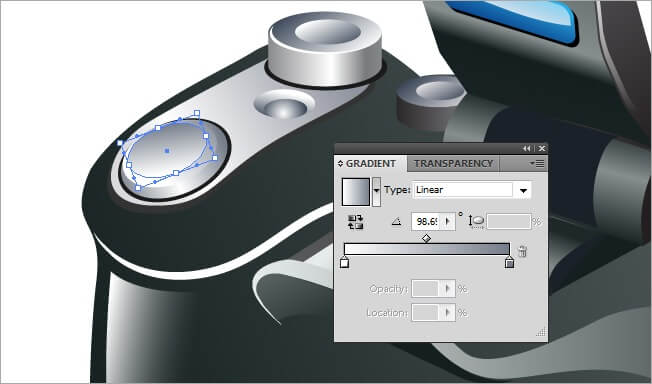
Another copy task, do a (Ctrl + C > Ctrl + F) and place it on top, then resize it to a 90% and place it at the left of the button. Adjust the fill parameters to a 2 color linear gradient and 98.6 angle.
Creating a 3D feeling its a continuous process of adding objects over objects while adjusting its properties.
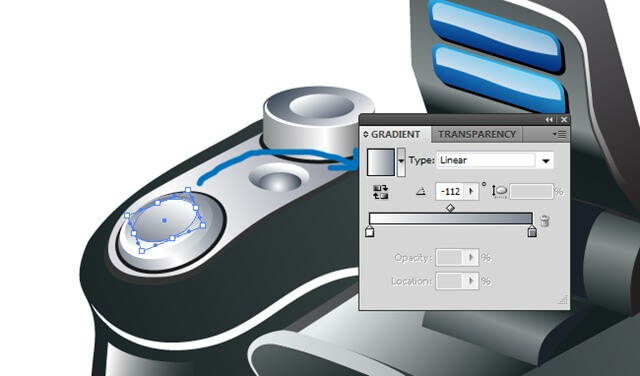
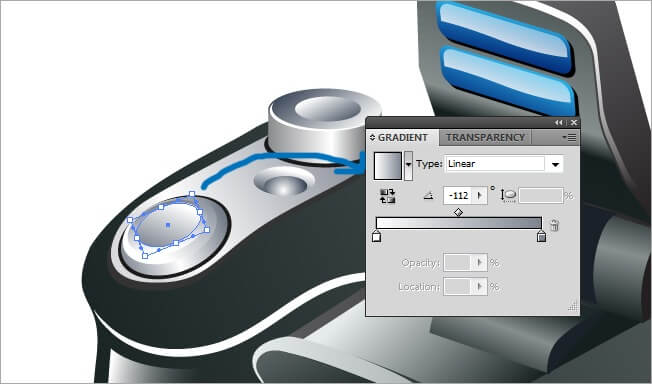
Repeat the copy paste process (Ctrl + C > Ctrl + F), hold Shift and resize it to about a 90 %, then move it to the left and adjust its fill qualities to a linear 2 color gradient with a –112 angle.
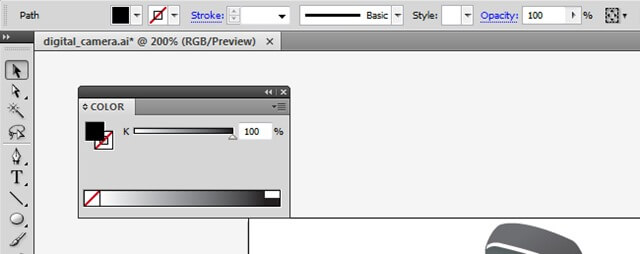
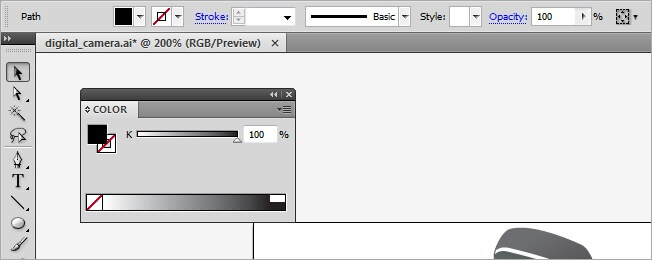
The next item we’re going to create is the first element of the camera lens, grab your pen tool and draw a 100% black shape.


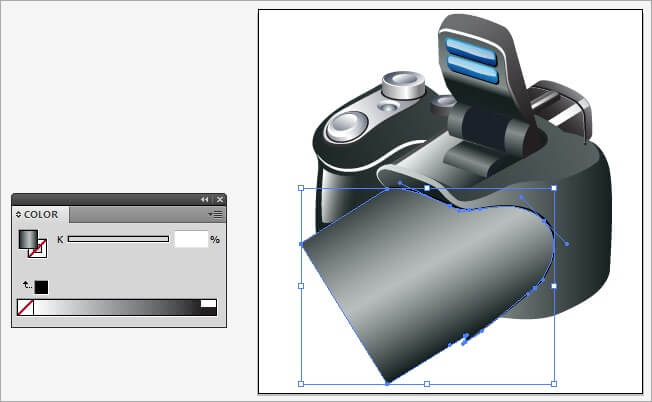
Copy this large black shape and paste it on top, then move it a couple of pixels down and left. Assign it the following fill properties: 3 colors linear gradient with a –60 angle.
Now a glowing line, draw with the pen tool and choose a white fill color.

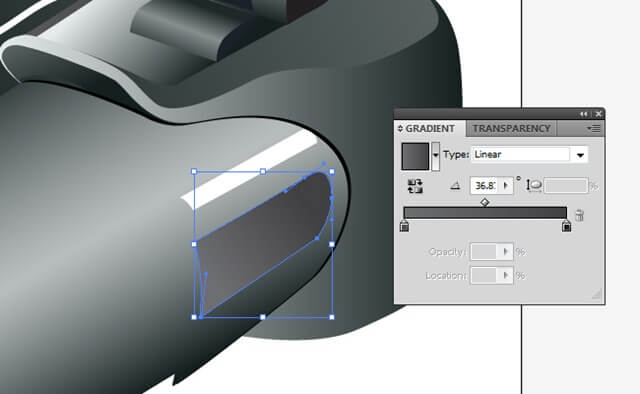
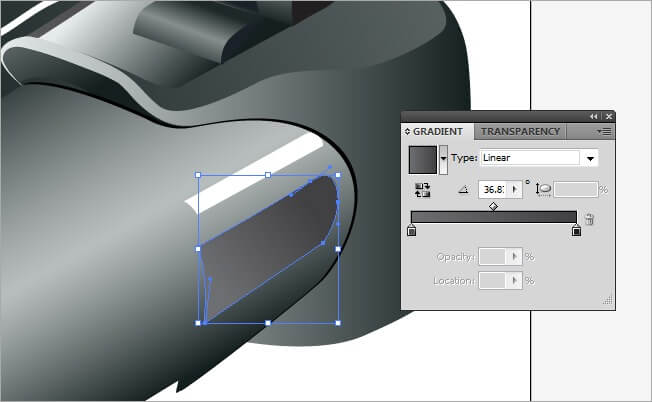
From now on we will be working a lot on the lens, after completing it, our camera will be almost ready. Draw a shape next to the white object we just did and assign it the filling properties 2 color linear and 36.8 angle.
Copy paste the last shape and place it a little bit down to the left, then hold Shift and resize it to about a 90 % and adjust its filling parameters to 3 color gradient with a –60 angle.
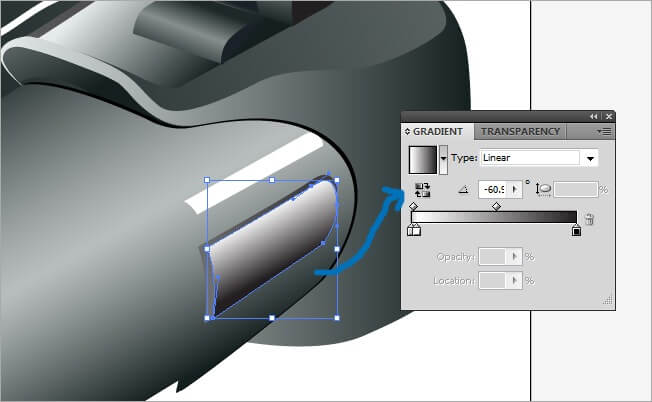
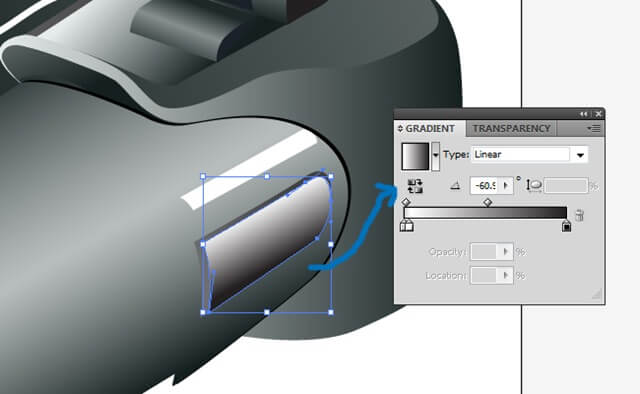
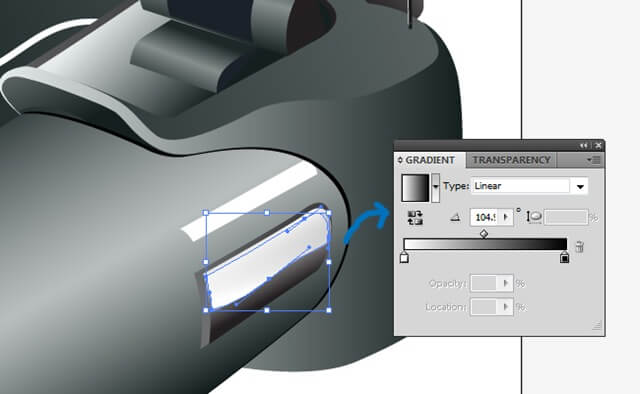
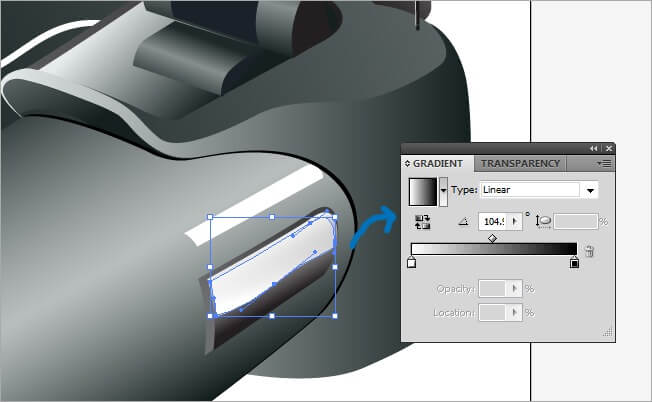
Grab the pen tool and draw a glow shape inside the object we are making. Regarding the filling properties, choose a 2 color linear gradient with a 104 angle.

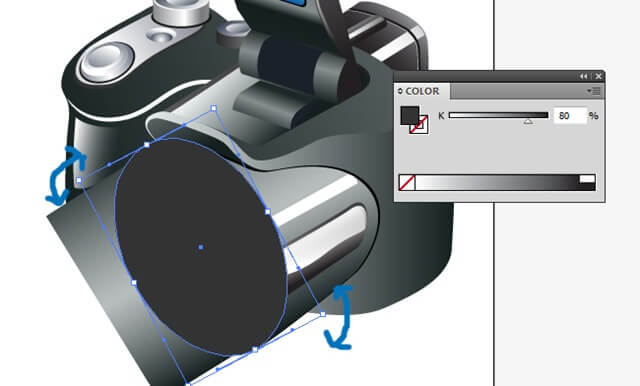
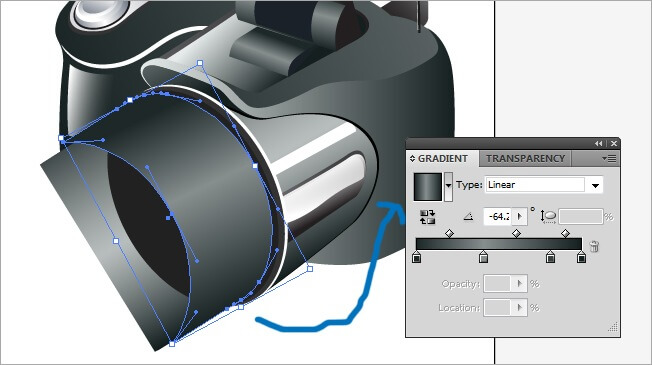
Select the ellipse tool and make a big 80 % black shape, then rotate it so it fits in the perspective of the camera.
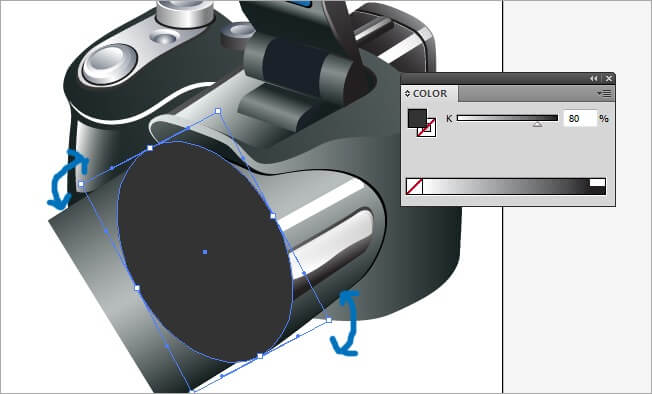
As you can see, by simply rotating an element we can generate a perspective condition, that’s nice, isn’t it?.
Now take the pen tool and draw a white glow over the upper border of the big ellipse.
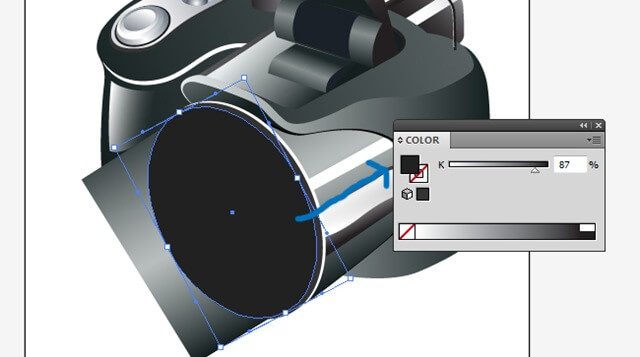
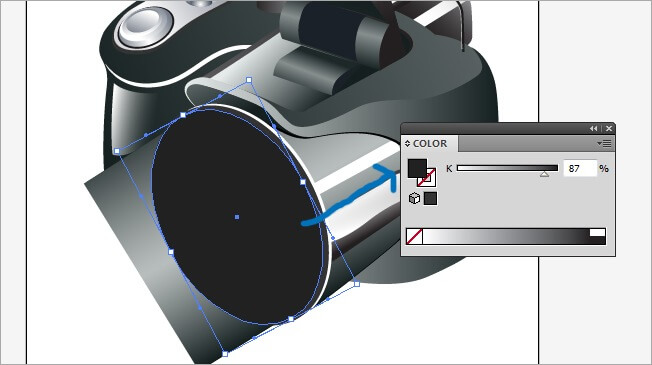
Now, copy paste (Ctrl + C > Ctrl + F) the big black ellipse and place it over and move it a few pixels to the left, then fill it with a 87 % black.
Give me one minute, I’m going for a bag of chips, I’m starving.
OK I’m back and ready to finish this icon, so let’s get it on!!!.
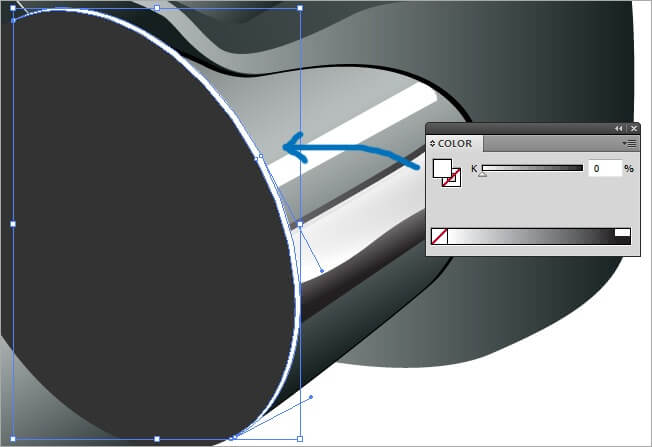
To draw the next shape, select your pen tool and make a piece that shows the right side of the lens and fill it with a 4 color linear gradient and a –64 angle.
Remember that for making straight turns while drawing a shape, you must click over the anchor point once and continue drawing.
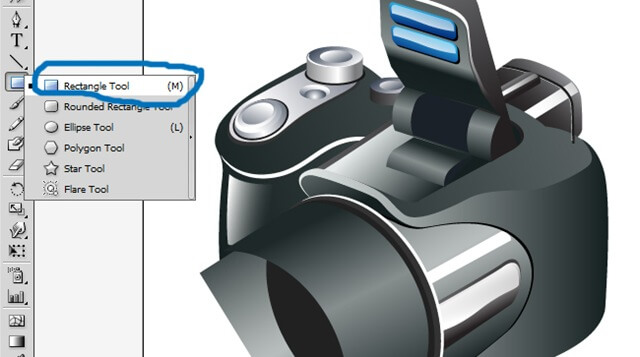
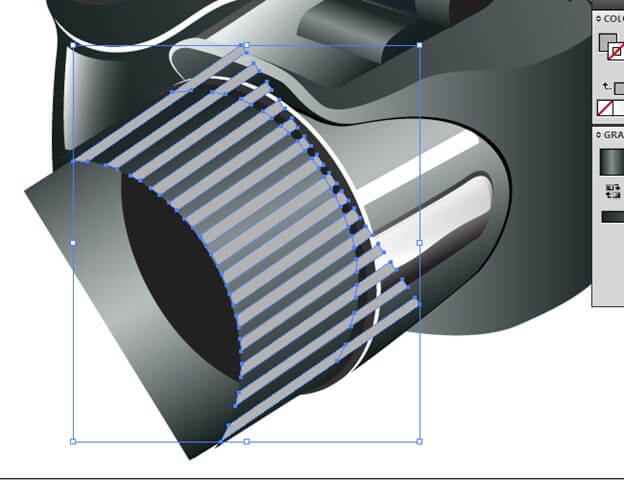
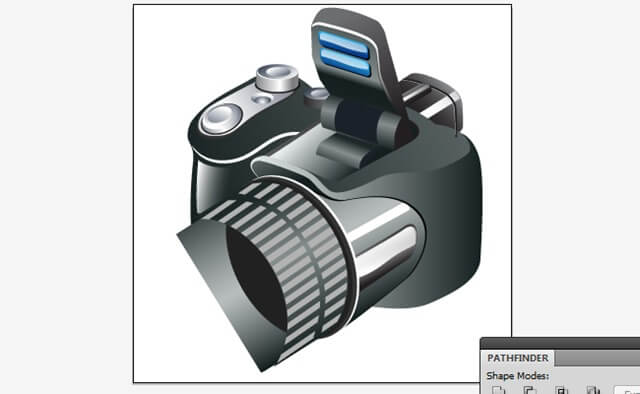
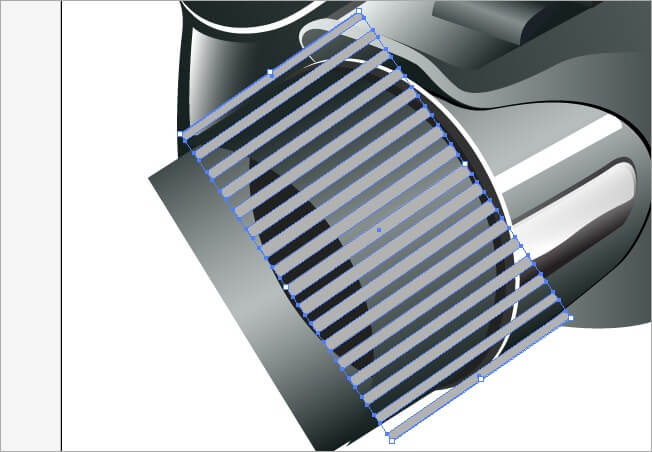
The following is a long process that will make our camera to look awesome, we are going to draw the focus details. We will be using a series of tools that will allow you to speed up your process.
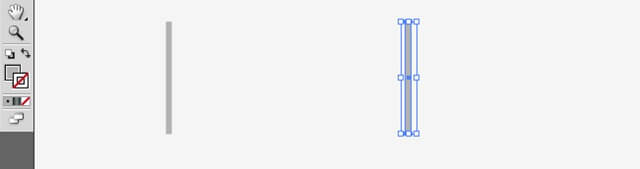
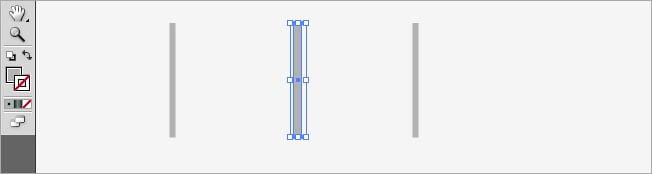
Select the rectangle tool and draw a thin but large figure, then copy paste the element and place it right in front of the original.

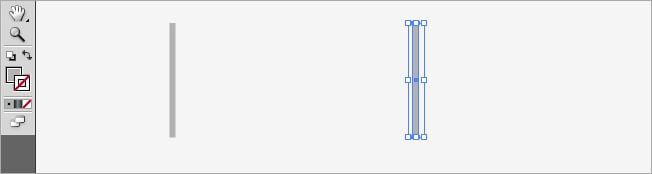
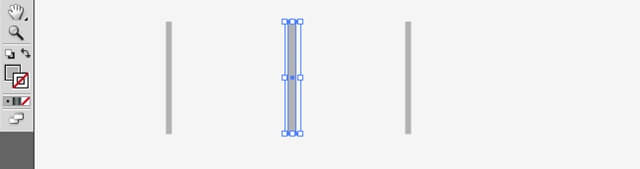
The next thing to do is to copy one of the rectangles and place it in the middle, then raise its width, to change only one of the measures, don’t hold Shift while doing the transformation.
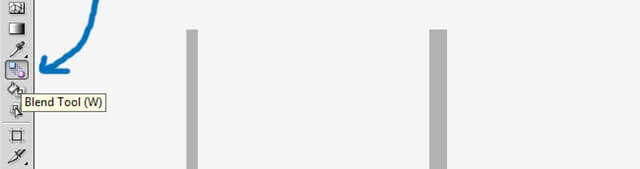
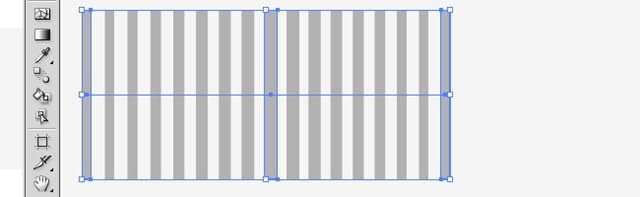
Now we are going to use a new Illustrator tool, the blend tool, select it at the tool bar.
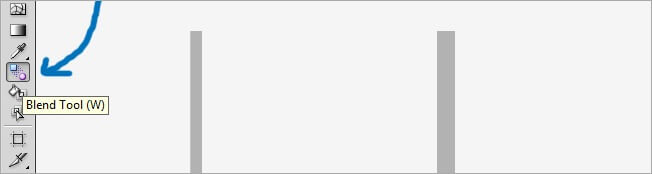
Now, click over the left rectangle, then click over the one in the middle and finally over the one at the right, what the blend tool does is to create a mix between vector elements.

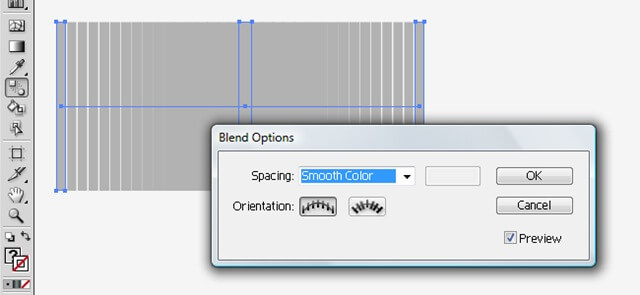
The next thing to do is to modify the blending properties, so while the new mixed element is still selected, double click over the blend tool and you will see a new window.
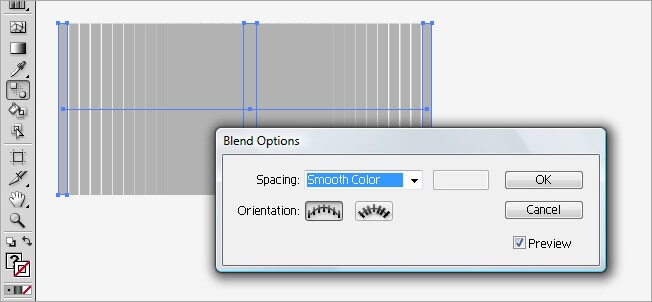
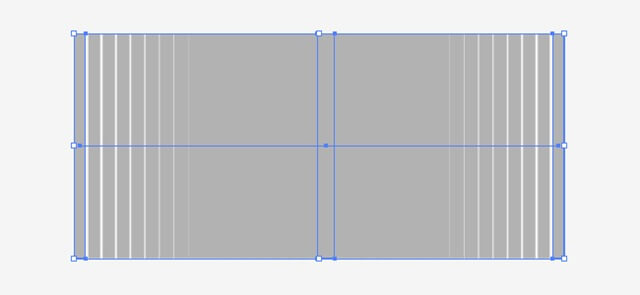
In the Blend Options tool, select “Specified Steps” on the spacing bar, enter 7 in the white bar next to the spacing one.

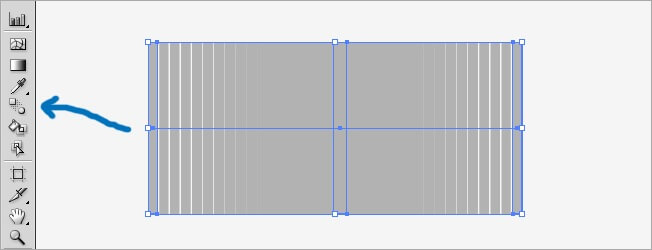
The result will be something like this:
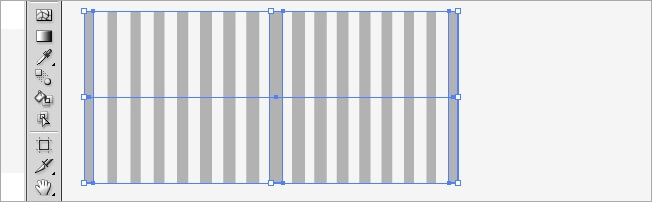
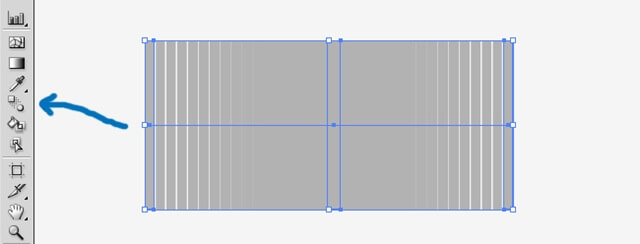
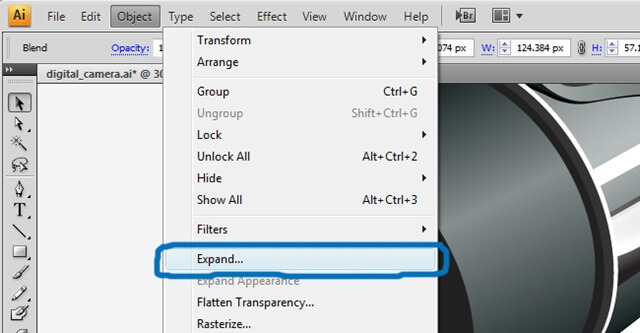
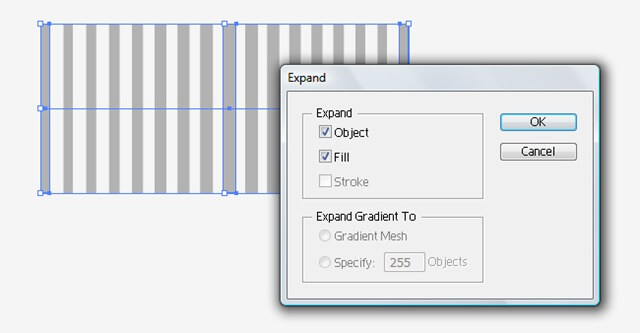
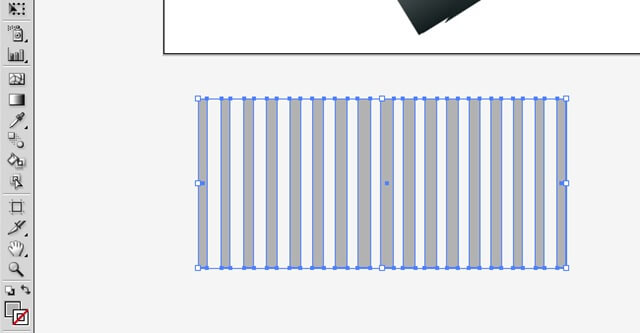
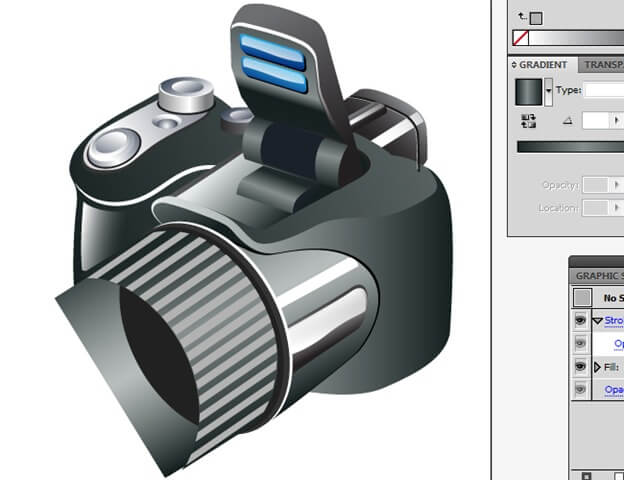
Now go to Object>Expand and click OK.
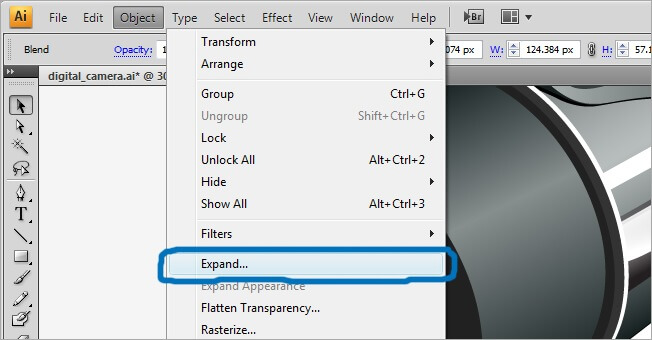
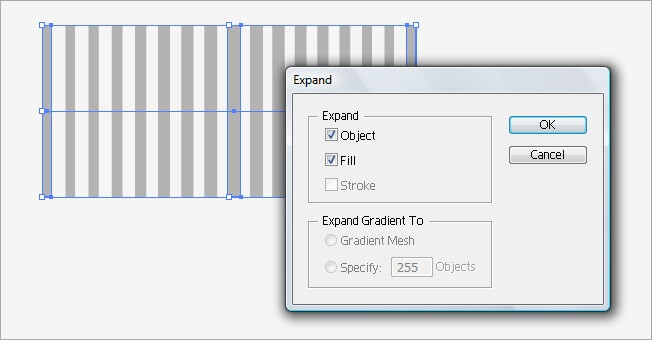
The Expand tool allows you to turn a blend object into a regular object.
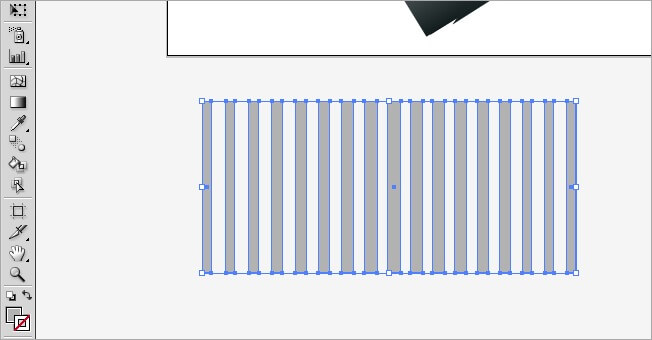
We’re almost done with this part, so be careful with the next step.
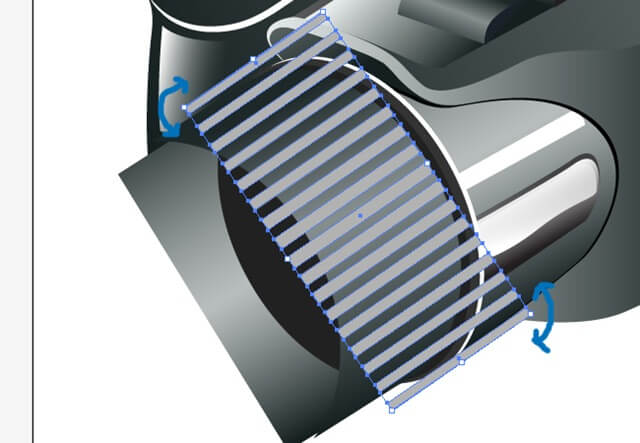
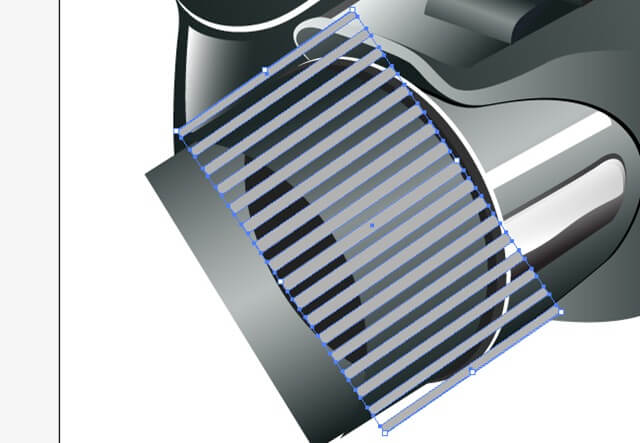
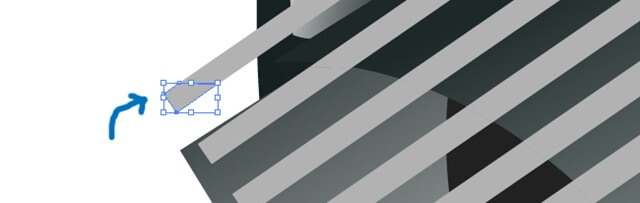
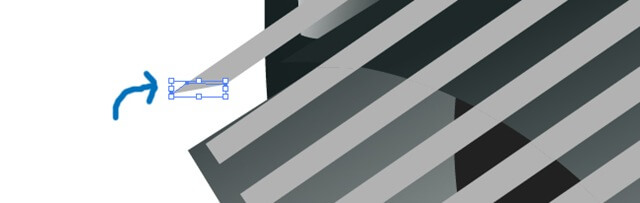
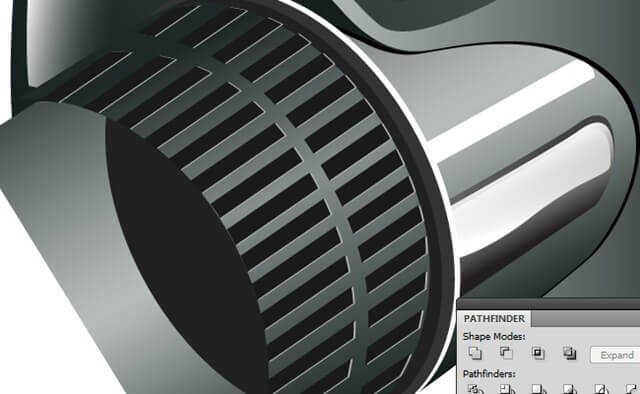
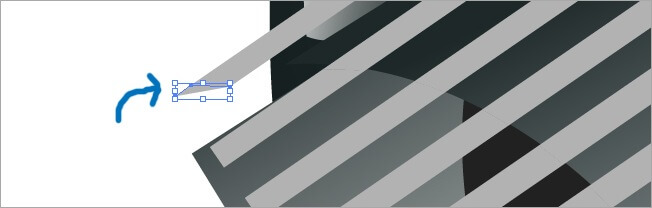
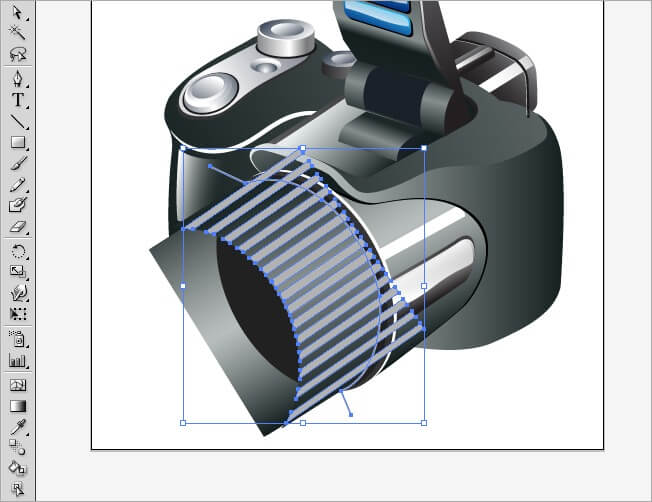
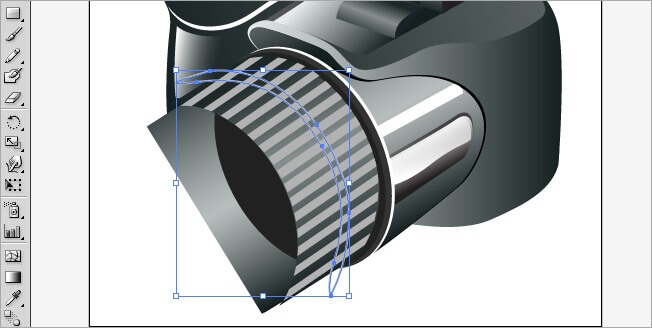
Rotate the expanded shape so it fits well over the focus part of the lens.

Now, modify the height so the shape fit all over the focus surface.
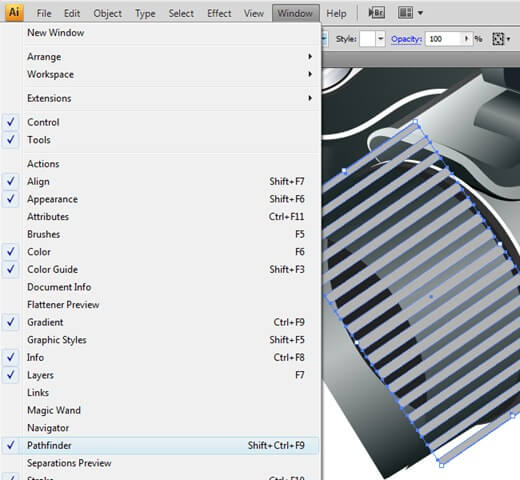
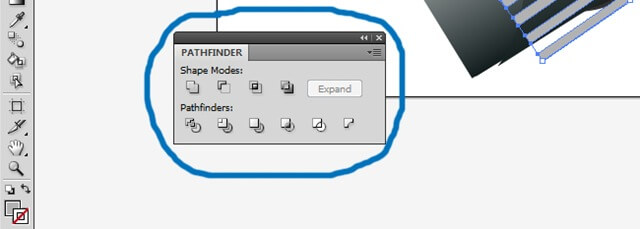
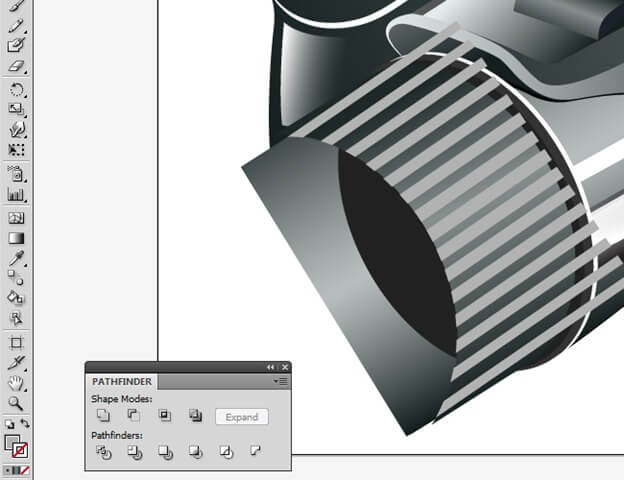
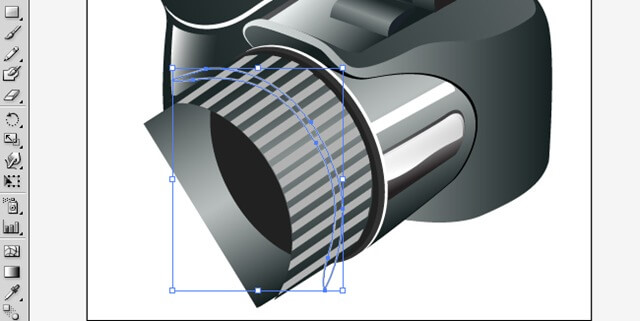
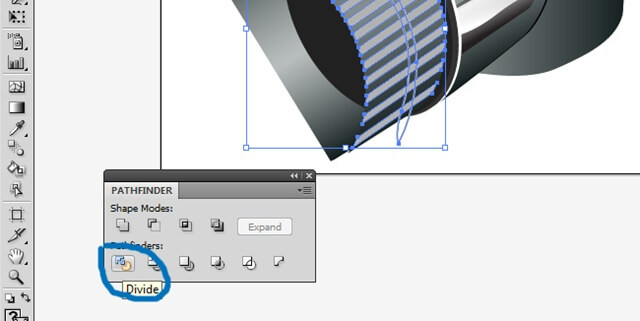
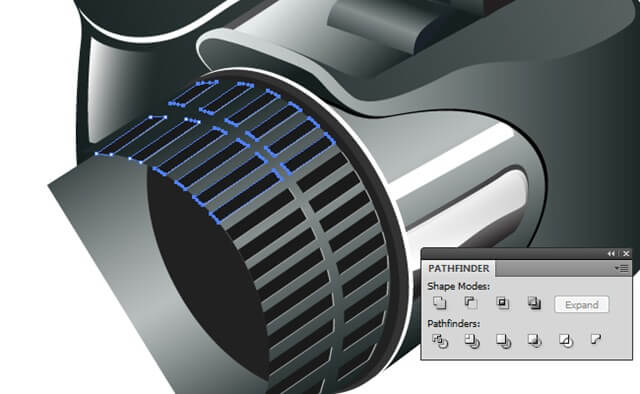
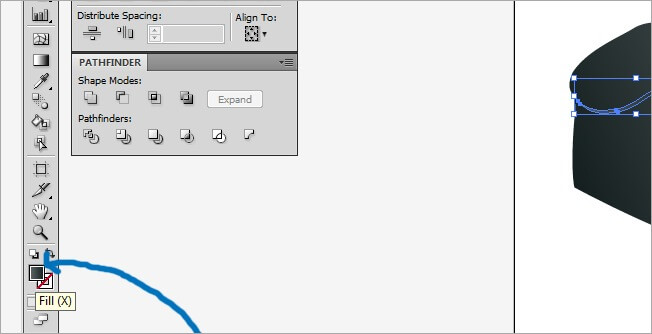
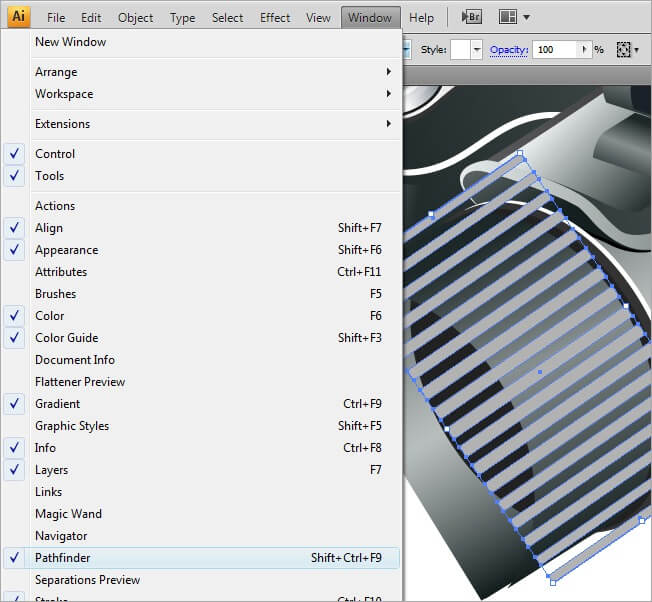
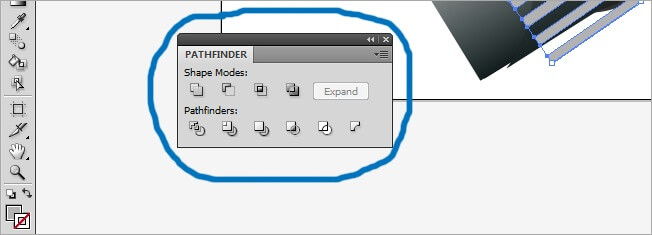
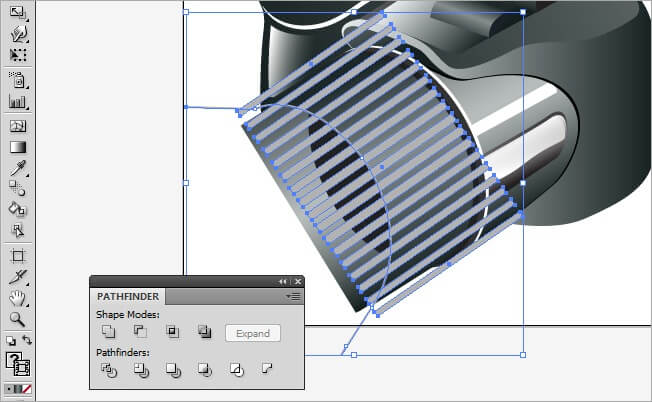
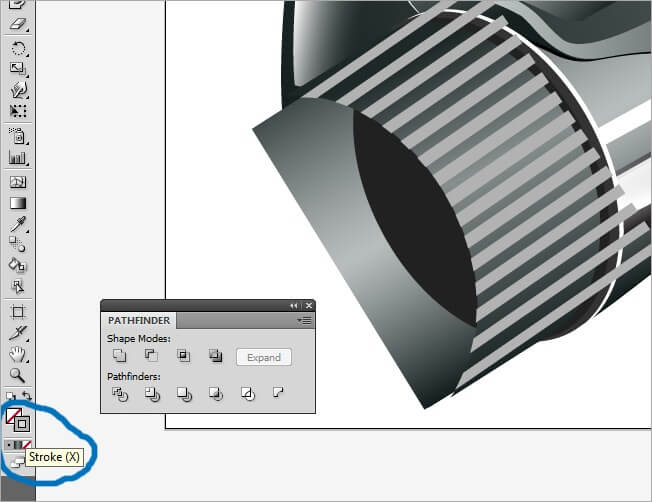
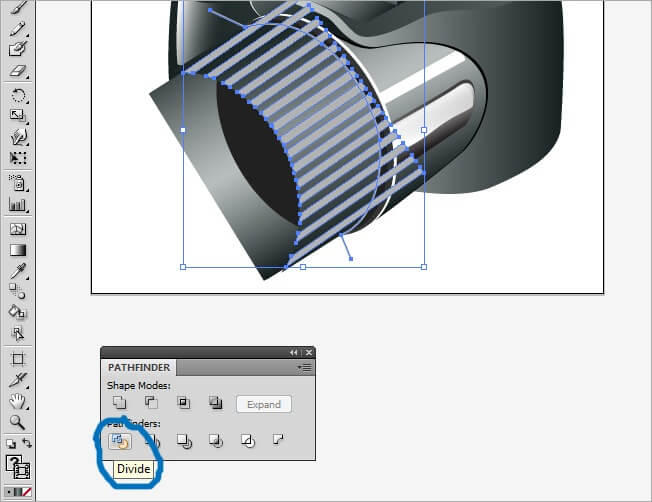
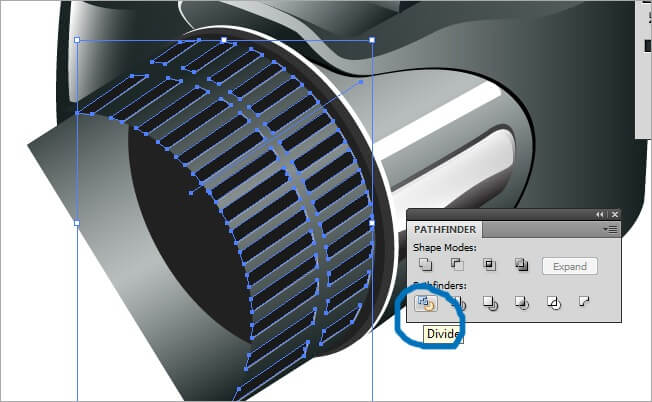
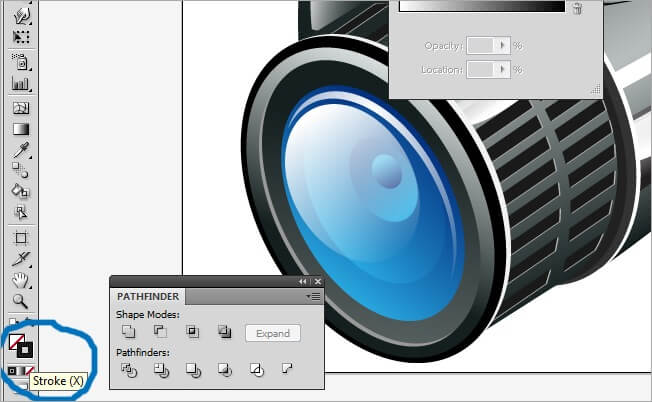
Now its time to use another new tool from Illustrator, the pathfinder, look for it at the right side of the window, if you don’t see it, click on Window>pathfinder.
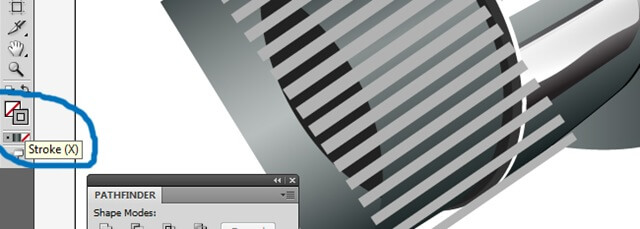
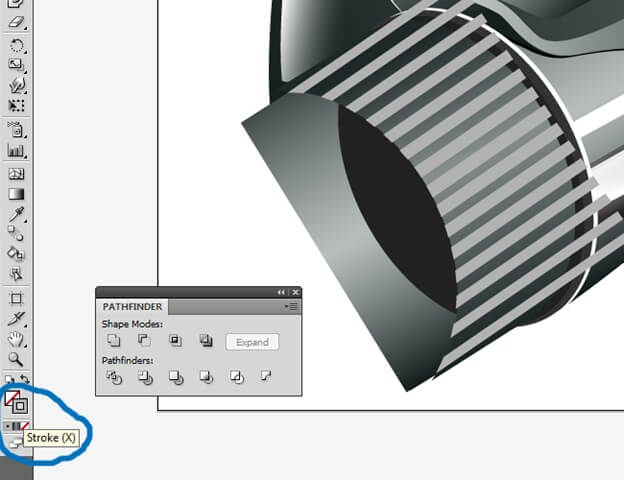
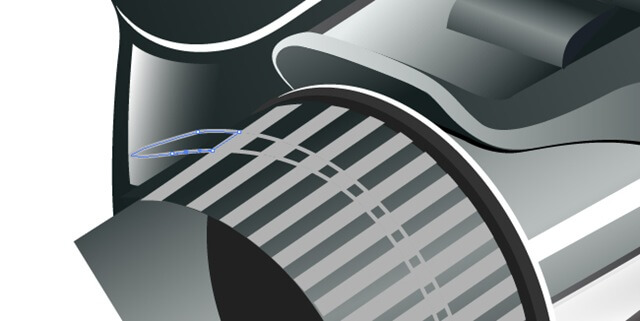
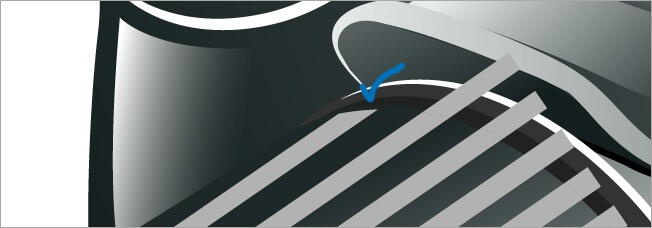
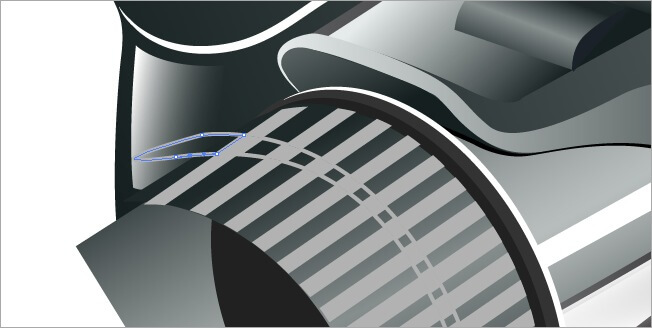
Before we use the pathfinder, select the pen tool and draw a stroke line through the focus lens border. To verify that you’re drawing a stroke and not a fill, check the squares field on the left side and make sure that the lower square is in front and with a color selected so you can see it.


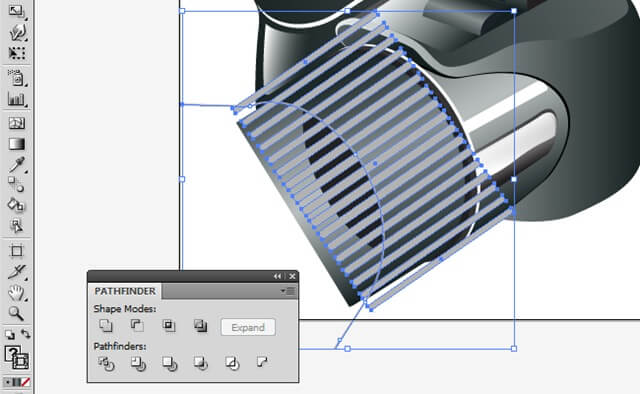
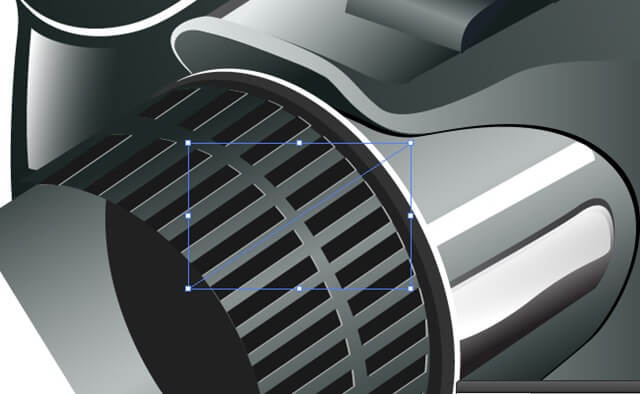
Now we are ready to use the pathfinder: first select the curve we just did and the line series.
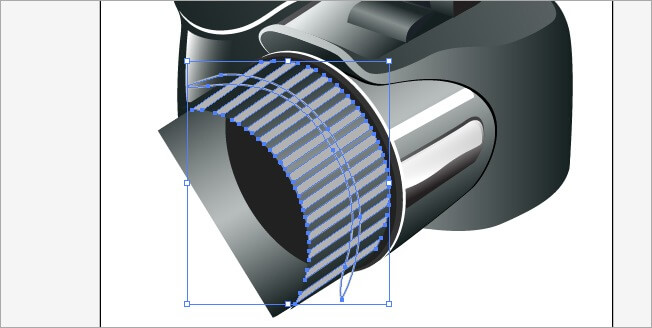
Now go to the pathfinder menu and click on the first button of the second row.
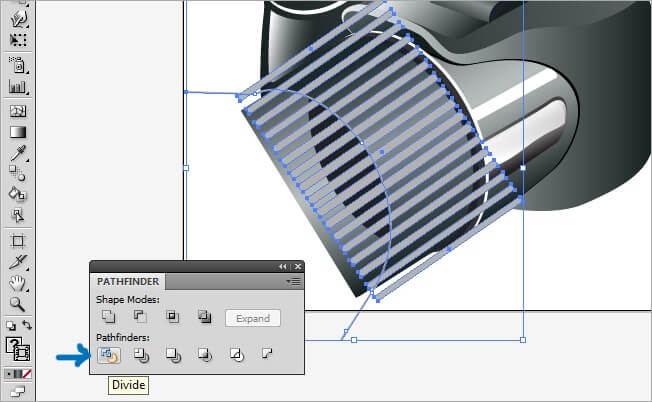
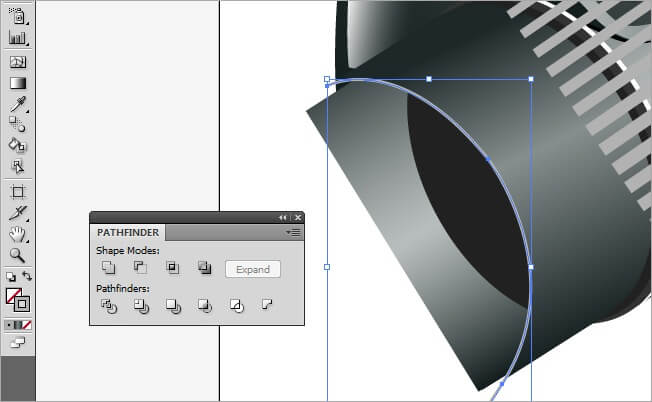
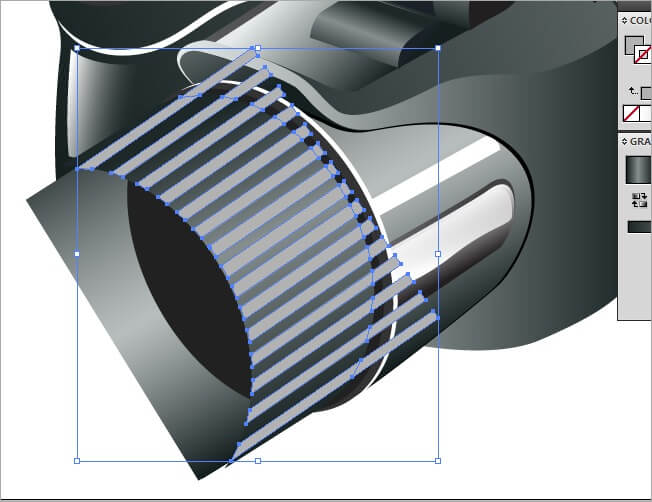
What this option does is to cut the shape by the stroke line path, you will see it like this:
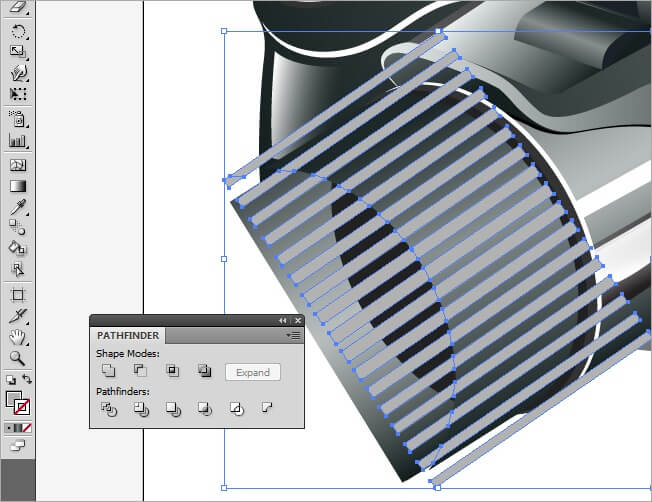
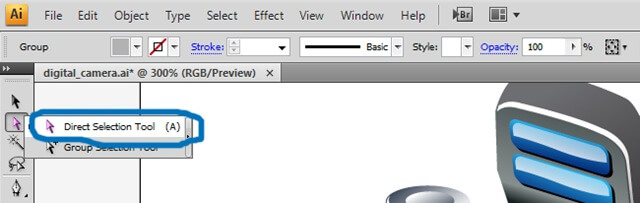
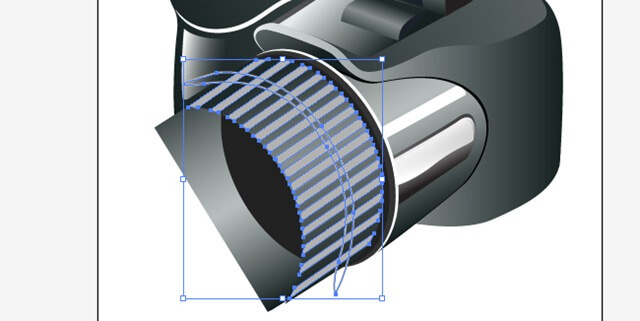
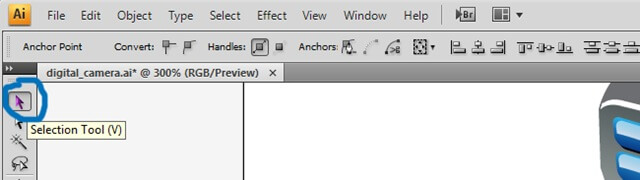
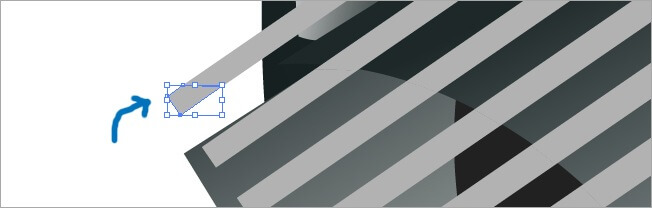
Now we are going to clean the parts that we don’t need. To select individual parts of a divided shape, select the white arrow under the black we have been using all the time.

Now we need to start cleaning the spare parts. You must click over each part at a time and tab Delete until you erase it.
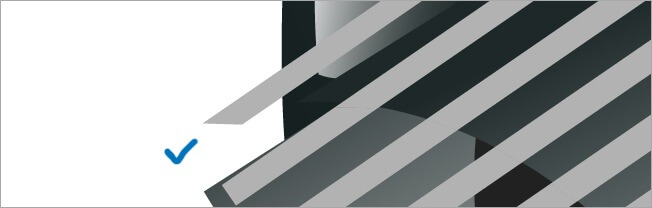
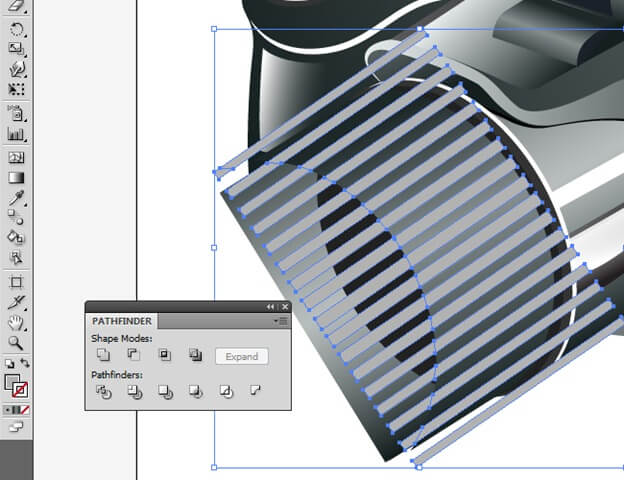
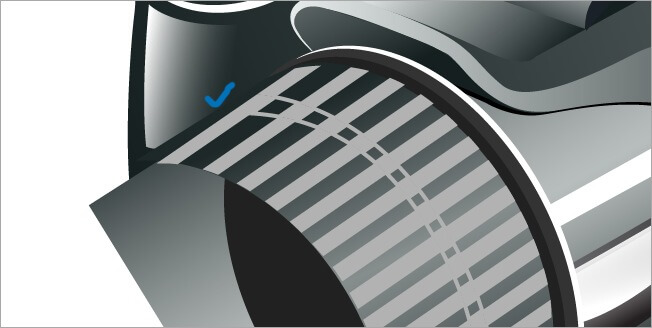
After you’ve cleared all the unnecessary parts, you’ll see something like this:

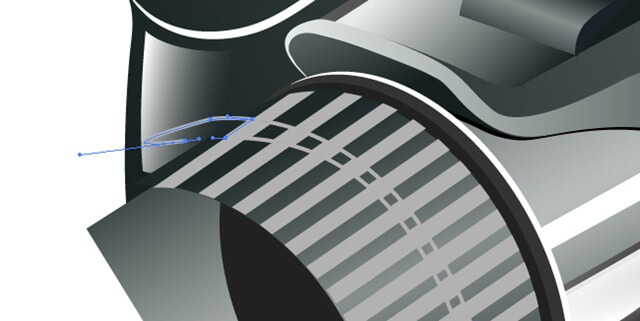
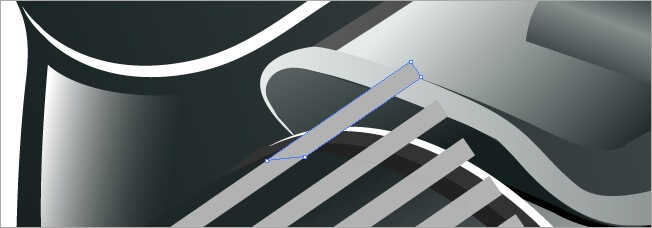
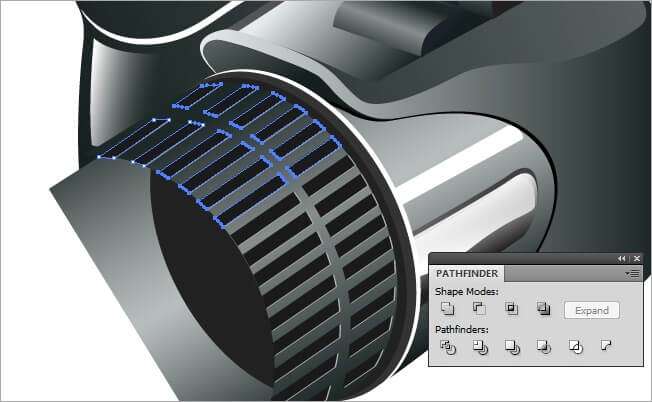
As the Red Hot Chili Peppers say, we must take it to the other side. Let’s draw a new stroke line on the other extreme that we must clean.

Once again, let’s click on the first icon of the second row in the pathfinder menu.
After doing this, the shape will look like this:
Now, select the white arrow and star cleaning the parts that we don’t need.

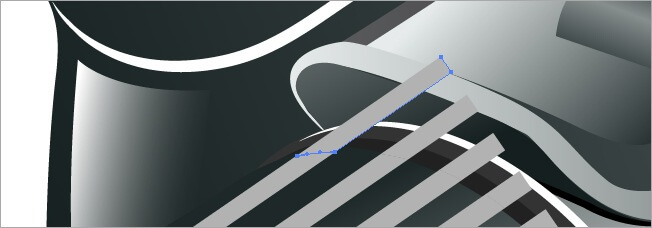
We’re almost done with this part, after deleting this scraps it will be looking like this:
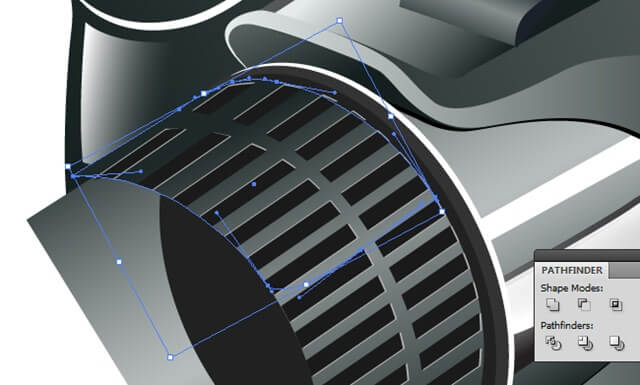
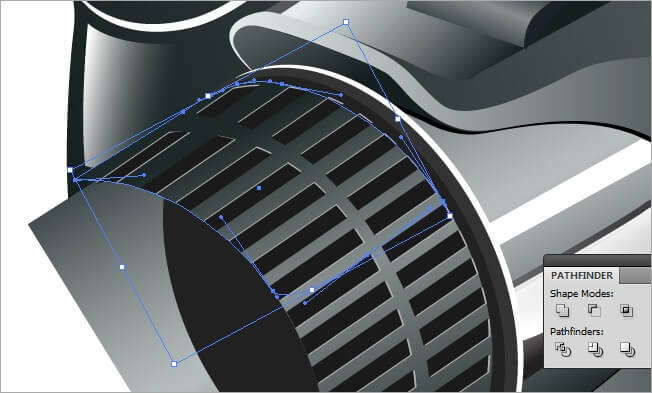
Choose the pen tool and draw a stroke line shape in the middle of the one we have been working on.

Now select both shapes and click on the pathfinder button we used before.

Now select the white arrow to start cleaning the unnecessary parts.

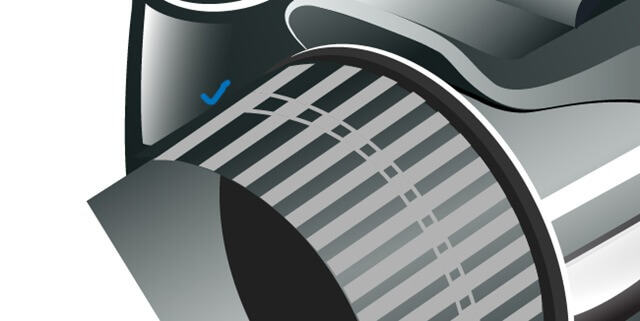
And let’s clean up all the mess.

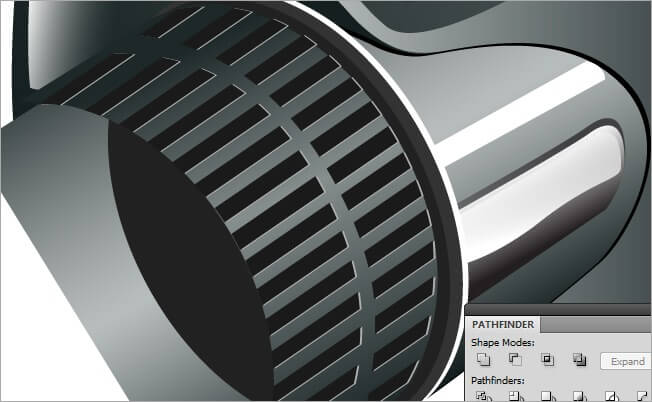
Good, the shape is done, now check the result.
Now we are going to create a 3D vibe with the shape we just did. Select the shape and copy it (Ctrl + C) and paste it over the original (Ctrl + F), change its filling properties for a 90 % black, then move it a couple of pixels to the upper left.
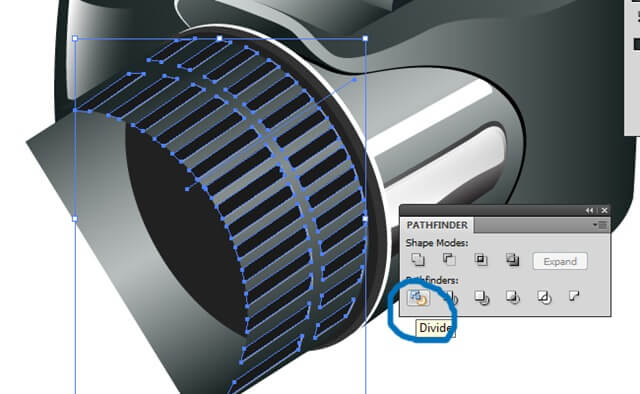
One final thing regarding this part. Select the pen tool and draw a line by the middle of the shape.

Select both the line and the shape and click on the divide icon (pathfinder menu) that we have used.
Then choose the white arrow and select all the objects from the middle to the left.

Now switch from the white arrow to the black arrow so we can move the selection as a group, then move it a couple of pixels to the right.


OK, we have done one of the most difficult things in the creation of this high quality icon, the rest its easier.
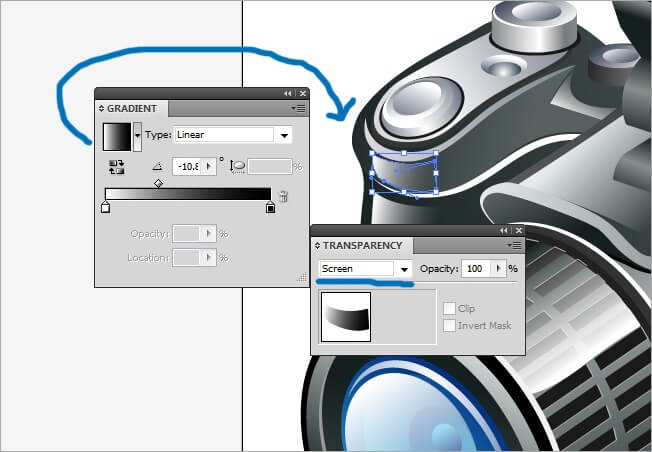
The next shape that we will be doing is a glow over the focus lens. Grab your pen tool and draw it.

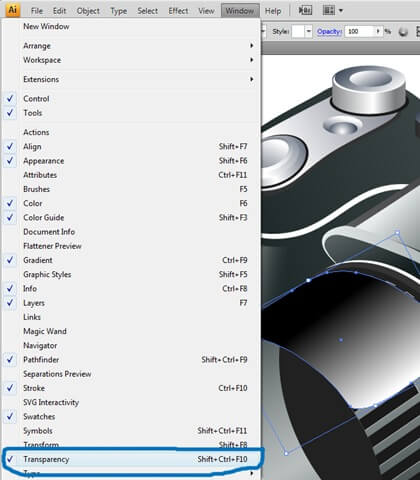
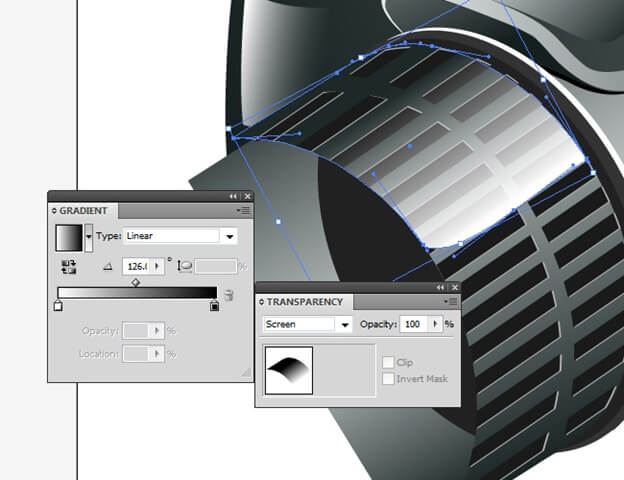
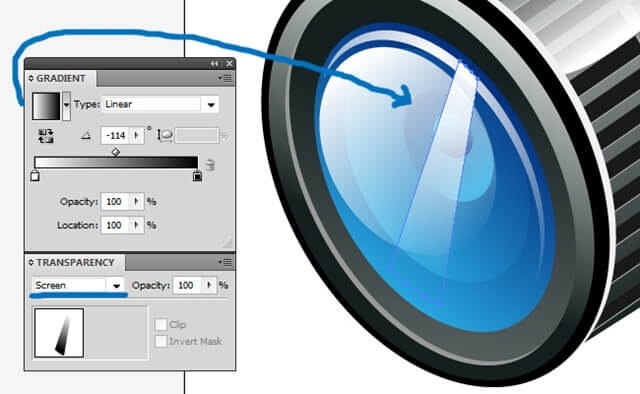
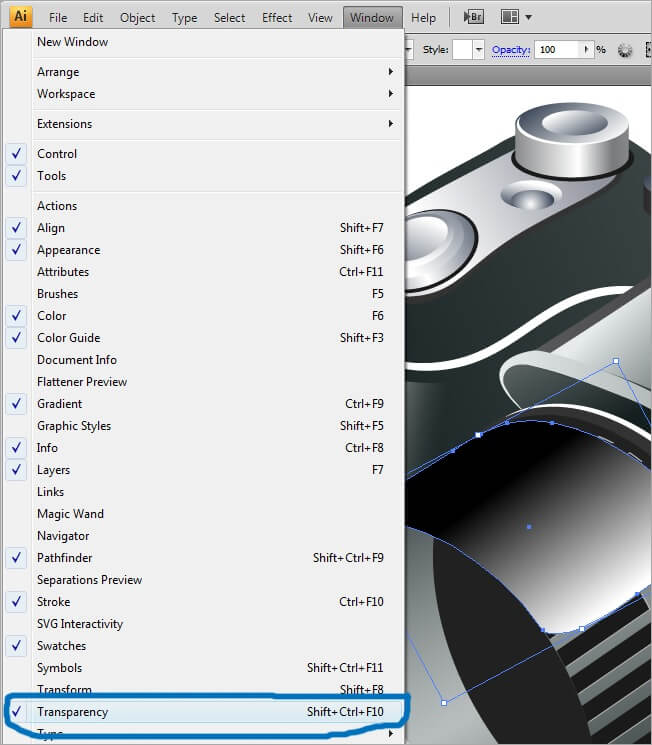
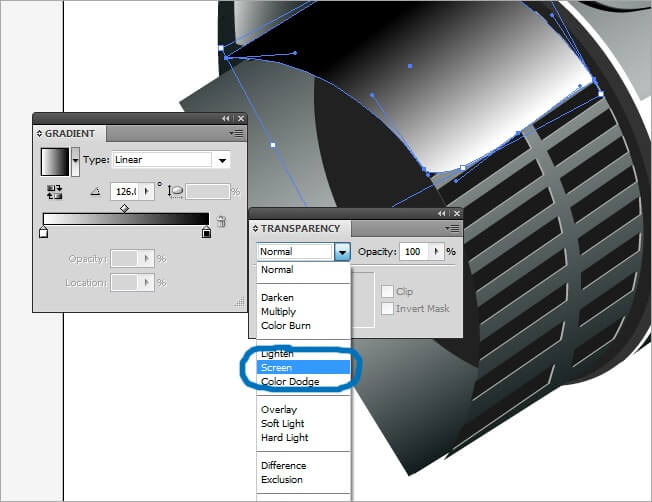
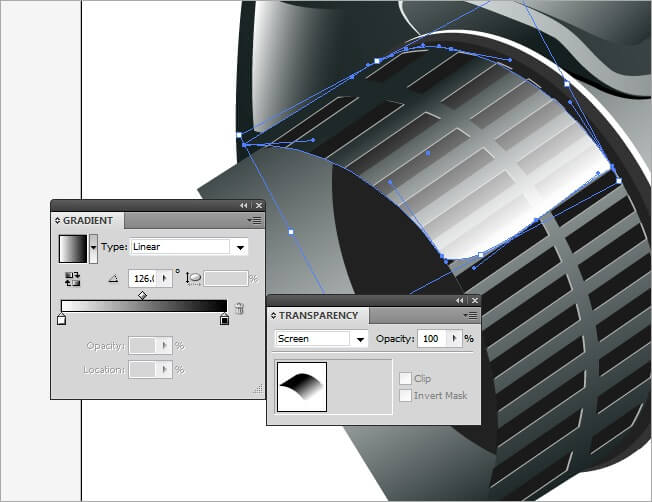
For the color fill, let’s choose a 2 color linear gradient with a 126 angle. But that’s not all, we are going to change the blending mode of the shape. On the same gradient menu, you will find the Transparency field, if you don’t see it go to Window>transparency. Activate this field and then change the mode from normal to screen, that will make a see-through effect to the shape.
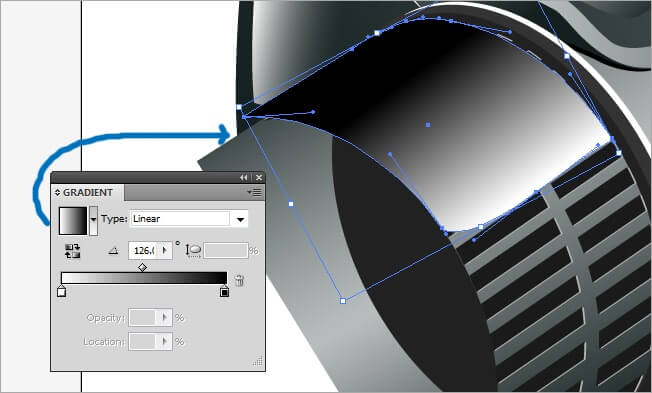
Changing blending mode, gives us a lot of options to change the interaction between objects.
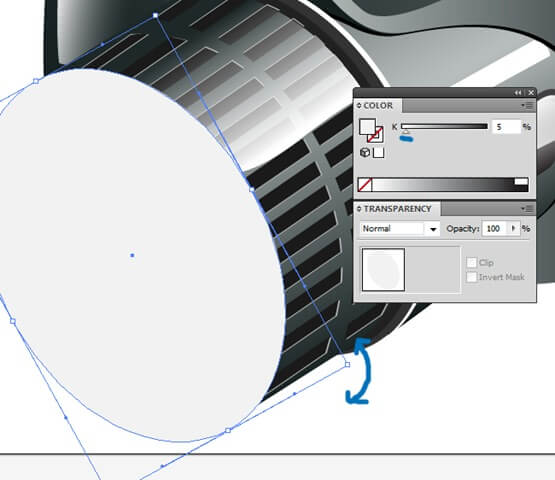
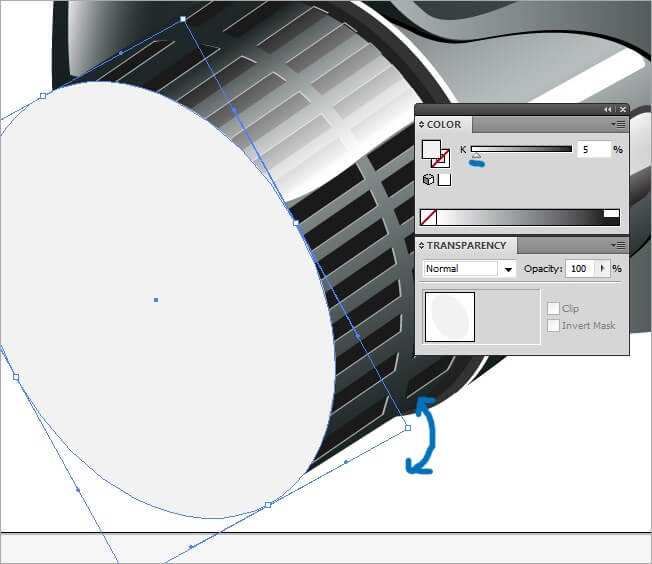
Let’s continue by making an ellipse with the tool of the same name, assign it a solid color fill, in this case a 5 % Black (almost white) and then rotate it to fit in the perspective of the icon.
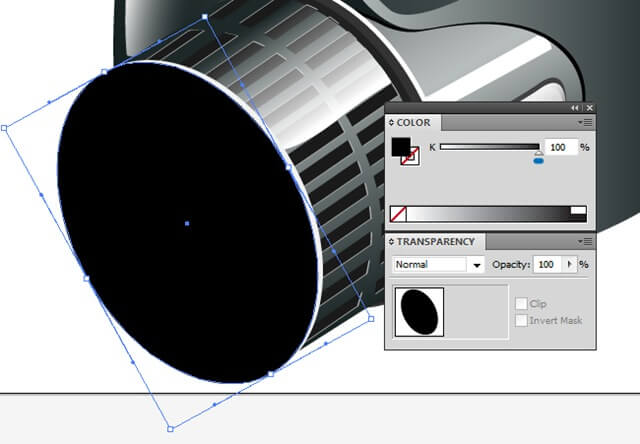
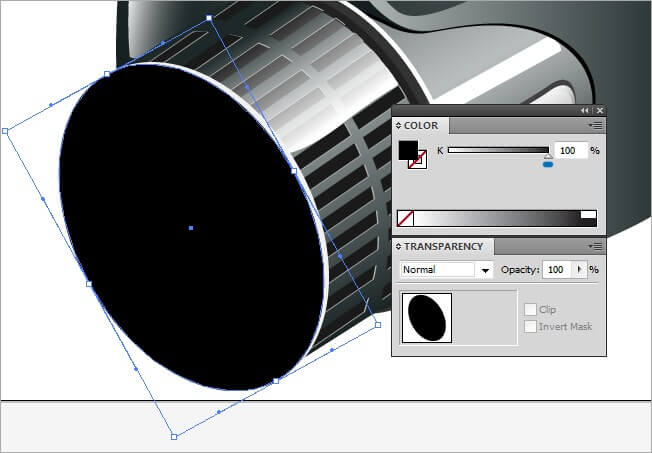
The next thing to do is copy paste the ellipse we just did (Ctrl + C > Ctrl + F), change the filling properties to a 100 % black and move it a little bit to the left.
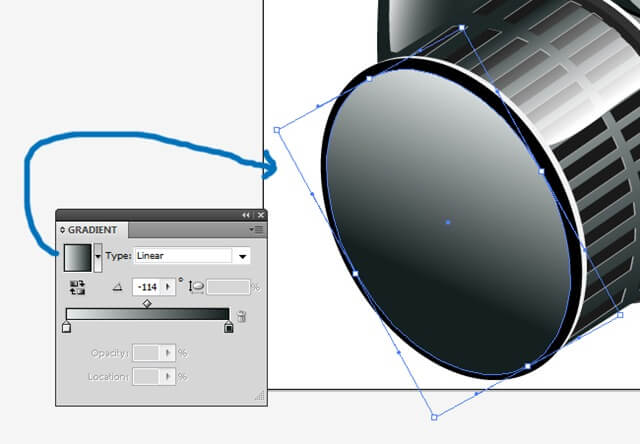
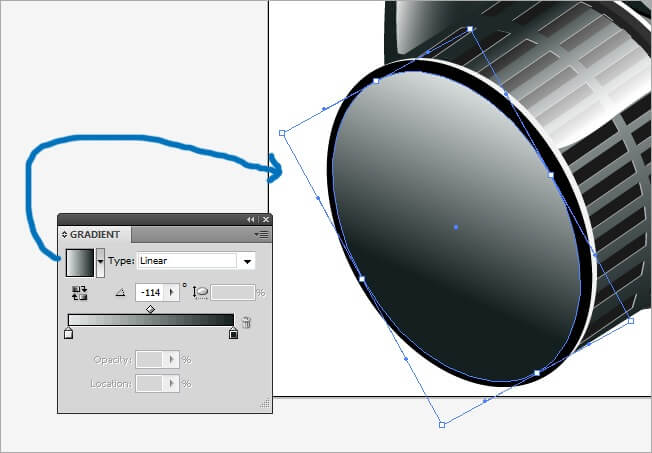
This is another copy task. Copy the shape we just did (Ctrl + C) and place it on top (Ctrl + F), modify the filling parameters to a 3 color linear gradient with a –114 angle. After doing that, hold Shift and reduce its size to about 90 %, then put it a little lower from the middle.
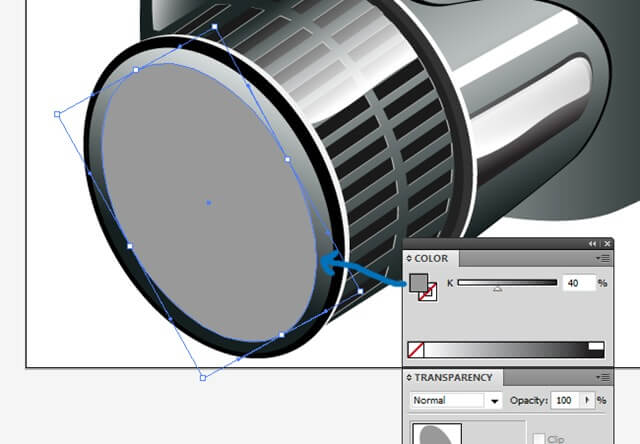
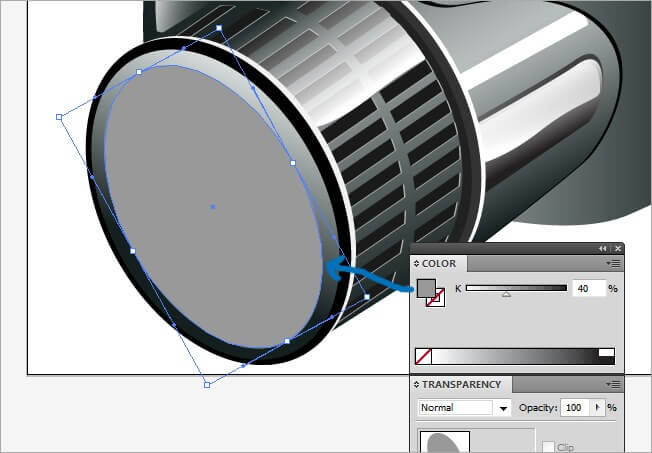
Make a copy of the element we just did, reduce its size to about 90 % and modify the filling values to a solid color, in this case a 40 % black.
We’re getting closer to the end, take a look outside this four walls for a couple of minutes and then we keep working on our camera.
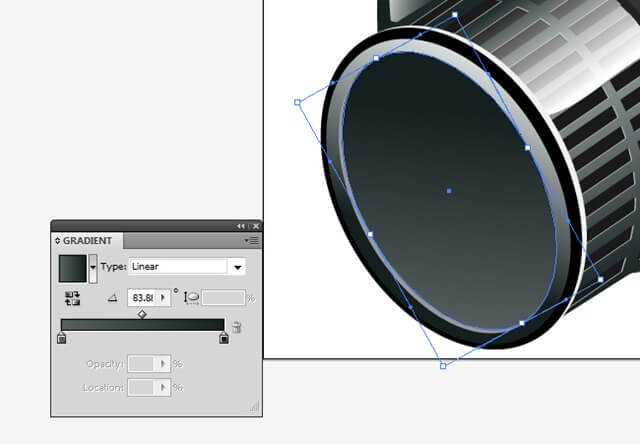
Time to continue. Copy the ellipse we just did and place it a little bit upper, change its filling properties to a 2 color linear gradient with a 83.8 angle.

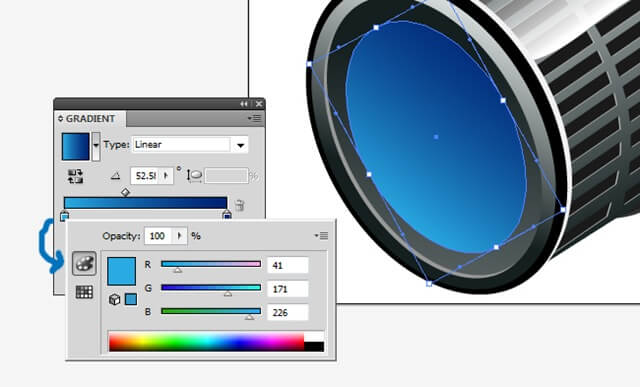
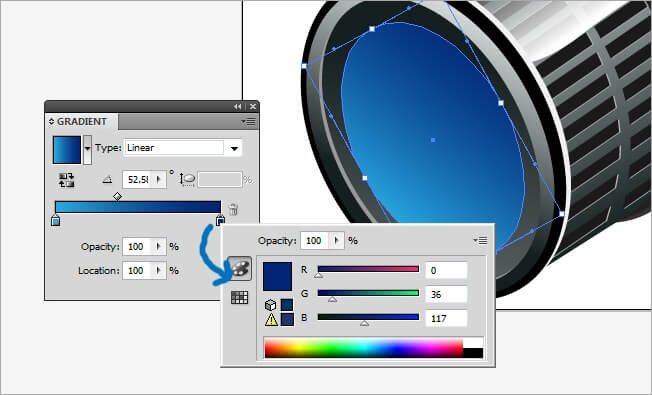
Now we will be making a change in our color palette, because we will start the lens glass. Copy paste the last ellipse we’ve done and reduce its size to about a 85 %, place it on top of the rest and in the middle, then change the filling color properties to a 2 color linear gradient with a 52.5 angle.

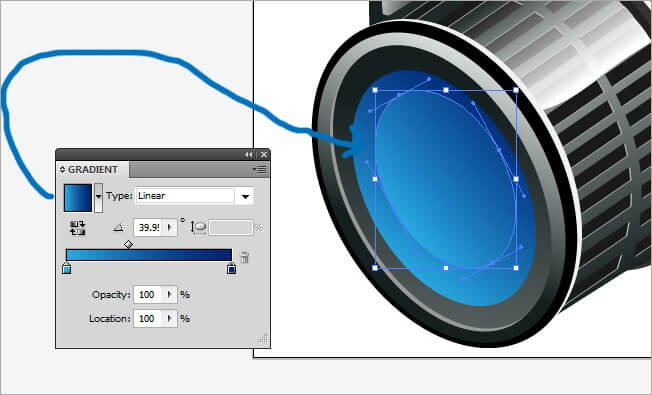
We will be using this two blue tones for all the objects similar to the one we just did. Copy paste the ellipse, reduce its size to about 80 % and place it a little bit above from the middle, modify the angle of the filling properties to 39.9.
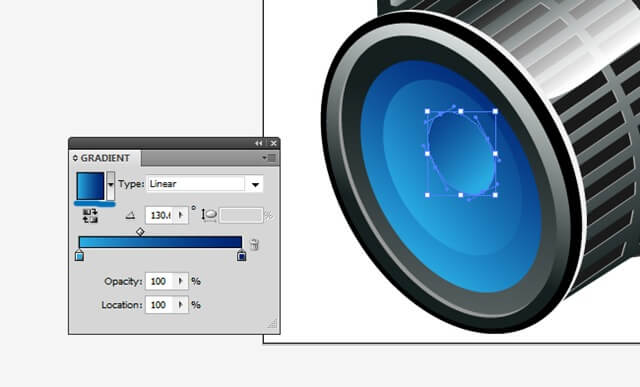
Copy and paste one more time an ellipse, the last one we did to be exact. Reduce its size to about a 40 % and change the angle in the filling parameters to 130.

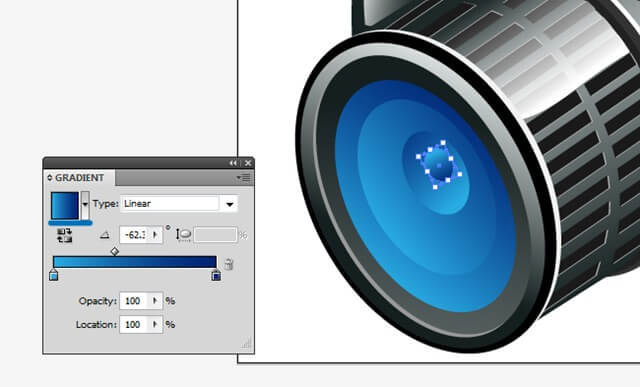
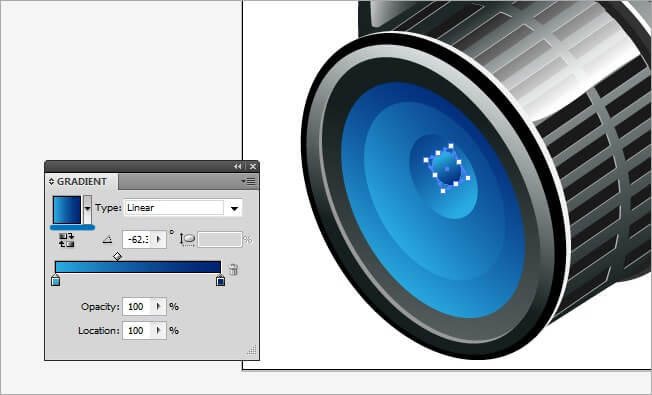
One last copy. (Ctrl + C) to the last ellipse we made and place it above the middle of this one, change the angle of the filling properties to –62.
Now we are going to add a glow. Choose the pen tool and draw a small shape in top of the lens, then fill it with a 2 color (black and white) radial gradient with a 0 angle.


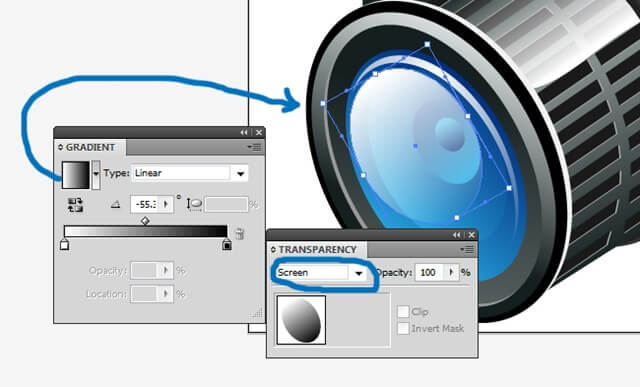
One more glow. Select one of the ellipses we’ve done and reduce its size so that it fits inside the lens glass, then change its filling properties to a 2 color linear gradient with a –55 angle, also change the blending mode to screen.

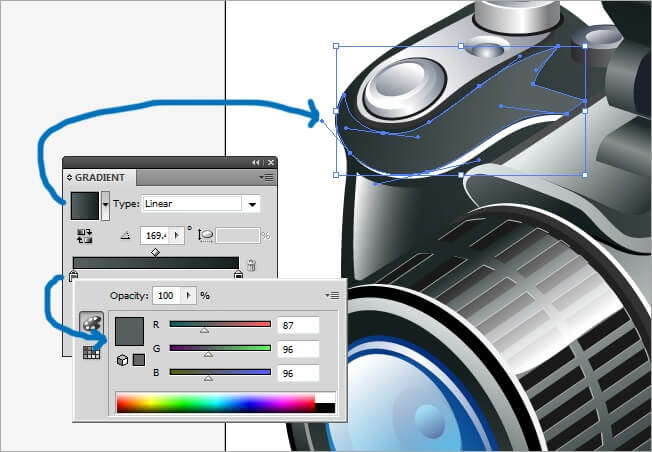
Let’s go back to the camera’s body. Grab your pen tool and draw a shape at the top left side of the icon, fill it with a 2 color linear gradient (dark green to 100% black) and a 169 angle.
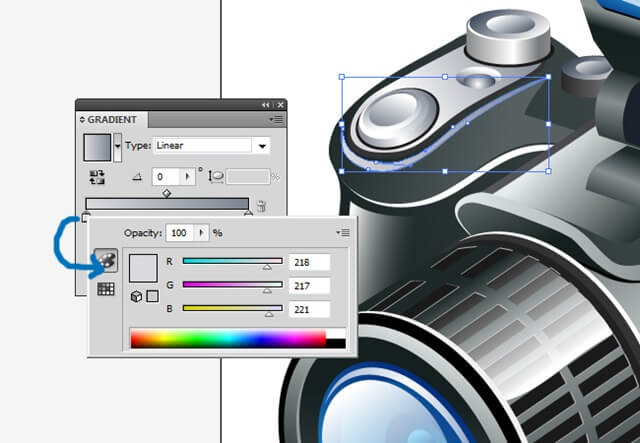
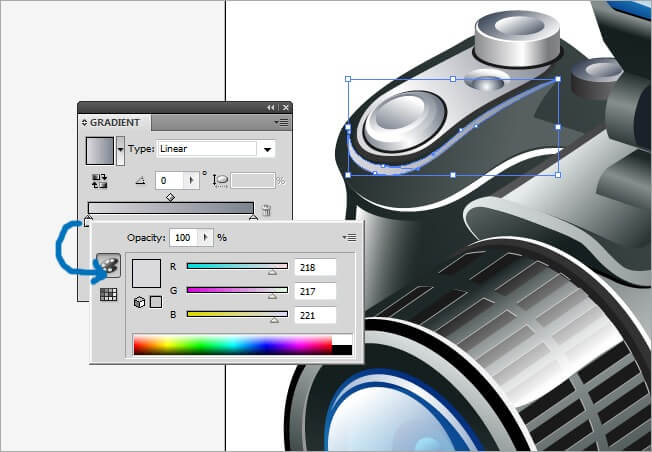
Draw another shape next to the one we just did to add some glow. Change its filling parameters to a 2 color linear gradient (light gray to dark gray) and a 0 angle.

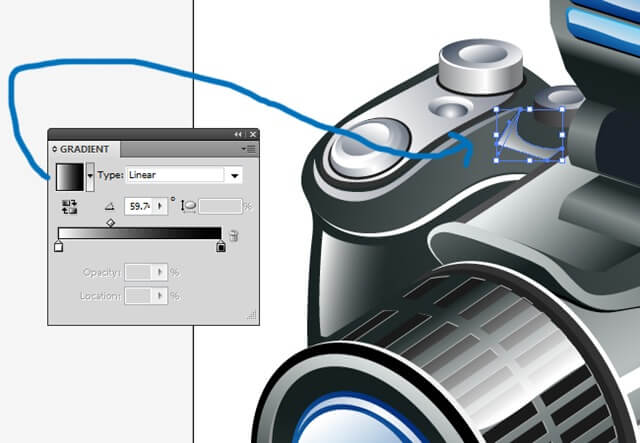
One more glow, draw it with the pen tool and regarding the filling properties choose a 2 color linear gradient with a 59.7 angle.

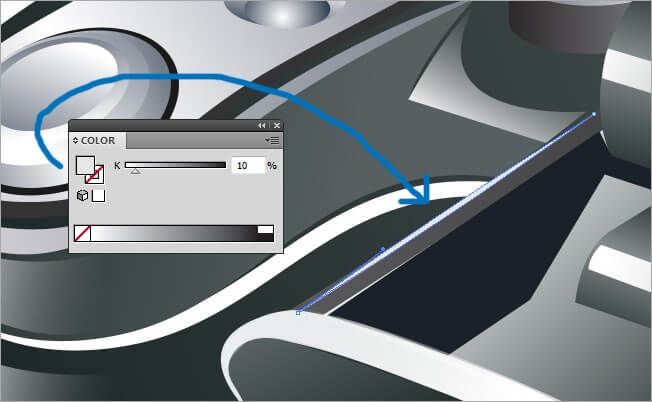
The next glow goes in the front part of the camera, draw it with the pen tool and assign it the following filling properties: 2 color linear gradient with a 10 angle. Change also the blending mode to screen.
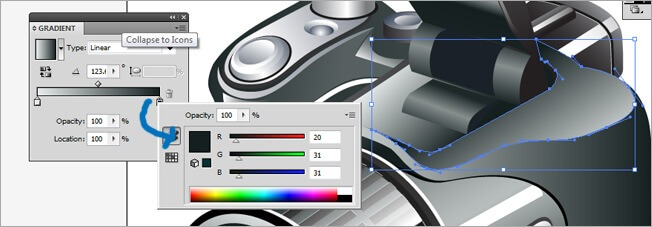
Let’s keep improving our camera details. Draw a new shape at the right side of the camera using the pen tool and assign it the following filling values: 2 color linear gradient with a 123 angle.
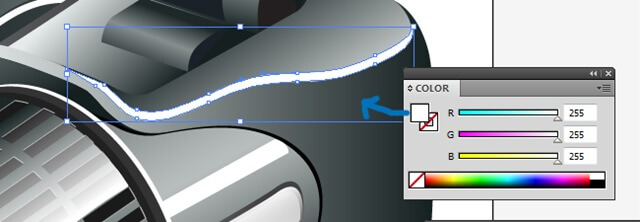
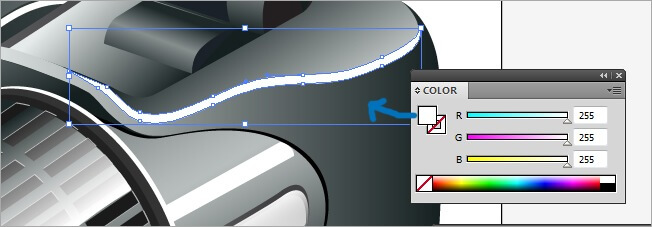
Now draw a glow shape with the pen tool at the right side of the one we just did, fill it with a pure white color.
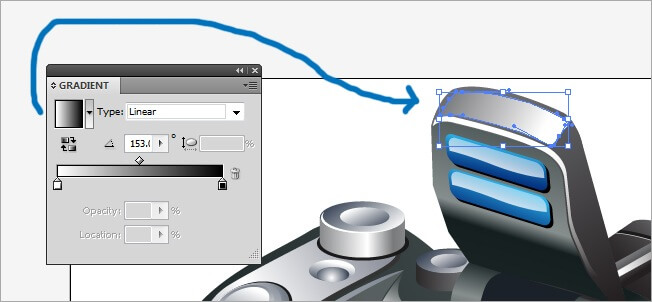
Let’s keep adding glow to our camera, choose the pen tool and draw a small shape on the top of the flash body, then fill it with a 2 color linear gradient and a 153 angle.
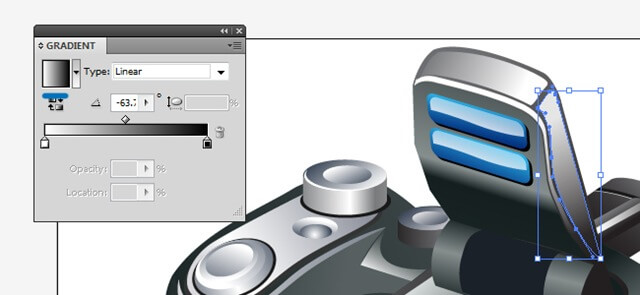
The next glow goes at the right side of the flash body, draw it with the pen tool and fill it with a 2 color linear gradient with a –63 angle.

The next figure is not a glow, but it helps with the 3D looking that we are looking for. Draw it with the pen tool at the left side of the flash base, fill it with a black tone.

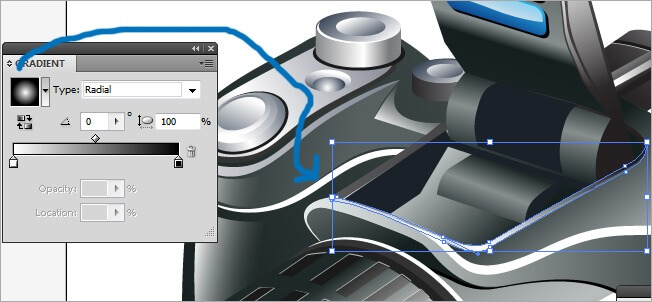
Now another glow, use the pen tool to draw it and then fill it with a 2 color radial gradient and a 0 angle.
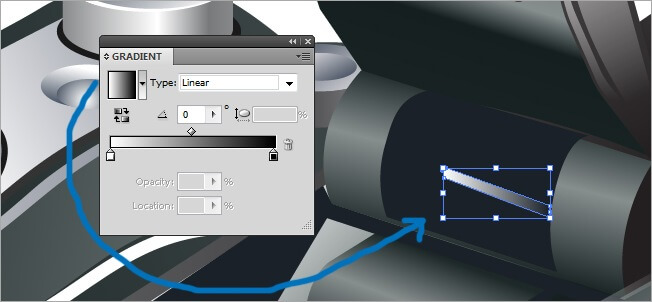
This one is a very tiny glow but still useful. Draw it in the back of the flash base and for the filling assign it a 2 color linear gradient with a 0 angle.
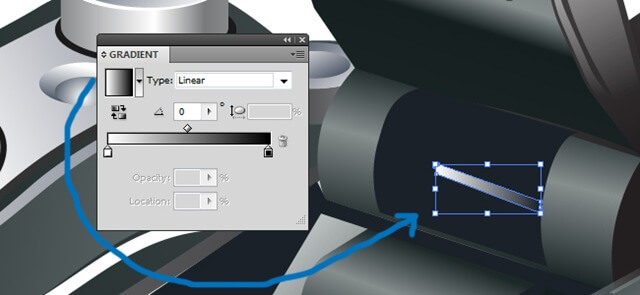
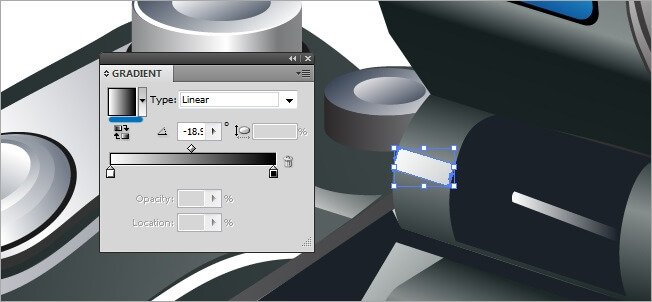
Another tiny glow, draw it at the left of the one we just did and fill it with a 2 color linear gradient and a –18 angle.
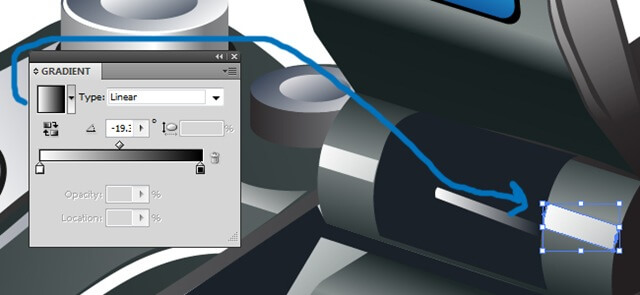
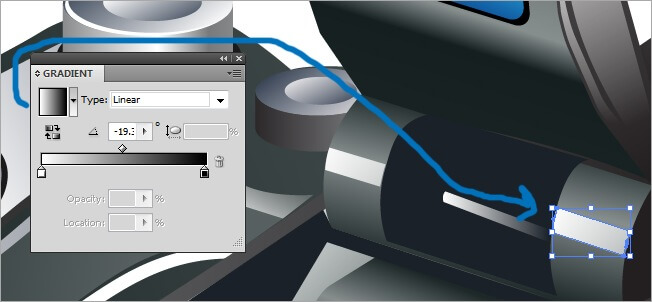
Let’s draw the same glow we just did but on the right side, regarding the filling parameters, choose a 2 color linear gradient with a -19 angle.
Another glow of the same style, but this one goes on the front, draw it and then fill it with a 2 color linear gradient and a –16 angle.

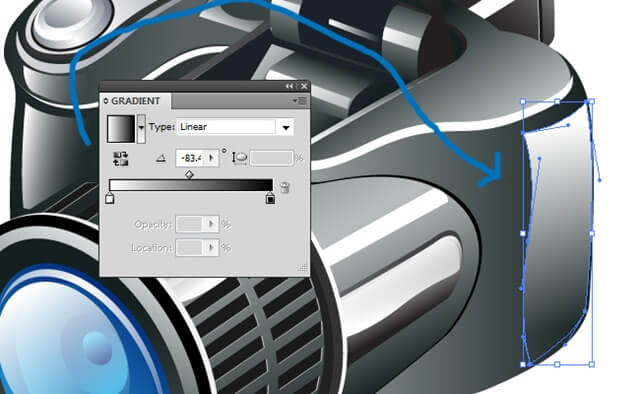
This one is a big glow, draw it at the right side of the camera’s body, then modify the filling parameters to a 2 color linear gradient and a –83 angle.
The next is a stroke line, remember to check the fields at the bottom of the tools bar, so that the stroke square is on top, select a 90 % black to make the line.

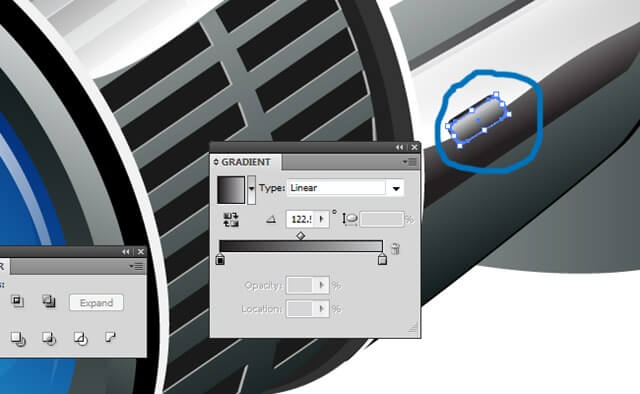
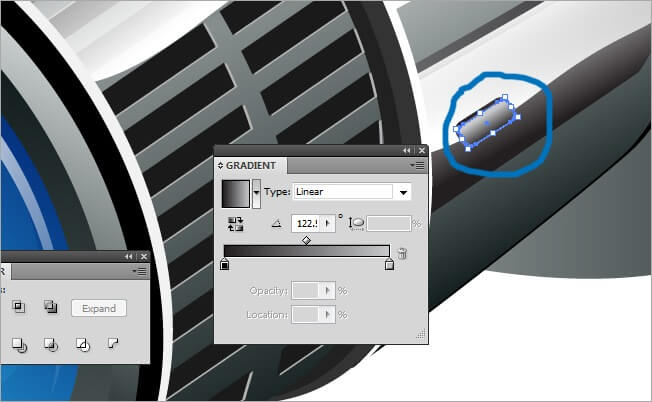
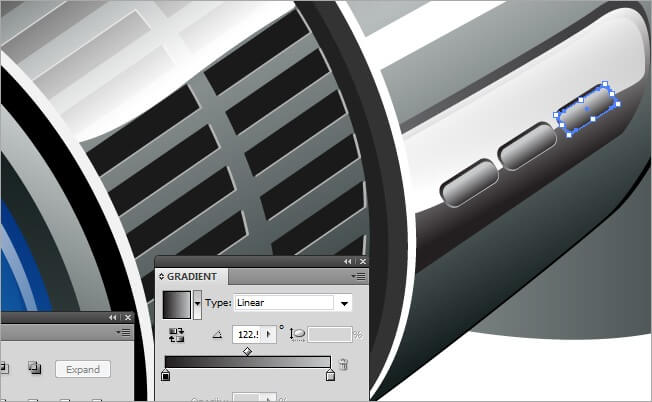
The next one is a small detail that will provide the camera a realistic look, draw it with the pen tool next to the focus lens and fill it with a 2 color linear gradient and a 122 angle. Then copy the button and place it on the same side and rotate it so the gradients get reversed.
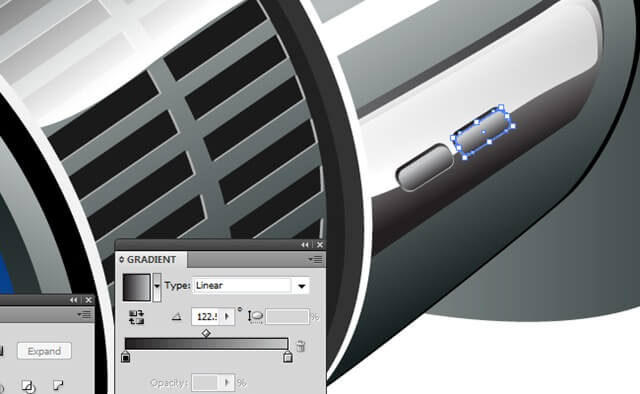
Now we must copy the button (Ctrl + C), make sure you select the original and the copy, then place it next to the first button.
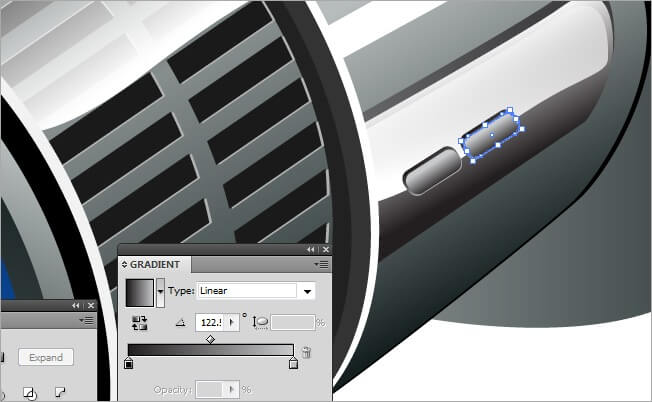
One more copy (Ctrl + C) of the button, place it at the right of the one we just copied.
OK, we’re almost there, just a few more details and we’re done.
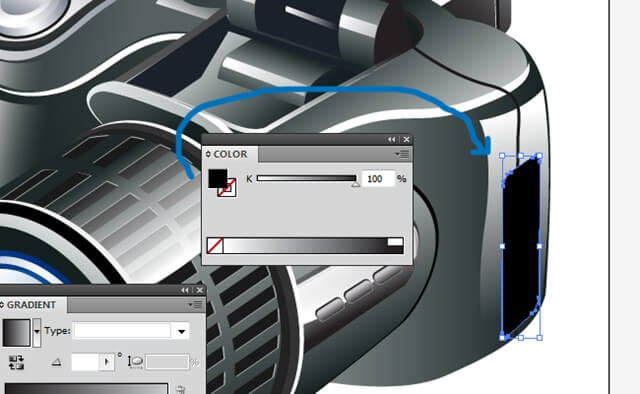
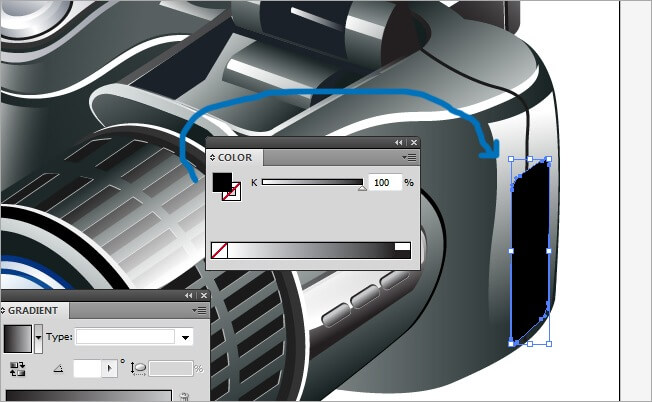
This is the part where the memory card goes. Let’s draw the base first, filled with a 100 % Black.
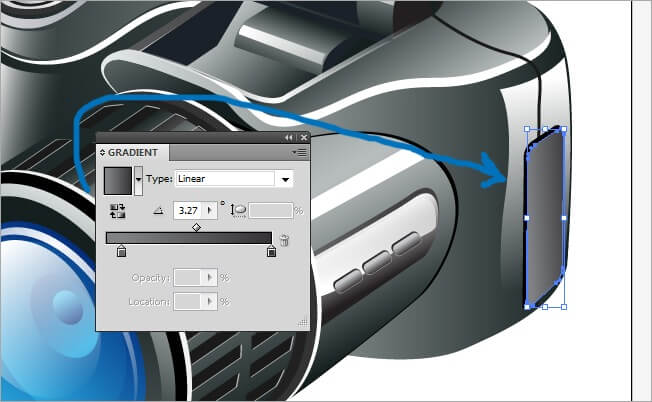
Now copy this base (Ctrl + C) and place it on top (Ctrl + F), then move it a few pixels to the right and change the filling properties to a 2 color linear gradient with a 3.2 angle.
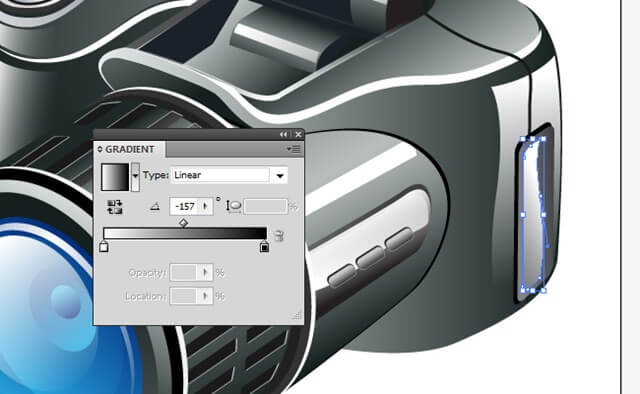
Now let’s draw it a glow, use the pen tool to do it and for the filling parameters choose a 2 color linear gradient and –157 angle.

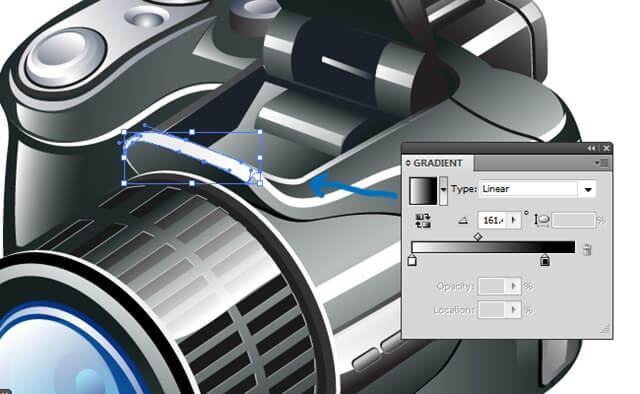
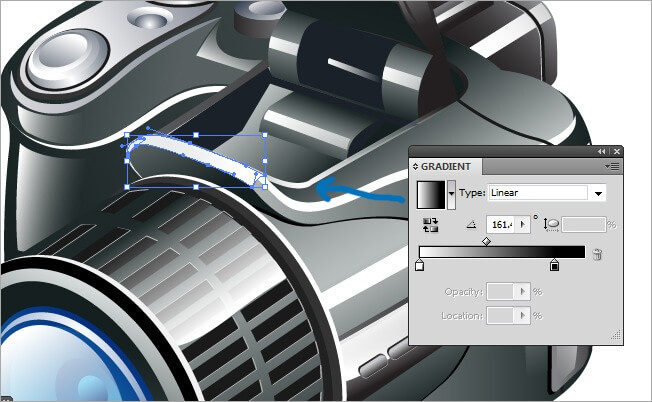
OK, one more glow, this one goes in front of the flash. Draw it with the pen tool and assign it the following filling parameters: 2 color linear gradient and a 161 angle.
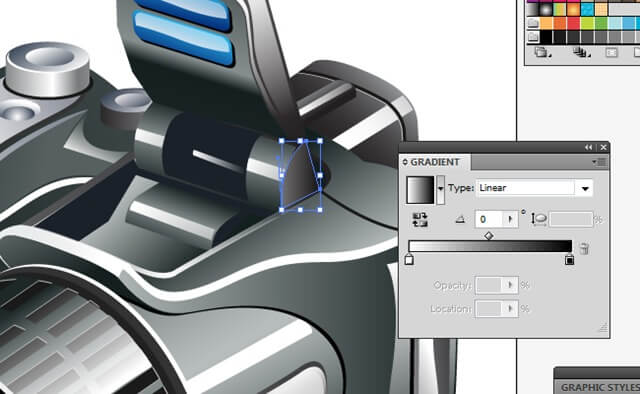
This is one is much a shadow as a glow. Use the pen tool to make the shape and then fill it with a 2 color linear gradient and 0 angle.
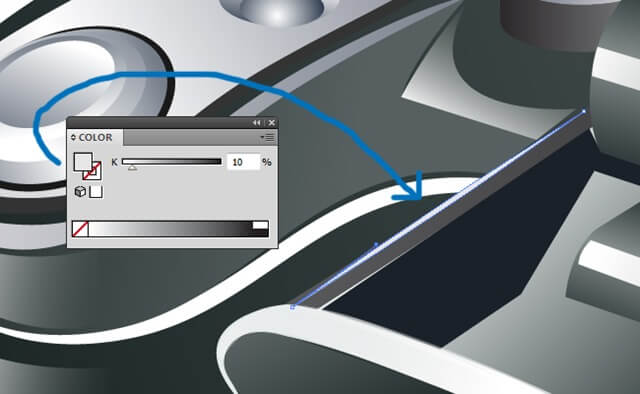
The next glow is a very thin one. Use the pen tool to define its shape and fill it with a 10 % black (almost white).
6. The final details
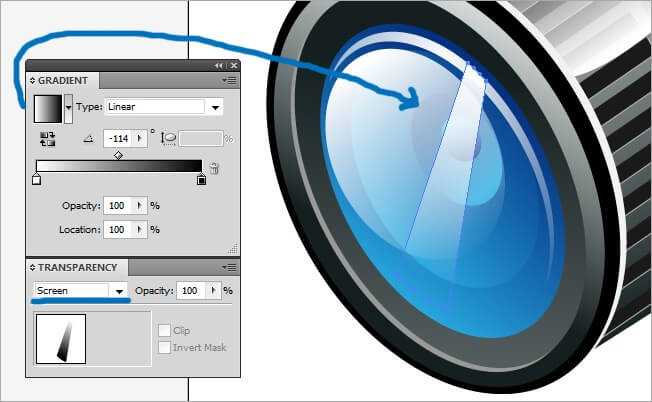
OK, just one more thing and we’re done. We are going to add a couple of glow shapes to the lens. Draw a straight shape that emulates a light shine. Then fill it with a 2 color linear gradient and a –114 angle, finally, change its blending mode to screen.
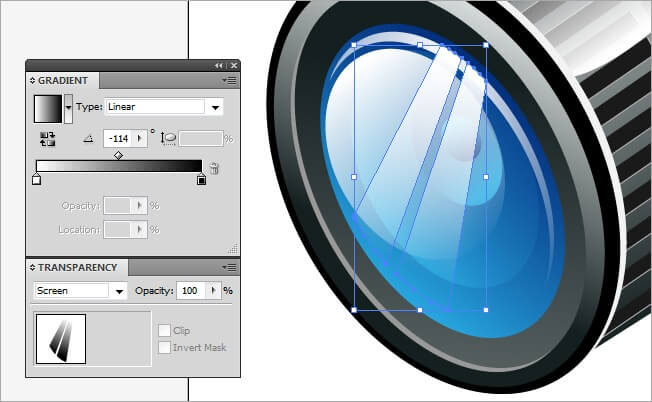
OK, now copy the glow (Ctrl + C) and paste it left to the original, then rotate it a little bit to the left.
Voila!!!, our camera is complete. It took almost 200 images for us to do it but I think it was worth the effort, we have learned to create 3D environments by just overlapping layers, changing blending modes and playing with the gradients. I hope you enjoyed this tutorial and we well see you next time.