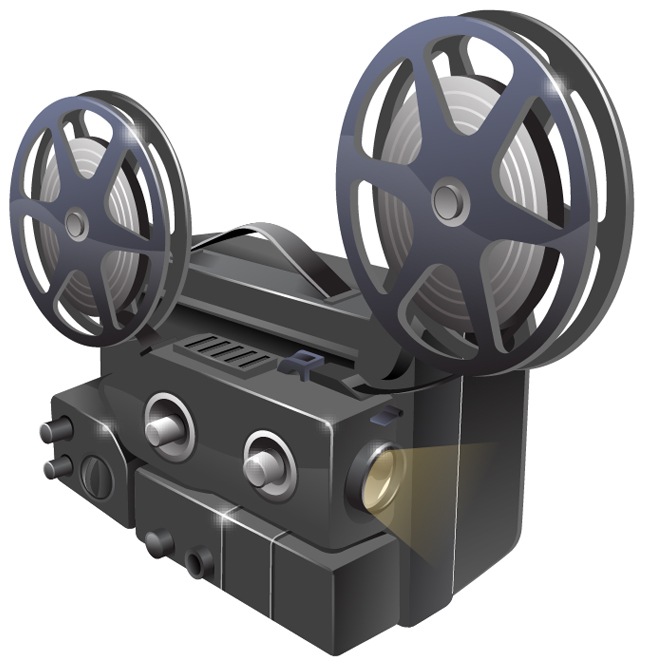
When you’re starting to learn how to create realistic objects in Illustrator you usually take a real life picture for inspiration and begin drawing it. On this tutorial we will offer a better solution for you to practice your skills in Illustrator. Throughout the whole post we will learn how to make a real object with Adobe Illustrator, in this case, we have selected an old film projector, such as the early 20th century. Get ready because it’s time to start, open your Illustrator and let’s go.
1. Grab references
We are making an antique object, so it’s probably that you’re not completely sure of how it suppose to be, fortunately we have the internet, so navigate for a while and check some examples for inspiration.

2. Setup your canvas
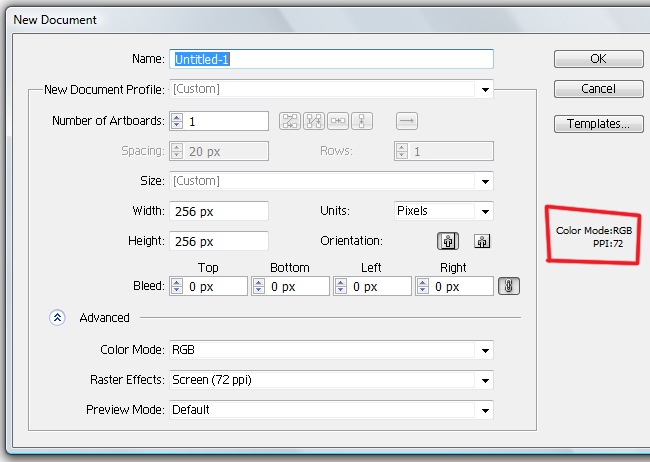
OK, now that you know exactly how a film projector looks like you’re ready for start tracing vectors. First go to File>New and setup a canvas with the following properties: 256 px X 256 px, RGB color mode and 72 ppi.
3. Start vectorizing
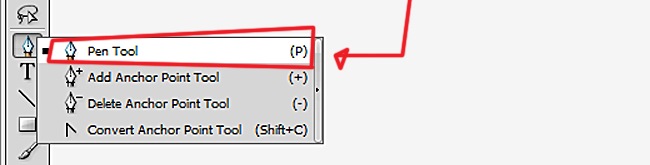
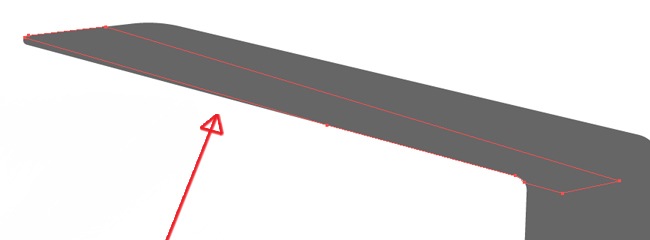
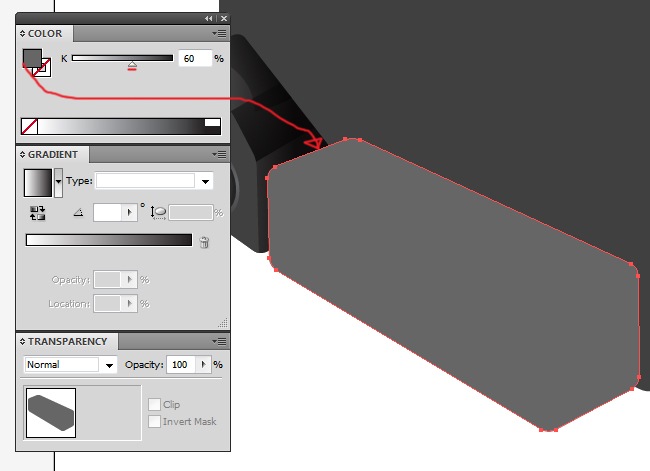
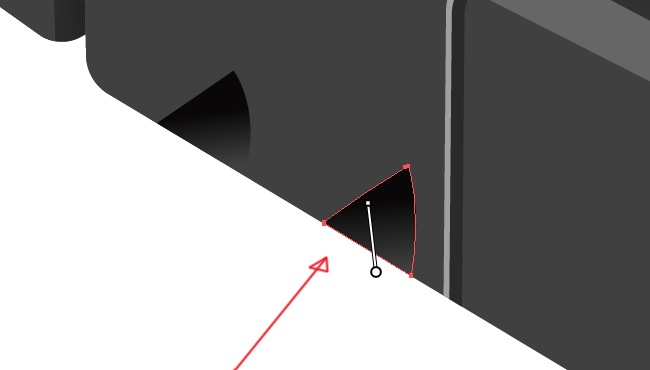
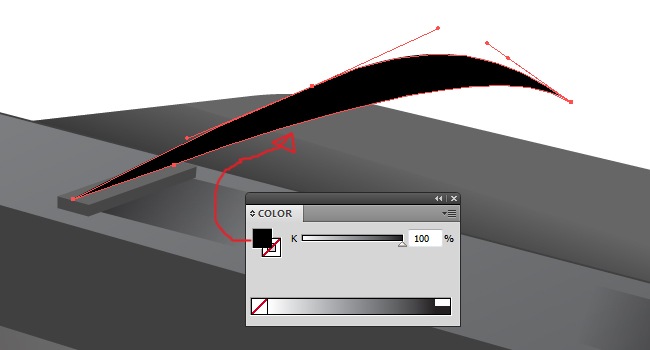
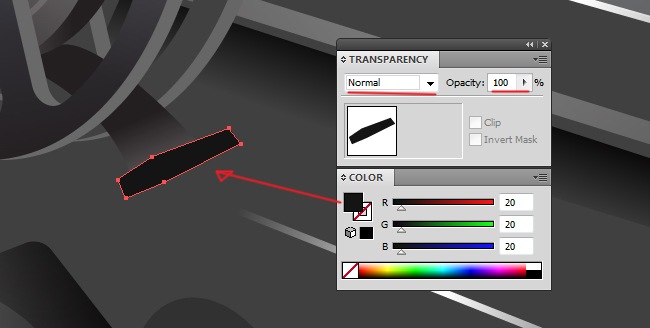
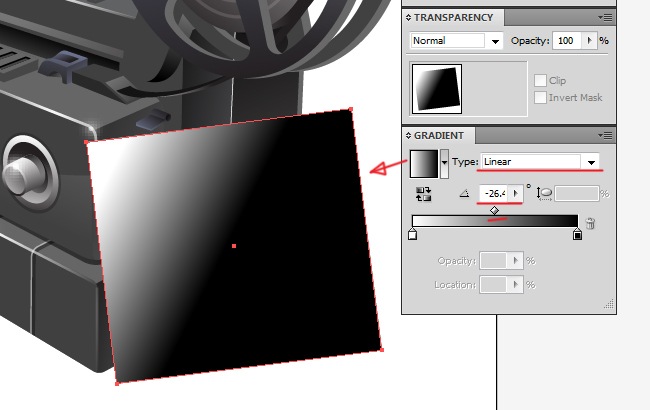
This is going to be a long tutorial, we suggest you to sit comfortable, grab some food, maybe a cup of coffee and then we can begin. OK the first shape we are going to make uses an Illustrator plugin called Rounded Corners. First select the pen tool in order to start drawing.
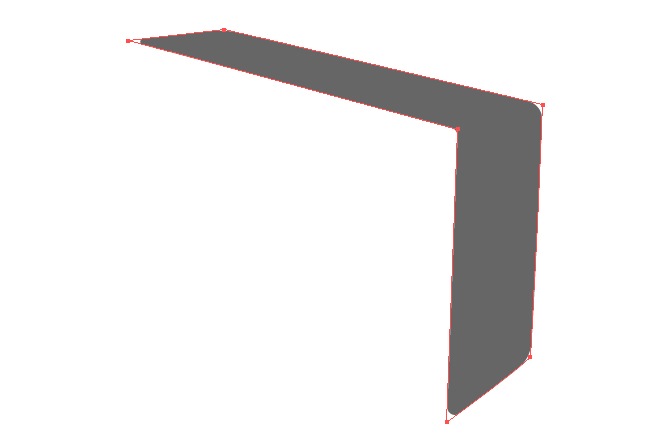
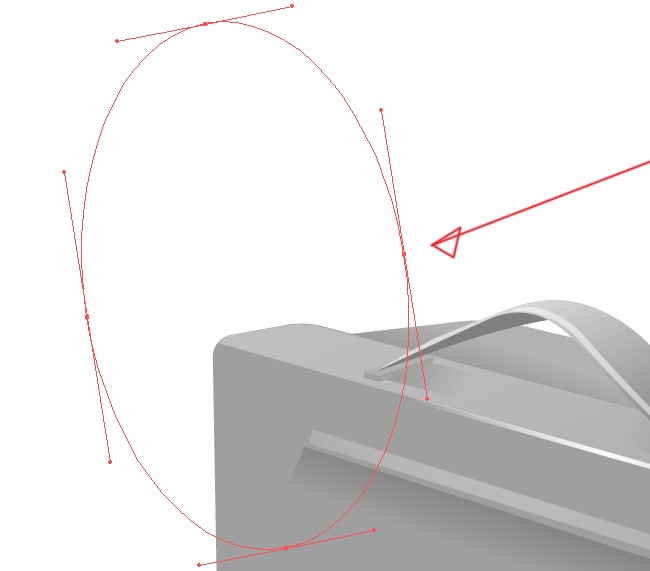
Now, draw the following shape:

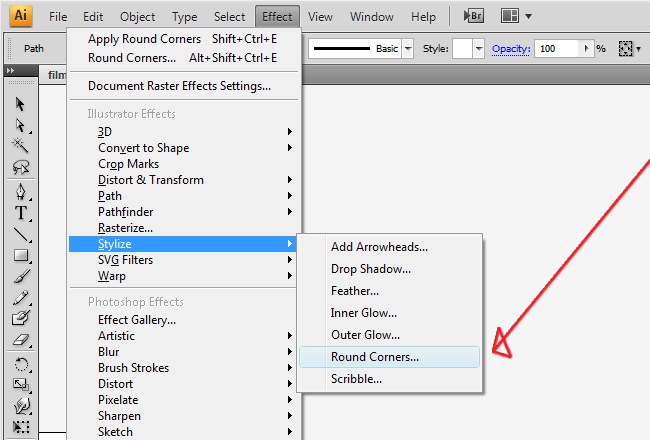
And now the plugin, go to Effect>Stylize>Round Corners and adjust the different values until you get something closer to this.

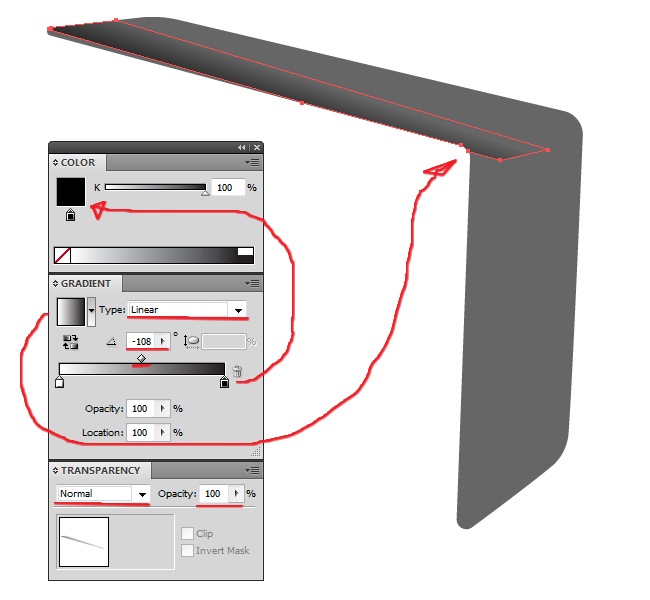
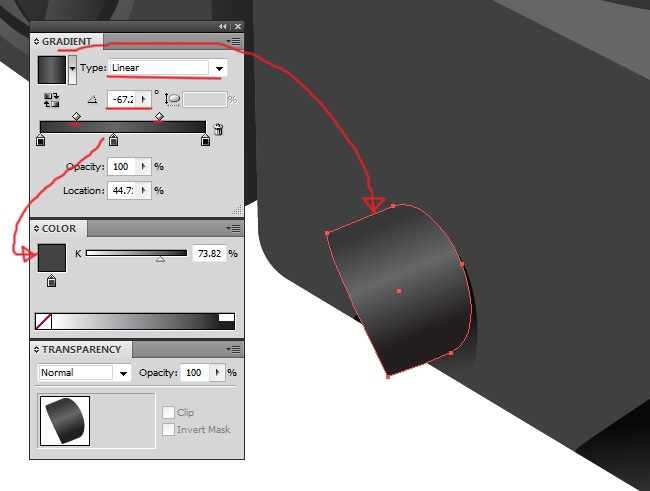
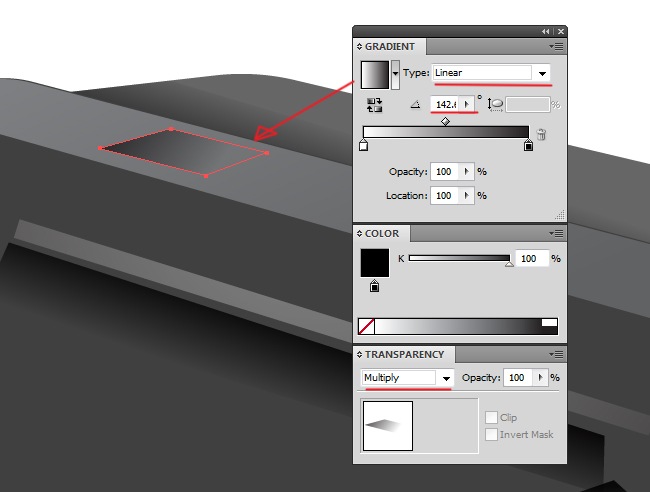
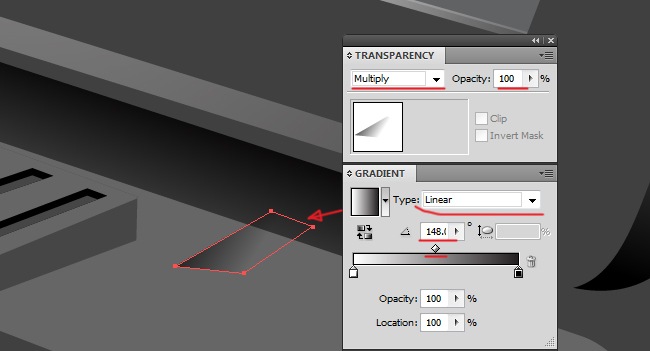
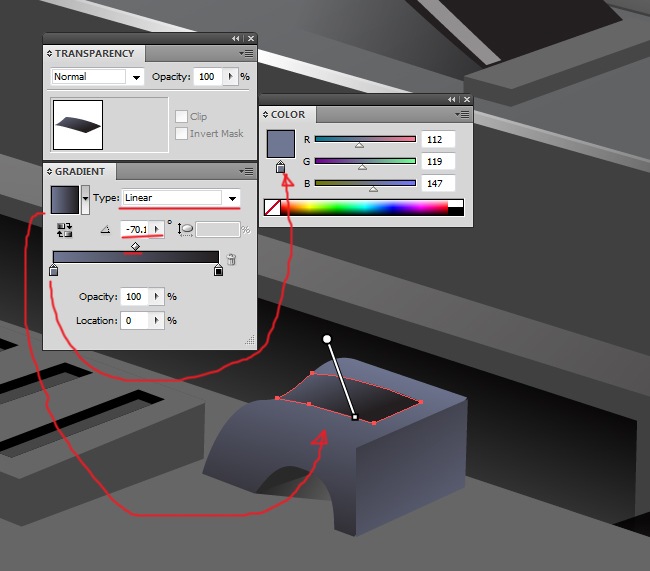
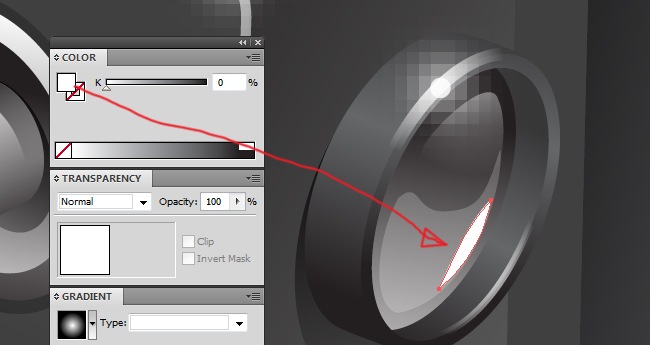
Because we’re making a realistic element, there’s going to be a lot of shadows and highlights, like the one we are doing at next.
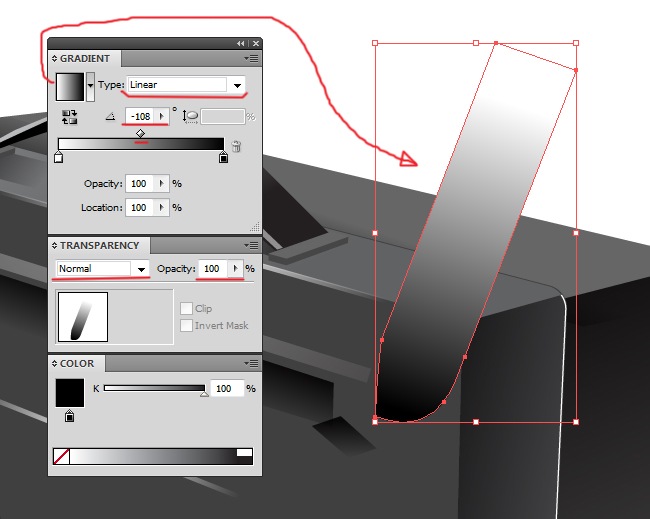
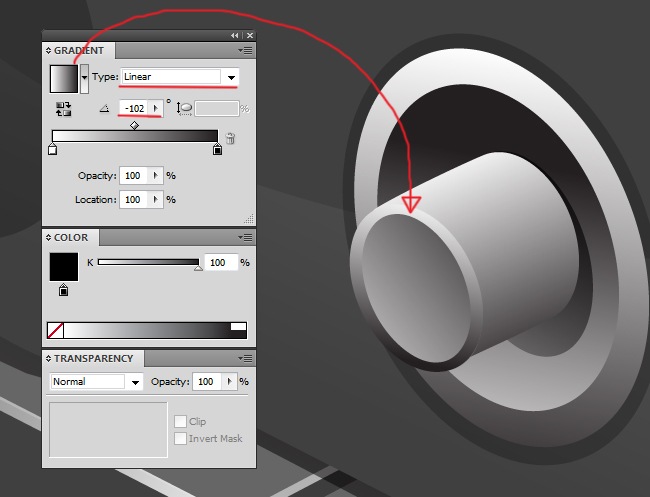
And now for filling our object let’s use a two color gradient, linear type and –108 angle.
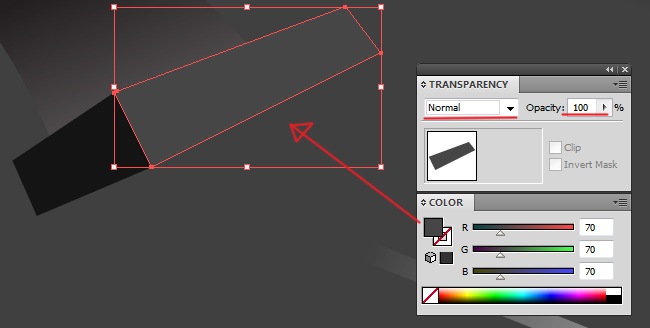
Next shape, grab your pen tool and trace it.

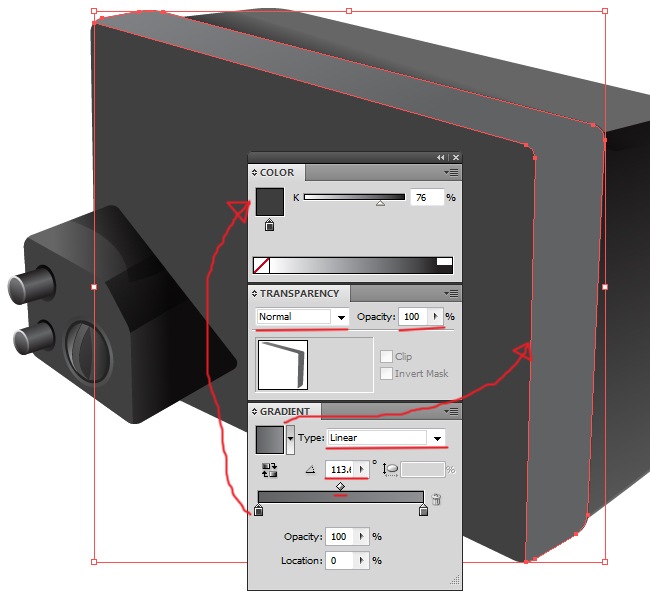
For the filling use a two color gradient, linear type and 113 angle.

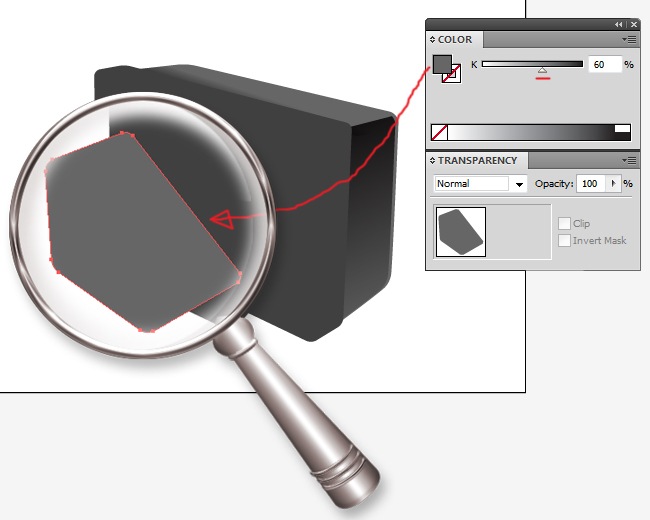
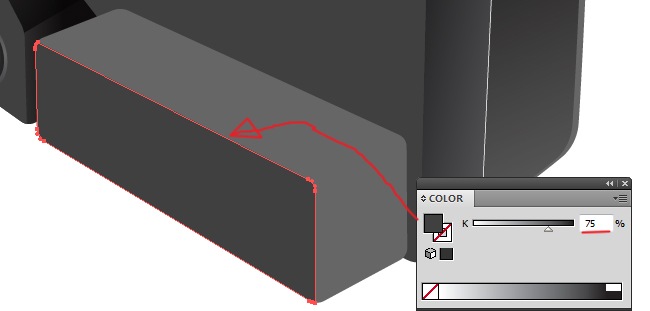
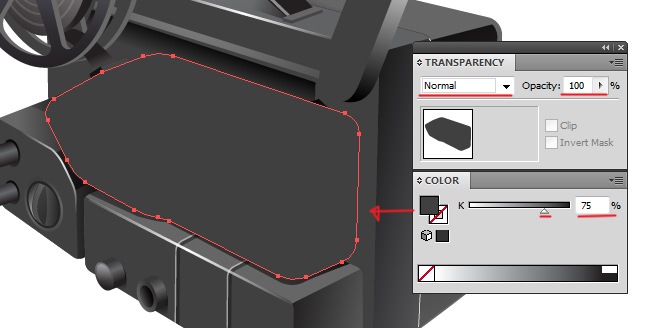
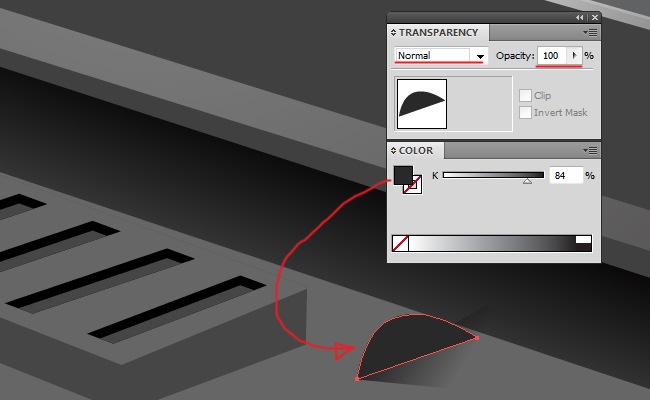
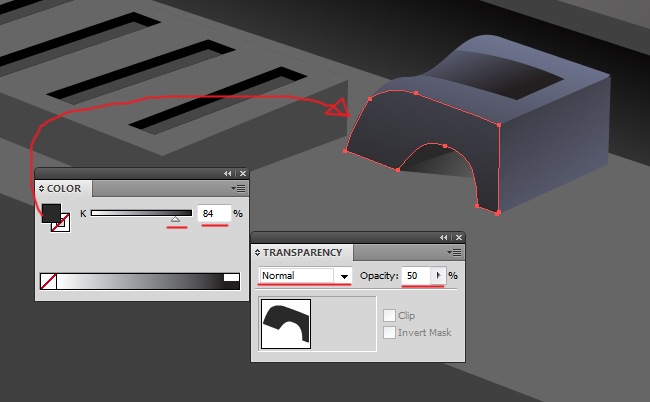
We can generate the next figure with the round corners plugin, but because we want it to be very detailed, we better trace it with the pen tool directly.

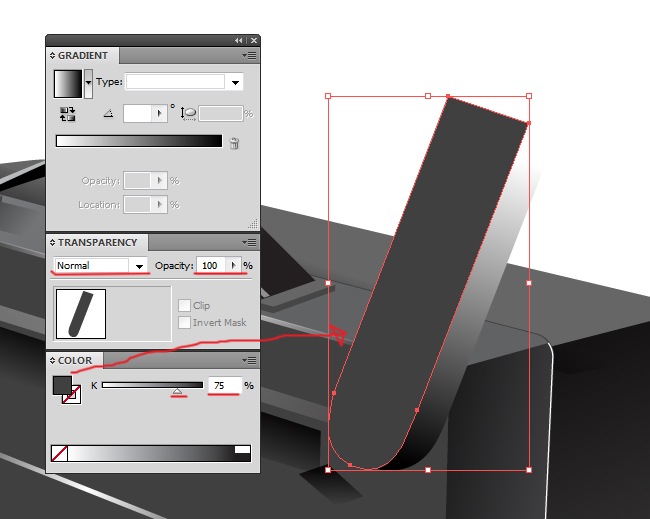
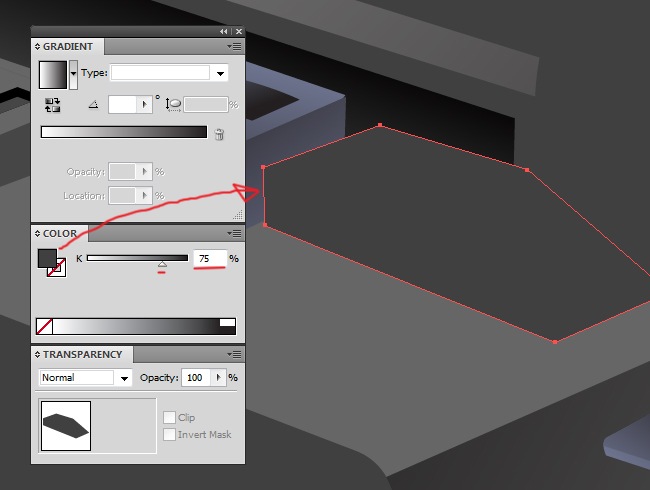
For the fill we used a solid color ( 75 % black ), no more adjustments for this one.

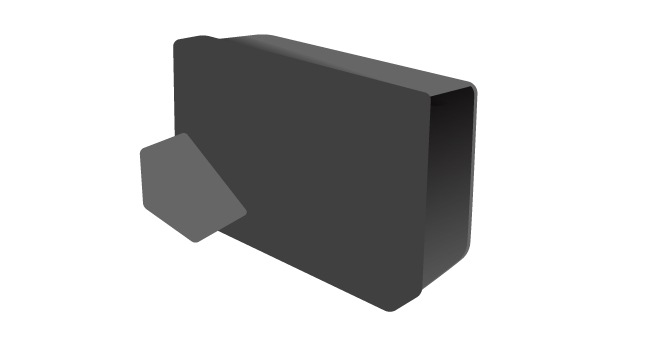
4. Stepping up
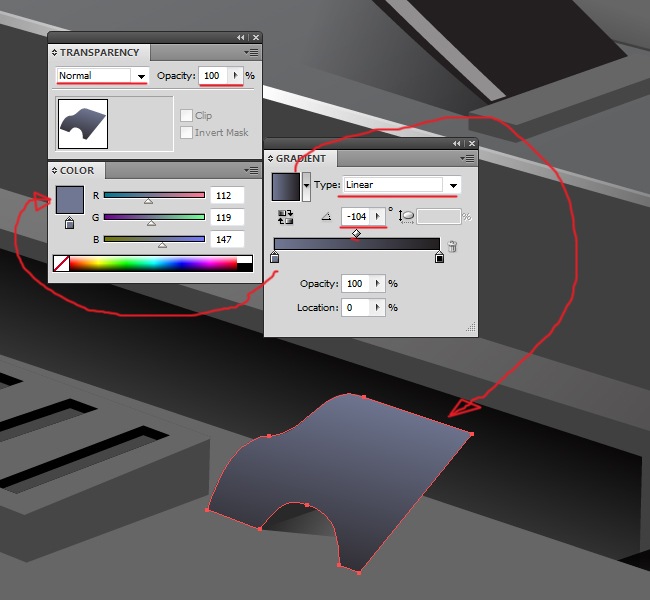
OK from this point we are going to skip the screenshot of the unfilled objects and move right away to the filling, that way we can improve our results and make your job easier. Grab your pen tool and trace the next shape.
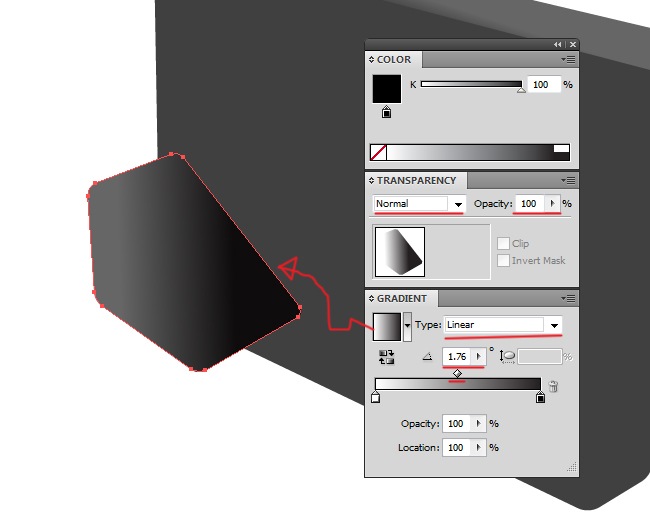
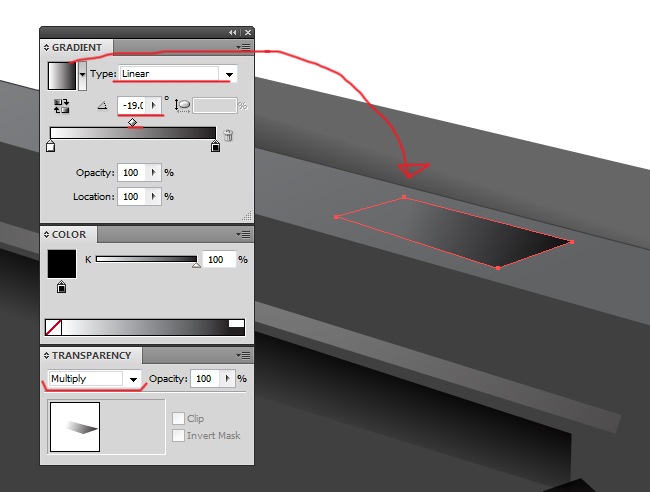
Select the shape that we just did and copy paste it over the original (Ctrl + C, Ctrl + F), then switch the filling properties to linear type and 1,76 angle.
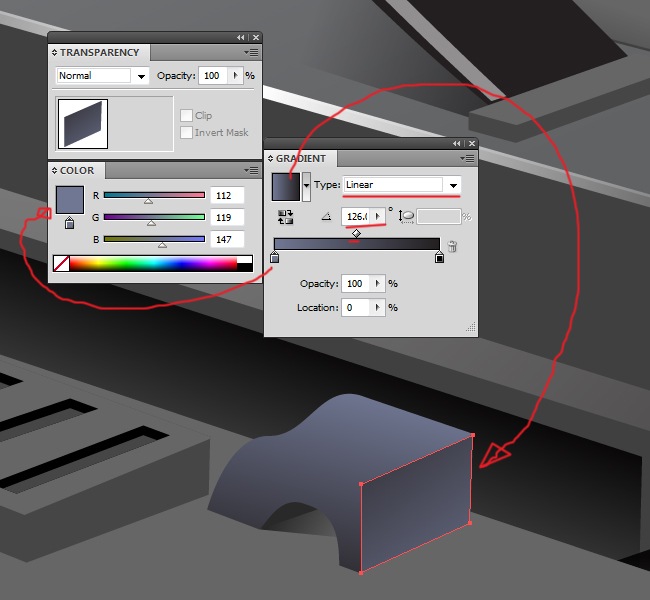
Another shape, select your pen tool and start drawing it.
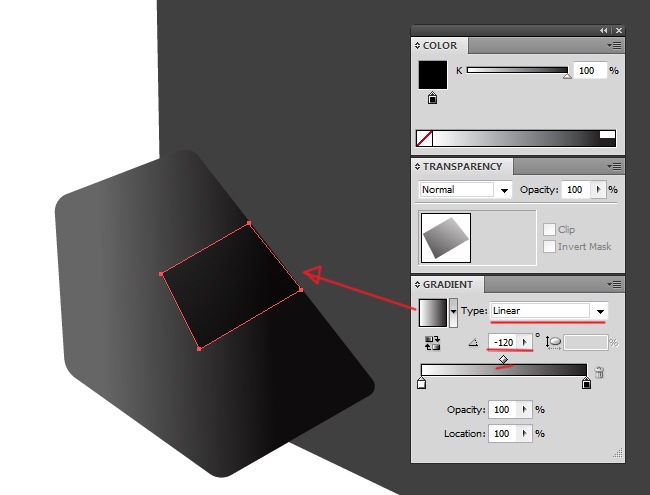
Fill the shape with a two color gradient, linear type and –120 angle.
The next shape has a solid color fill, 75 % black, no further changes.

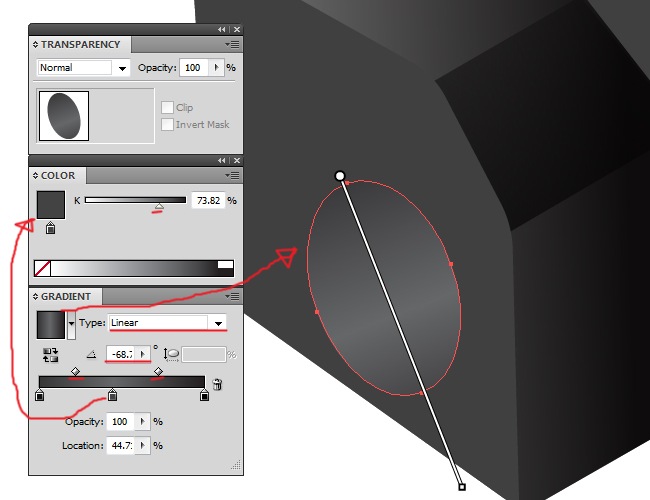
Now we change from the pen tool to the ellipse tool in order to make the next shape.

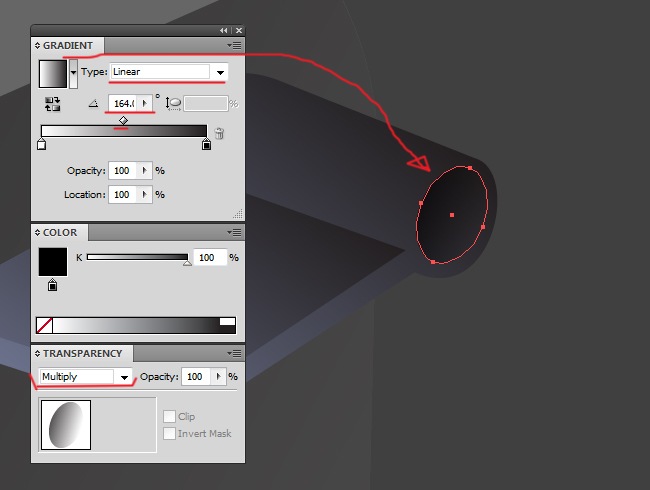
Fill it with a three color gradient, linear type and –68 angle. Procure to check with G the gradient position every time.
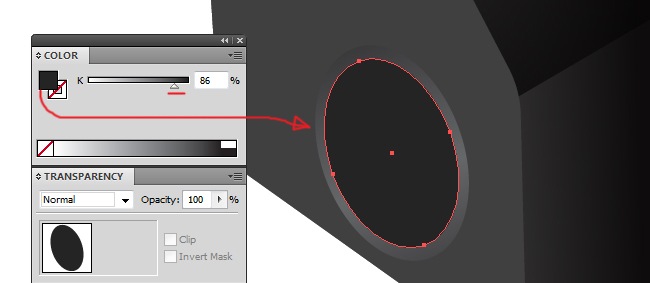
There are two ways of doing the next step, you can either copy paste the last ellipse we did and reduce its size or simply make a new one, it’s up to you.
Fill the ellipse with a solid color, 86 % black.
Go back to the pen tool and make a new shape inside the dark ellipse we just did.
The fill it’s going to be a two color gradient, linear type and –3,84 angle.

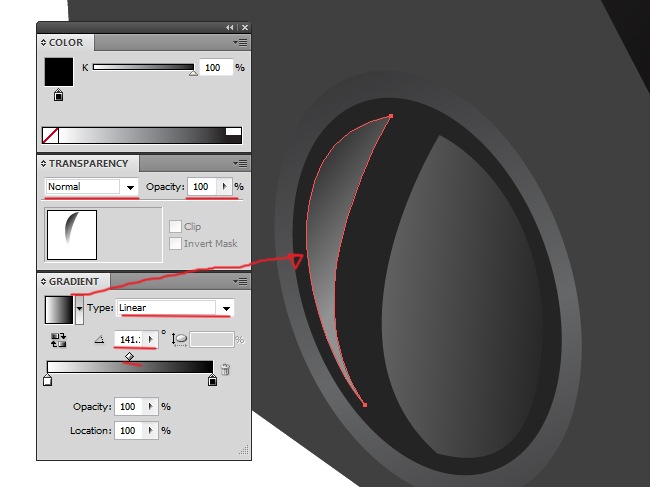
Maybe an additional shape can be a good complement, so grab your pen tool.
Fill this shape with a two color gradient, linear type and 141 angle.
You now what’s next, take the pen tool and start drawing.
Fill with a two color gradient, linear type and –167 angle.
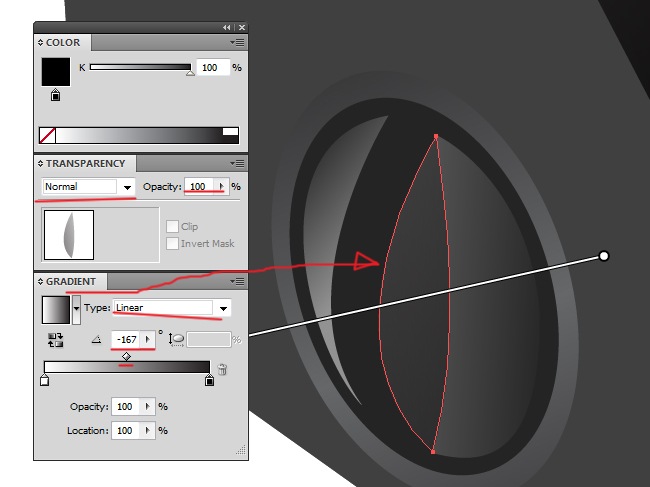
The essence relies on the details, we need to trace a lot of shapes to generate realistic volumes.
Use a two color gradient for this fill, linear type and –167 angle.

Using the ellipse we are going to create a new figure of our icon.
Fill the ellipse with a 2 color gradient, linear type and 47 angle.

Next shape, you know what to do, select the pen tool.
For this object we will be using a 3 color gradient, black on the head an tail and gray (73 %) in the middle, the other values are linear type and –73 angle.

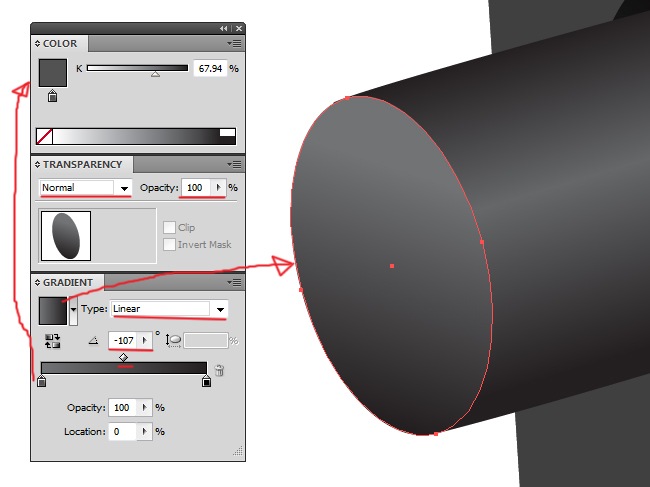
Cover up this object by using an ellipse tool.
This ellipse will be filled with a 2 color gradient, linear type and –107 angle.
Copy paste the ellipse (Ctrl + C, Ctrl + F), then copy paste it one more time and reduce its size, that way you’ll have two concentrically made ellipses.
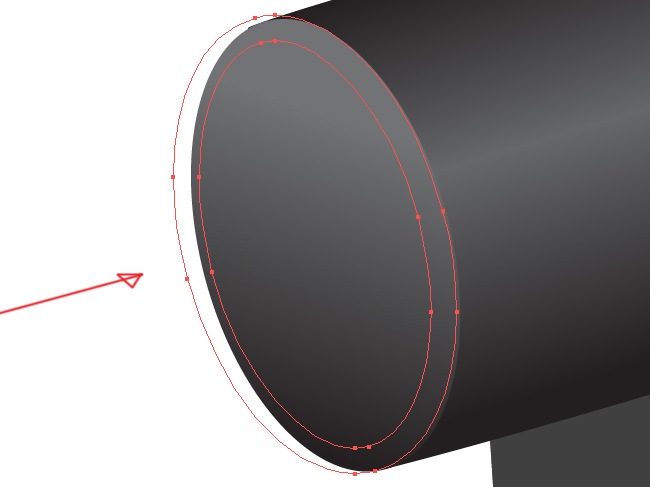
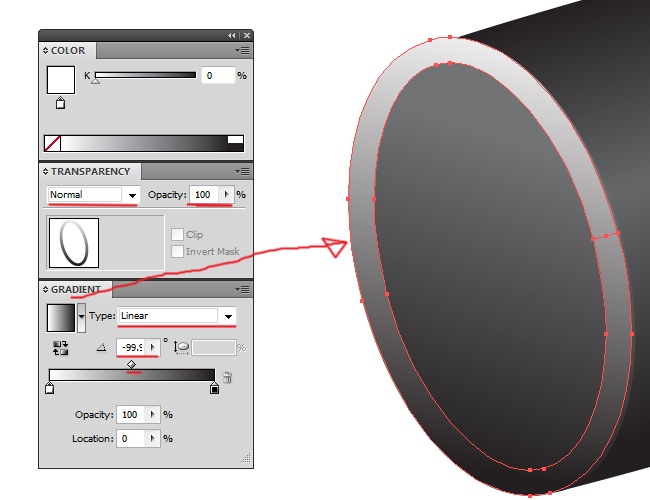
And now we are using the pathfinder tool, you can look for it at Window>pathfinder. When you find it, select the two ellipses (previous screenshot), and click on the second button of the first row, there will be apparently no changes but that’s because we haven’t added a fill.
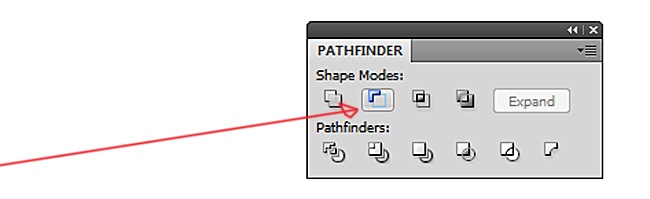
Select a 2 color gradient with linear type and –99 angle. You will notice that the pathfinder create it an empty space by intersecting the two ellipses, this is a very useful tool.
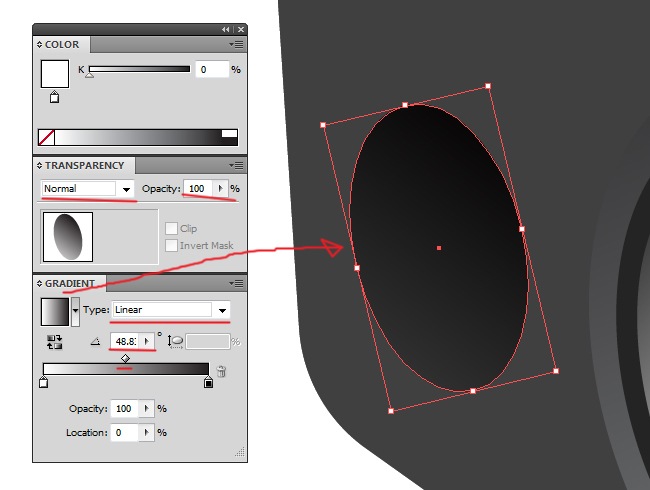
Another ellipse, let’s start by drawing it.
The fill for this ellipse will not present major changes, just a 2 color gradient, linear type and 48 angle.
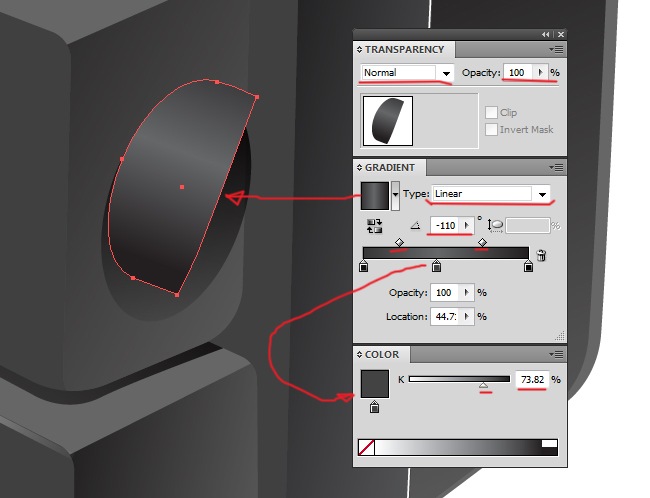
The following shape is similar to another that we already did, so it will be easy to do, just take the pen tool and trace it.
Fill this shape with a 3 color gradient (black on both extremes), linear type and –71 angle.

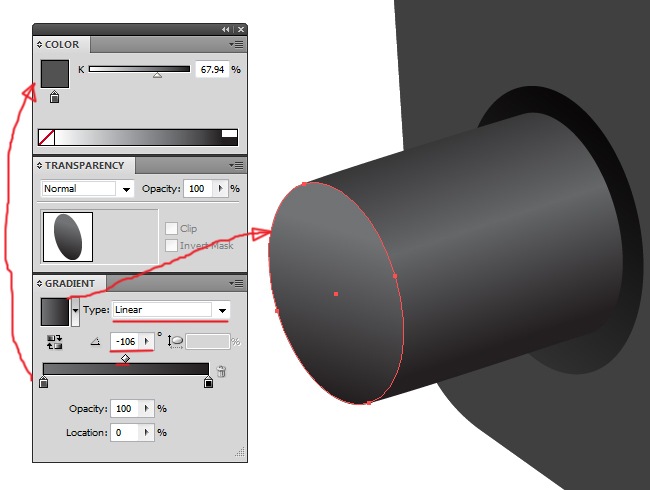
Take the ellipse for tracing the following figure.
This one is filled with a 2 color gradient, linear type and –106 angle.
Now an identical process than before, two ellipses, the pathfinder tool and a gradient.
Now apply the second button of the first row.
And now the fill, 2 color gradient, linear type and –98 angle.

Next shape, just trace it with the pen tool.
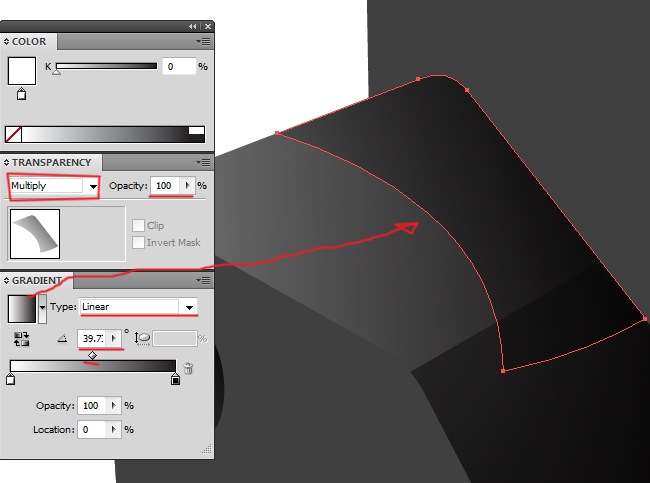
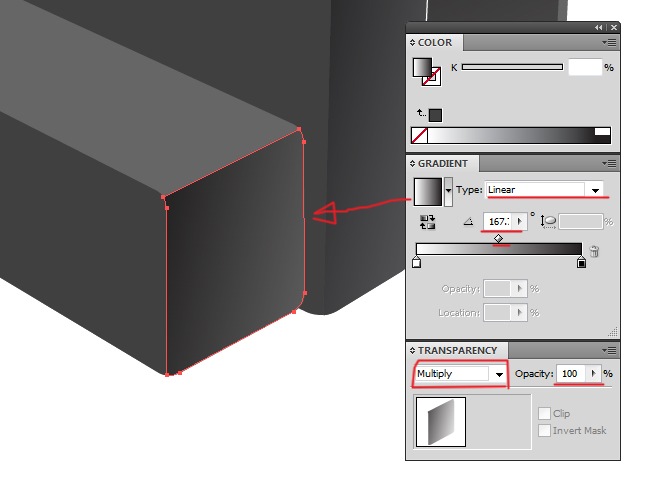
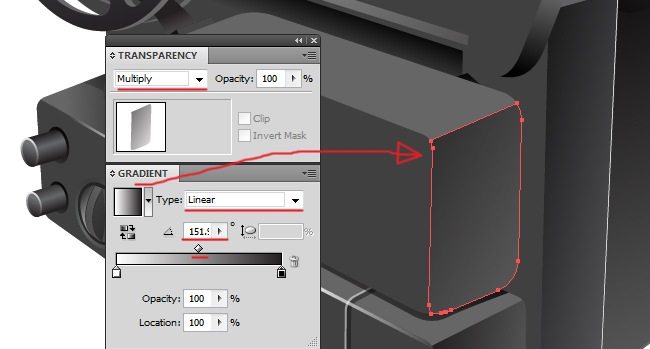
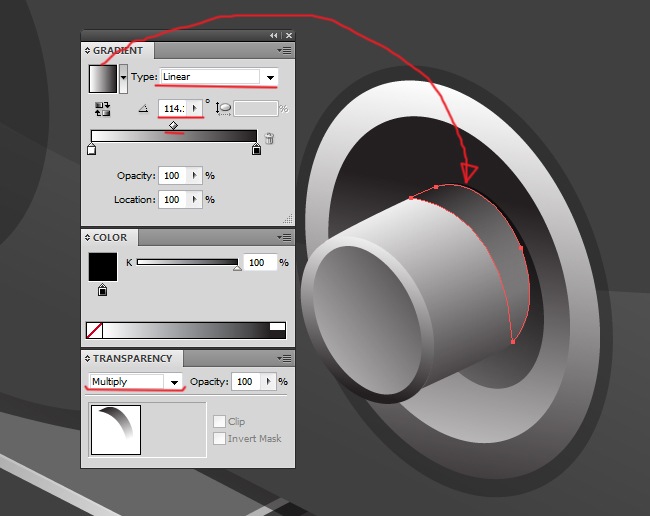
This object has a new adjustment on its fill properties, the parameters are the following: Linear type, 39,7 angle and the new property, adjust the blending mode to multiply.
Move to another part of our film projector and use the pen tool to create the next shape.
This gradient has neither white or black on its color markers, only gray tones in a linear type and 113 angle.
This next shape works as a shadow, first draw the initial shape with the pen tool.
Fill the shadow with a new color gradient (2 tones), linear type and 167 angle.

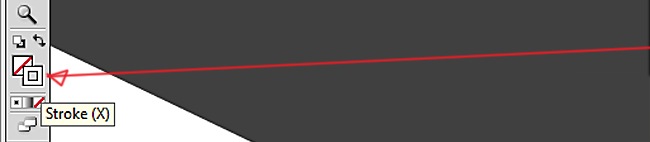
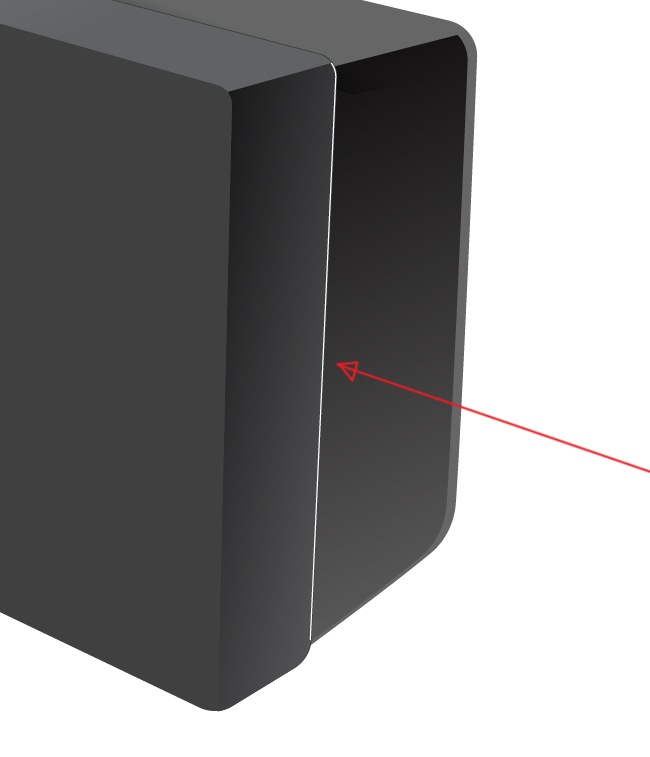
Be careful because the next shape is not a fill but a stroke line, you need to change that on the tool bar.
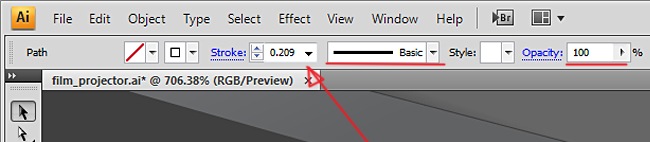
And now using the pen tool draw a long line of 0.29 stroke and white color.
And this is the line that you need to trace.
We are done with this part, now comes another large shape, for start we use the pen tool.
Fill the shape with a 60 % black, non extra adjustments.
Keep it up, we have still a long way to go but it’s looking great so far.
This object will be filled with a 75 % black.
And then comes the frontal side of this area, simple task for your pen tool.
Fill with a 2 color gradient, multiply blending mode, linear type and 167 angle.
Now some thin lines to give some realism to our icon, start by drawing them with the pen tool.
Fill the element with pure white and then reduce its opacity to 45 %.
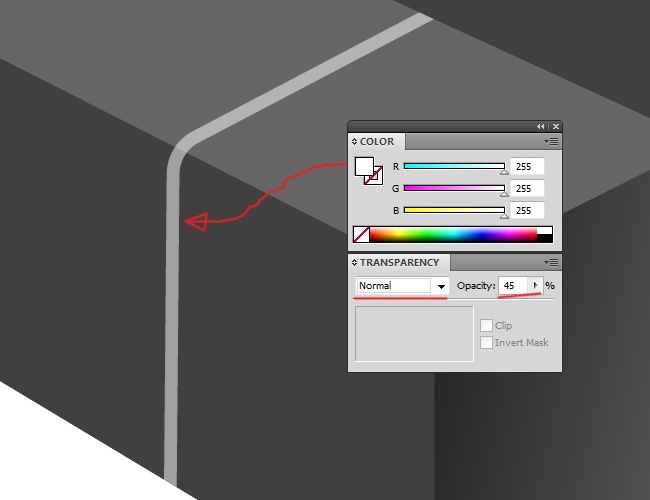
Copy paste the shape and move it a little bit to the right, then change the fill to black, make sure it keeps the opacity at 45 %.
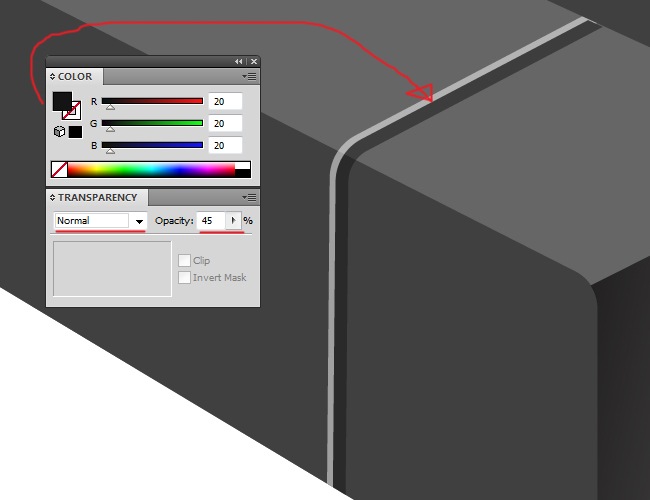
Select the two lines and duplicate them at the left side of this block (Ctrl + C, Ctrl + F).
Create a large shape using the pen tool, it’s going to be a shadow.
This object has the following fill properties: Multiply blending mode, linear type and 61 angle.

Some tiny shapes come at next, do this one with the pen tool.
Fill with a black and white gradient, linear type, 97,2 angle and multiply blending mode.
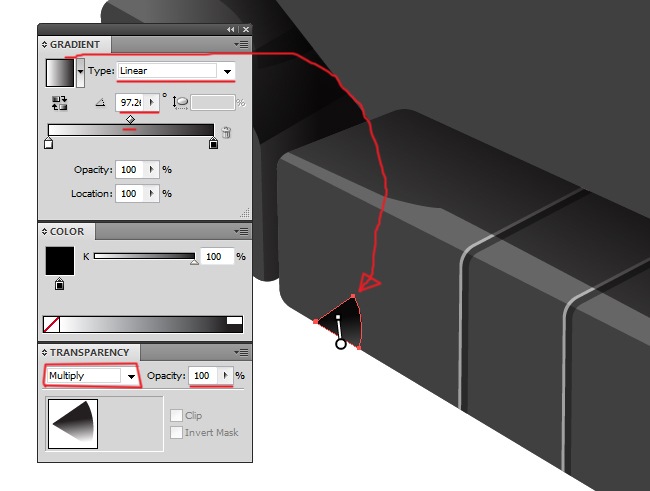
Copy paste (Ctrl + C, Ctrl + F) this shape and place it towards the right side of the original.
And continue drawing, this next shape goes like this:
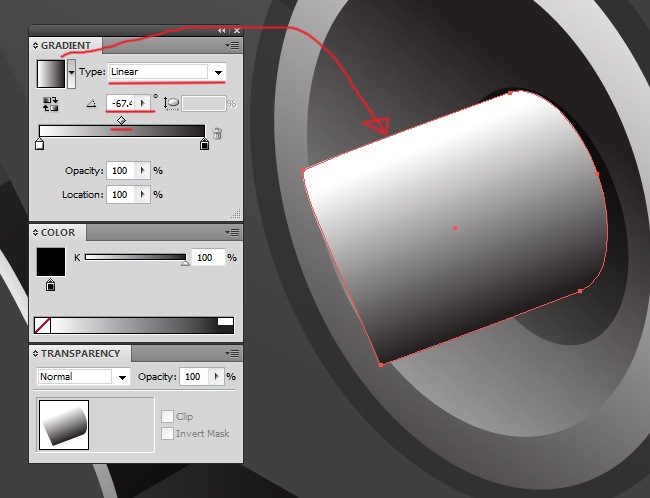
3 color gradient (gray in the middle), linear type and –67 angle.
Here comes the ellipse tool.
Fill with a simple gradient, linear type, and –101 angle, no more changes.

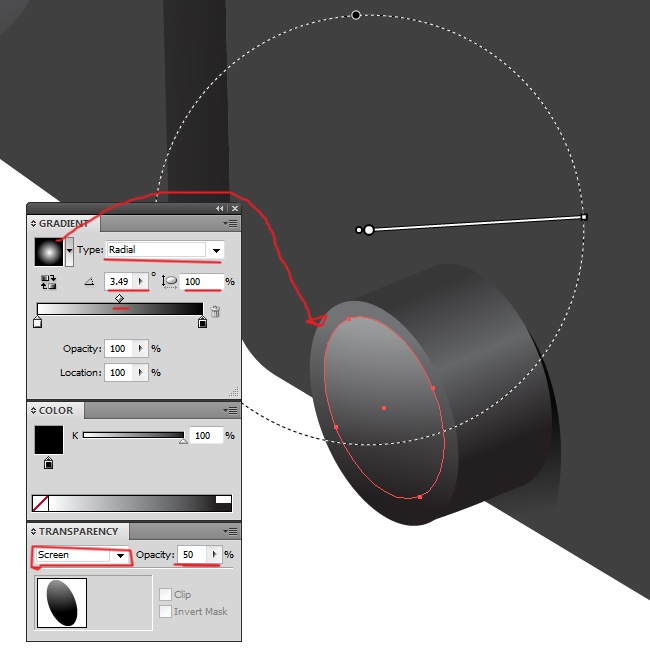
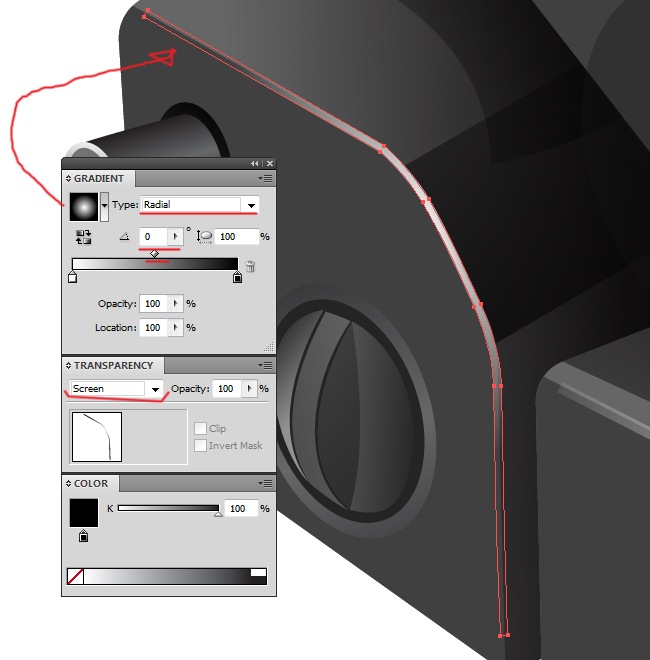
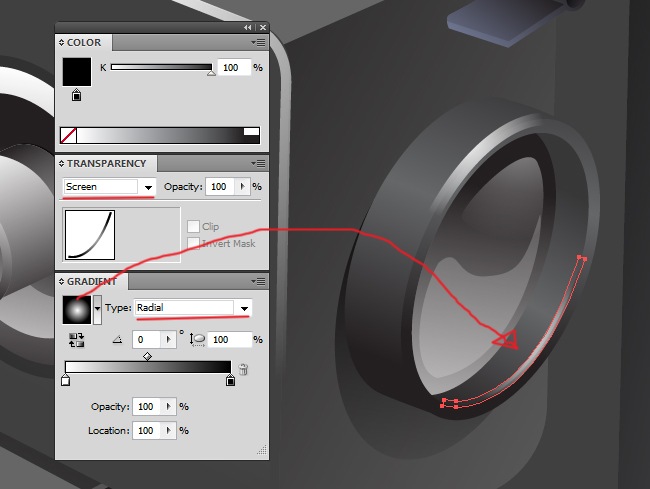
Add another ellipse inside this last one that we did. The fill properties are quite special on this one, so pay attention: Radial type (click G and place the gradient center outside the shape), 3,48 angle, 100 % aspect radio, screen blending mode and finally 50 % opacity.
Copy this entire element except the last shape (smaller ellipse) and place it to right side. Switch the fill values of the frontal ellipse to linear type and 26,6 angle.

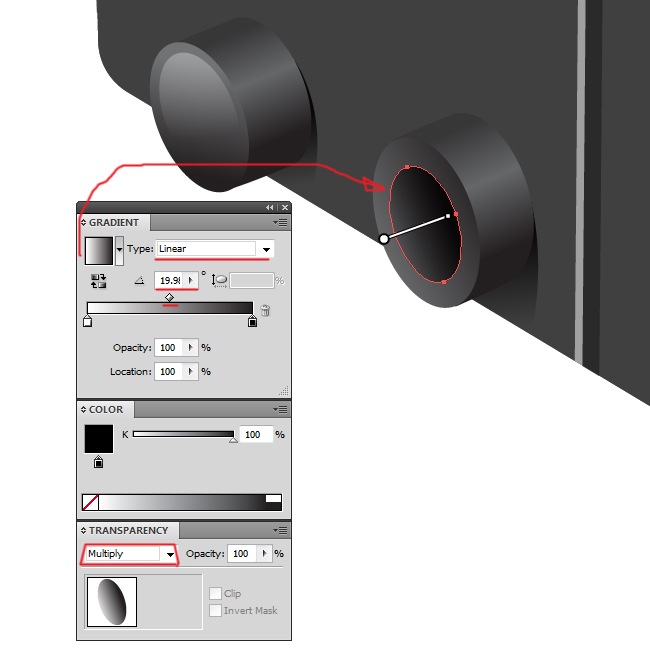
Then add an ellipse similar to the left element.
The fill values are going to be linear type and 19,9 angle.
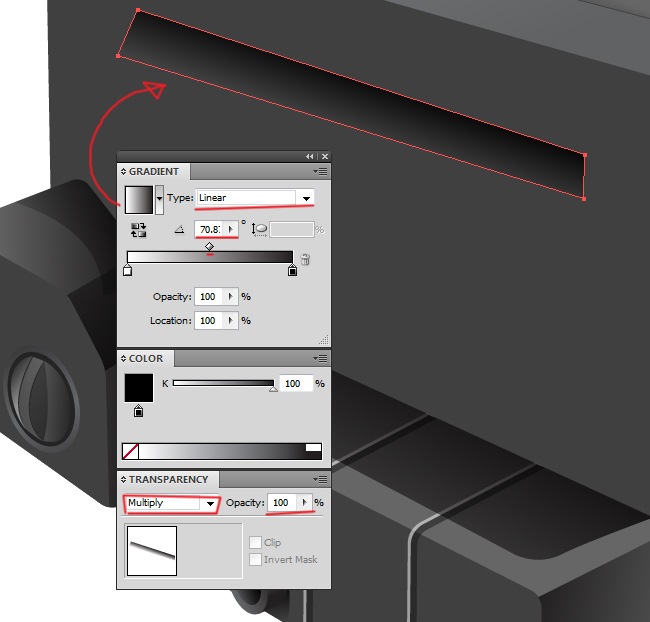
A large shape is the next one on our way, let’s draw it immediately.
The filling properties are: Linear type, 70,8 angle and multiply blending mode.
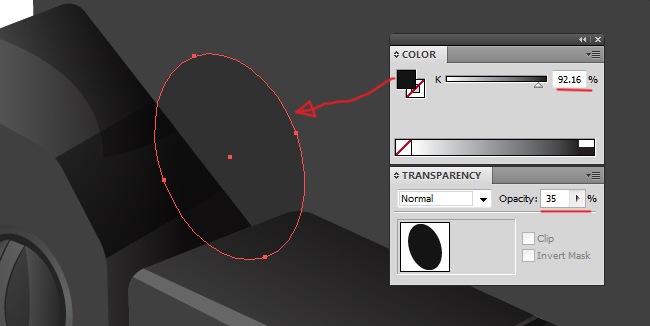
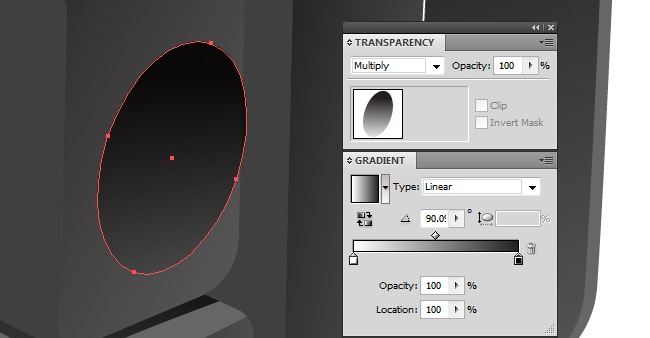
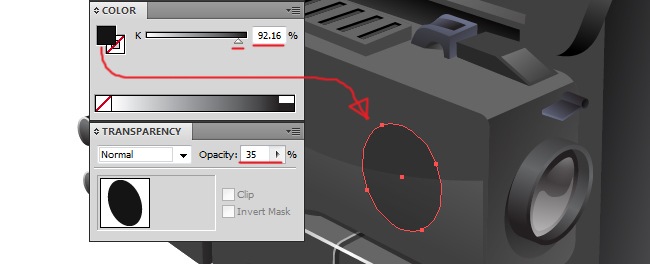
Notice the particular object that comes next, the shape is a simple ellipse but.
The trick is in the fill, you need to use a 92 % black and 35 % opacity.
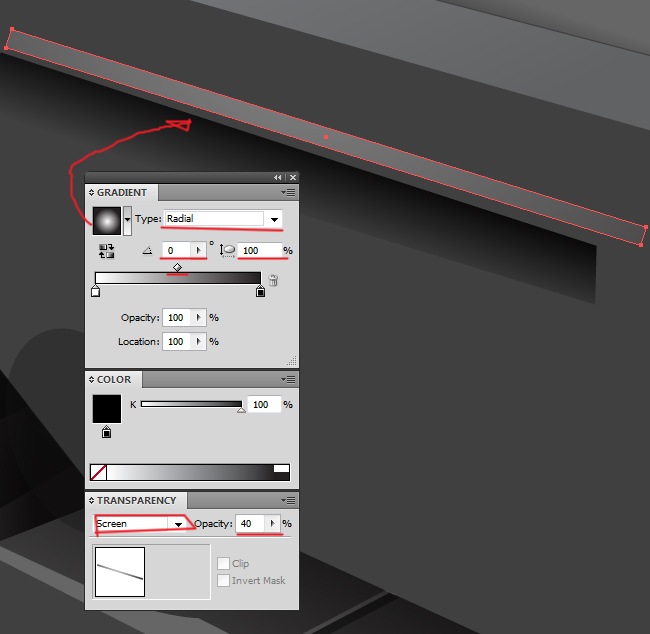
Take the pen tool for start tracing our next figure.
The fill has a radial type, 0 angle, 100 % aspect radio, screen blending mode and 40 % opacity.
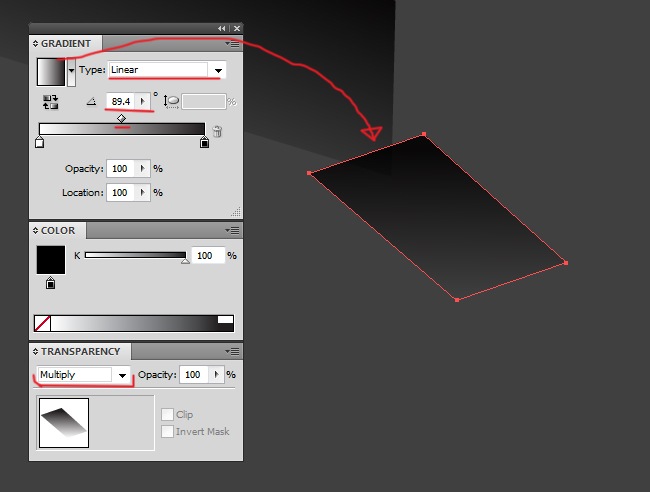
Another object made with the pen tool, simple as that.
Fill it with a linear type, 89,4 angle and multiply blending mode.
Next object, same thing as always, grab your pen tool for start.
Fill with a 2 color gradient, linear type, 142 angle and multiply blending mode.
Another shape in front of this last one.
Fill values are linear type, –19 angle and multiply blending mode.
And the next shape goes like this:
Fill with a 72,5 % black, no further changes.
Next object is very simple, it goes like this.
The filling goes in a 60 % black, nothing else.
And now comes the next object.
Fill it with a 100 % black.
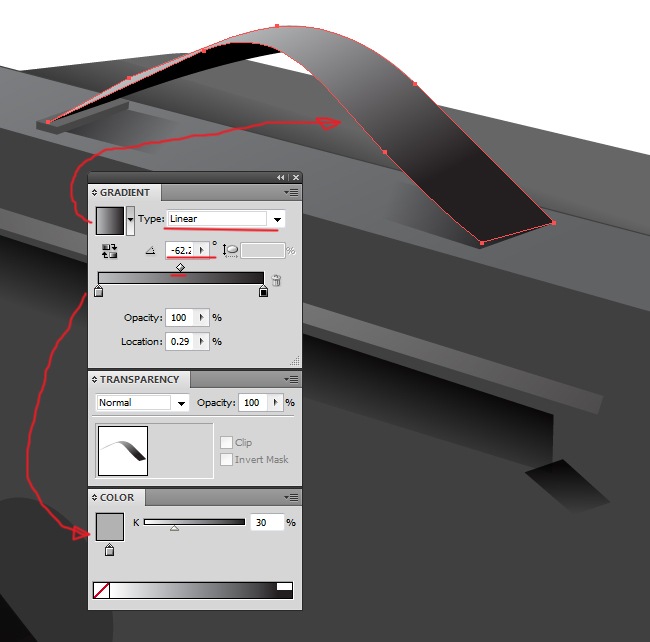
Hurry up and let’s finish this element, grab one more time the pen tool.
Fill the object with a 2 color gradient, linear type and –62 angle.
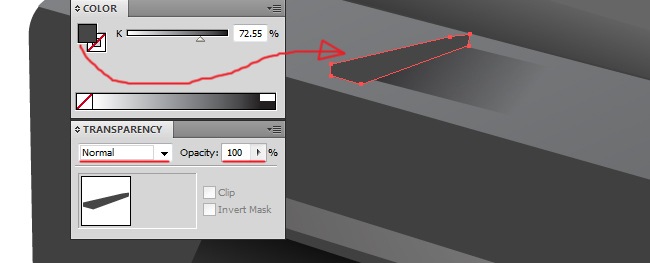
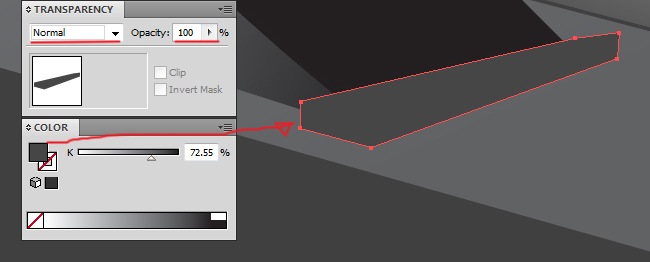
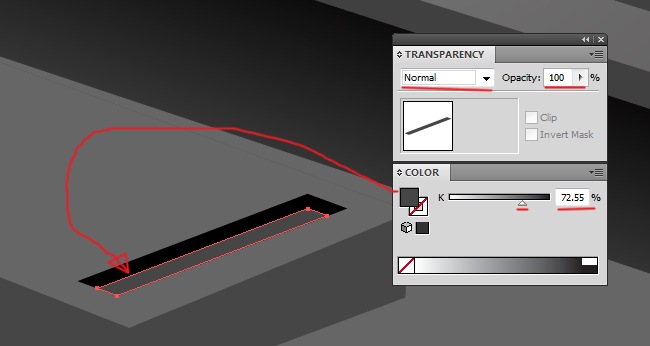
Keep it up with this next shape, proceed tracing it with the pen tool.
This shape will be filled with a 72,55 % black.
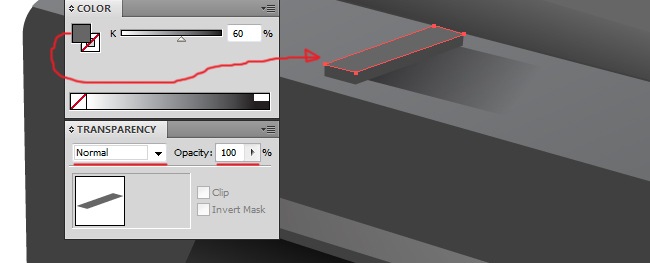
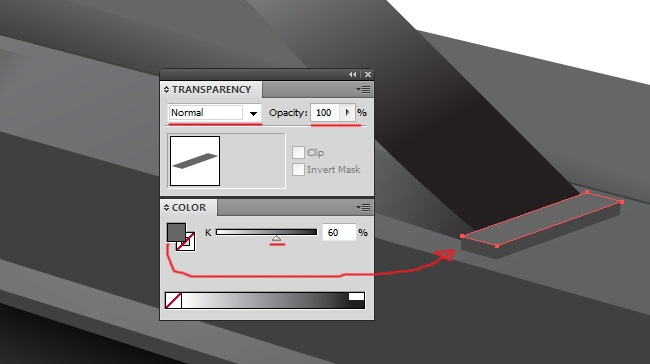
And now the next shape.
Fill with a 60 % black.
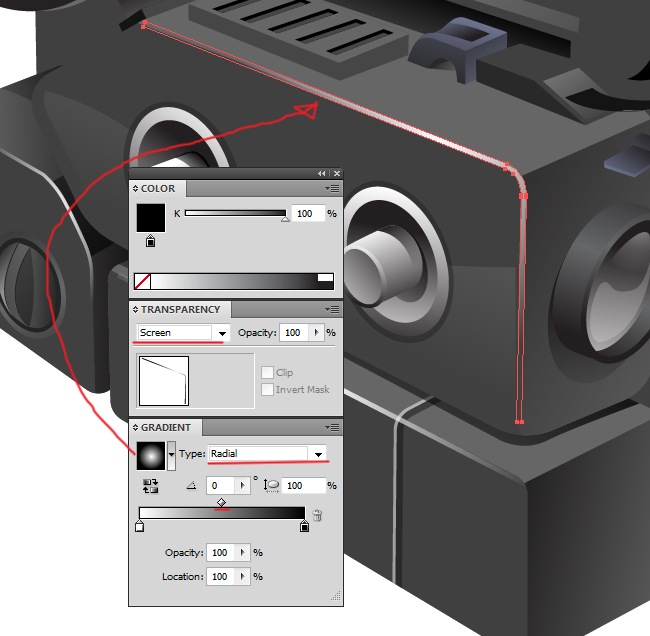
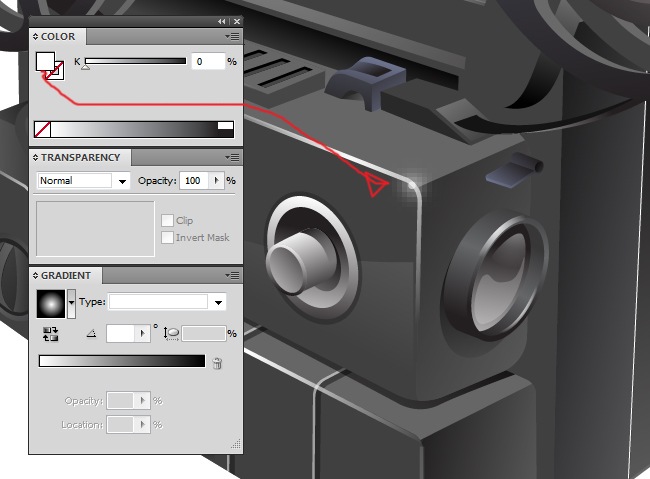
Next object is a highlight, first draw it with the pen tool.
This shape is filled with a 50 % white.
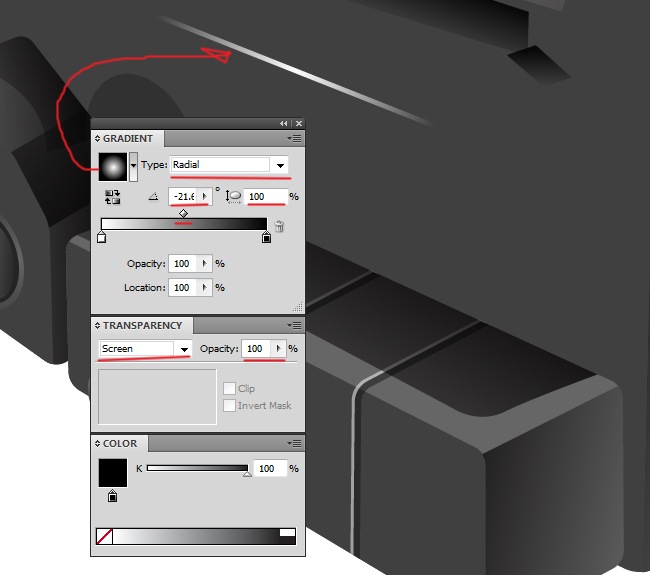
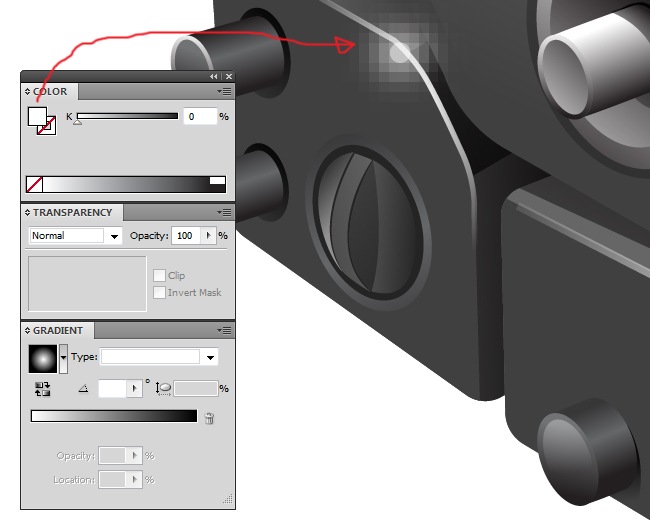
With this next shape we will add a highlight for an extra detail.
The fill properties for this shape are the following: Radial type, –21.6 angle and screen blending mode.
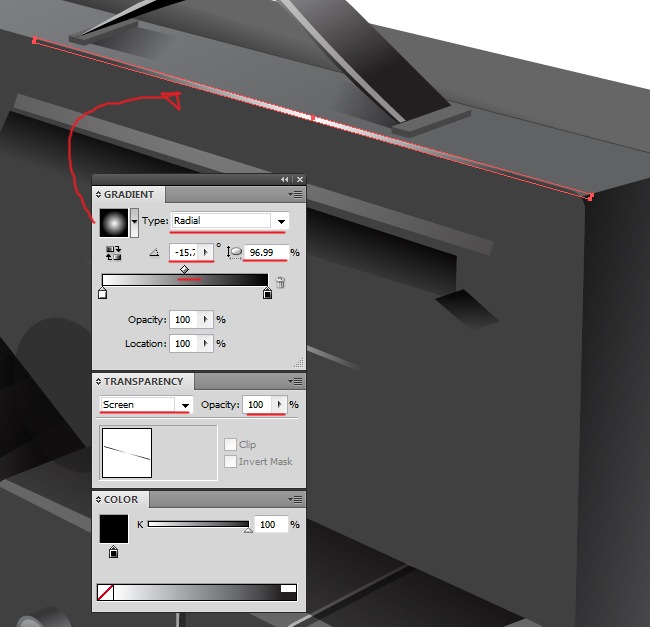
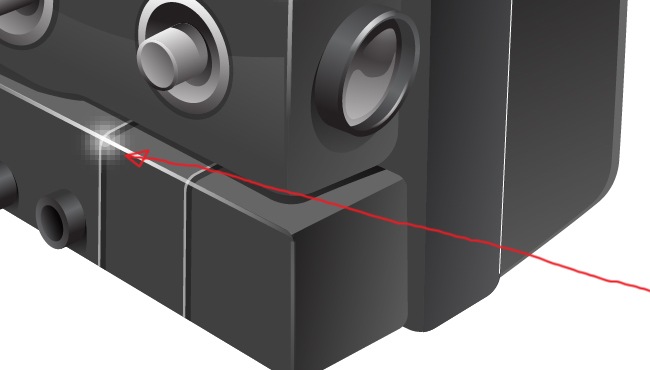
Another highlight, is on this little details that we will reach the realistic quality.
The fill goes like this: Radial type, –15 angle, aspect radio 96.99 and screen blending mode.
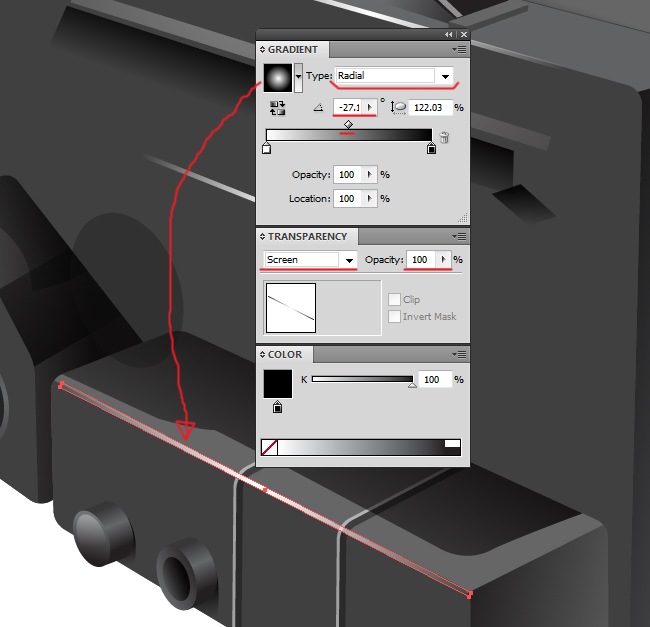
Let’s keep making highlights, so grab your pen tool.
For the fill we will be using a two color gradient, radial type, –27 angle, 122 aspect radio and screen blending mode.
You are noticing that this subtle highlights provide a nice texture to our icon, as the one we’re doing next.
For the fill we use a two color gradient, radial type and screen blending mode.
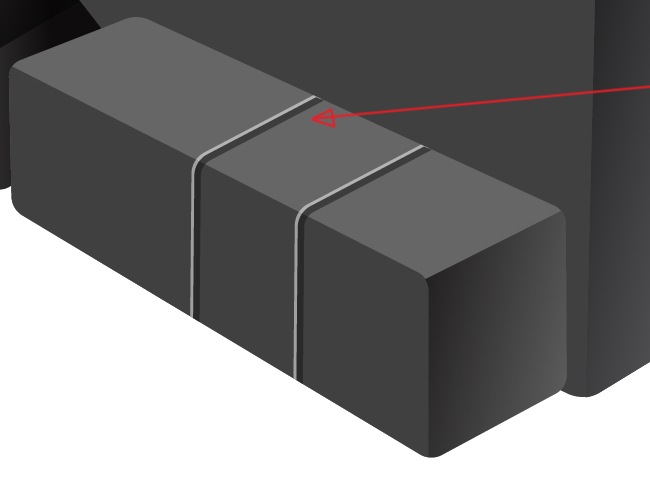
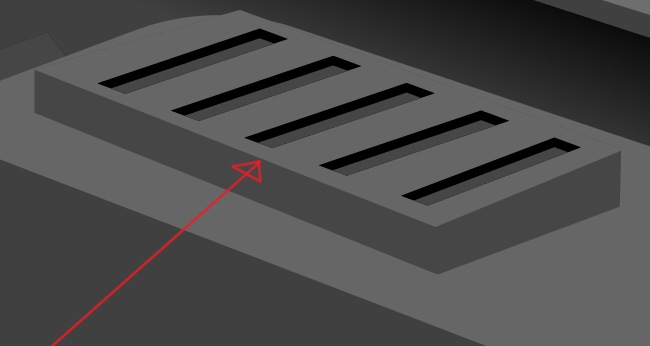
The basic box of our icon is practically done, from now on we are going to focus on the details and additional elements, select your pen tool and start drawing.
Use a two color gradient for the fill, linear type and –108 angle.
Copy paste this shape (Ctrl + C, Ctrl + F) and switch the fill to a solid color (75 % black).
5. The Reel
OK, now we are going to make the reel, which is probably the most emblematic part of a film projector, it will take a lot of steps to be done but in the end the result will look great. First we need to use the ellipse tool.
And then draw a series of shapes inside the ellipse using the pen tool.
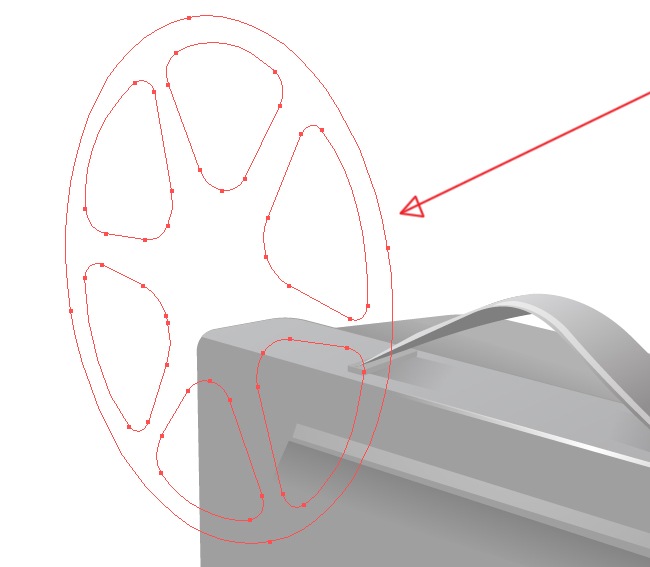
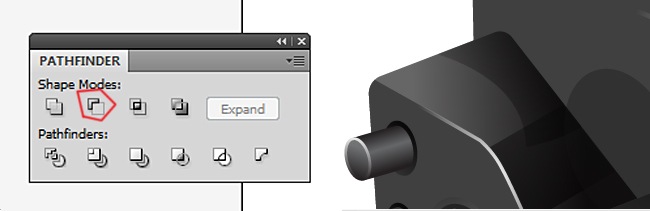
And now we need to use the pathfinder, select everything (ellipse and shapes) and click on the second button of the first row at the pathfinder menu. Then adjust the fill to a 60 % black.
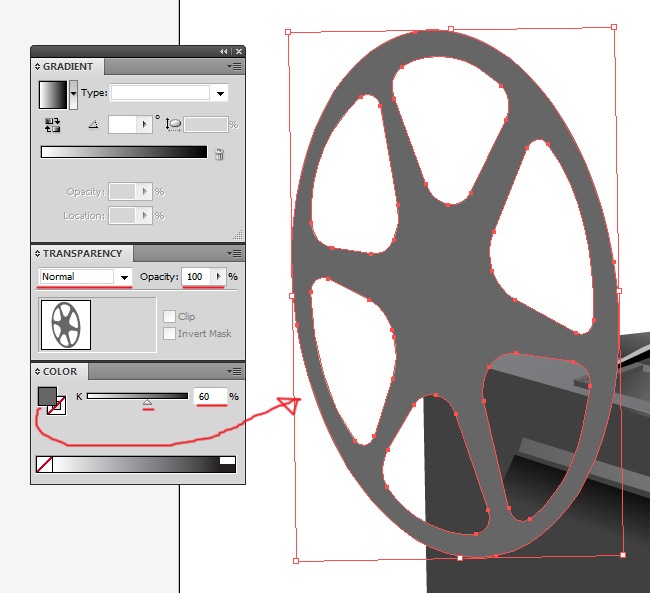
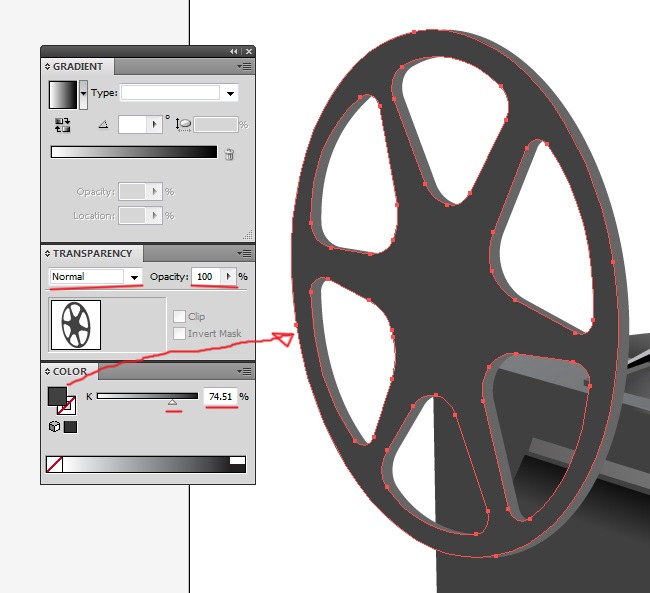
Pretty cool isn’t it?, now copy paste this object and move it a little bit to the left, then change its fill to a darker black.
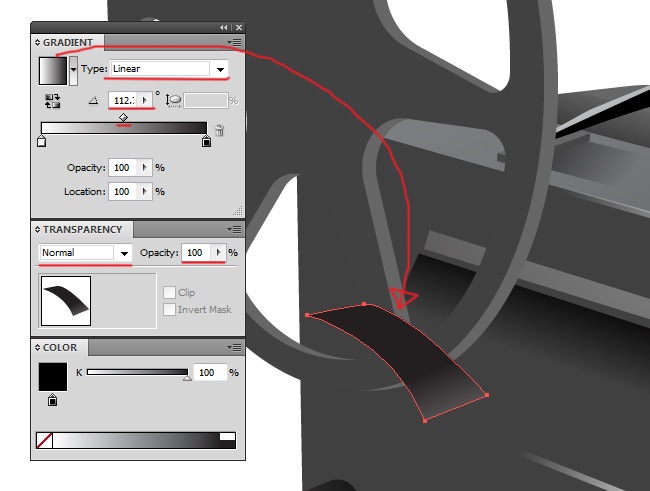
Now the tail of the tape, it’s a very simple shape.
Fill the object with a two color gradient, linear type and 112 angle.
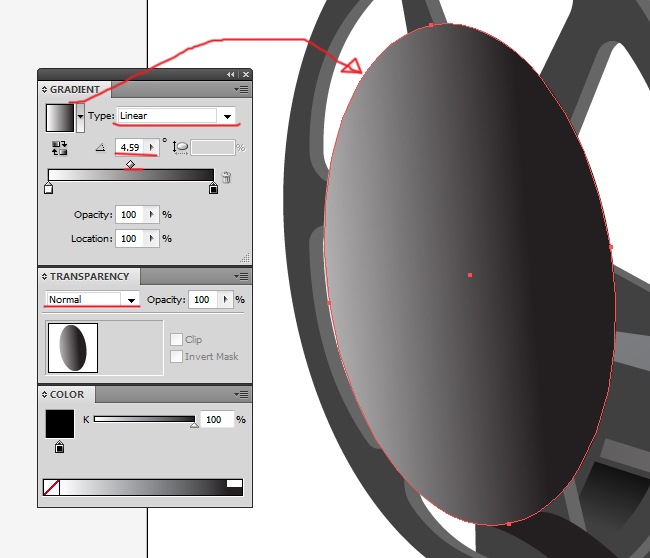
Use the ellipse tool to generate the next object.
Fill the ellipse with the basic two color gradient, linear type and 4.59 angle.
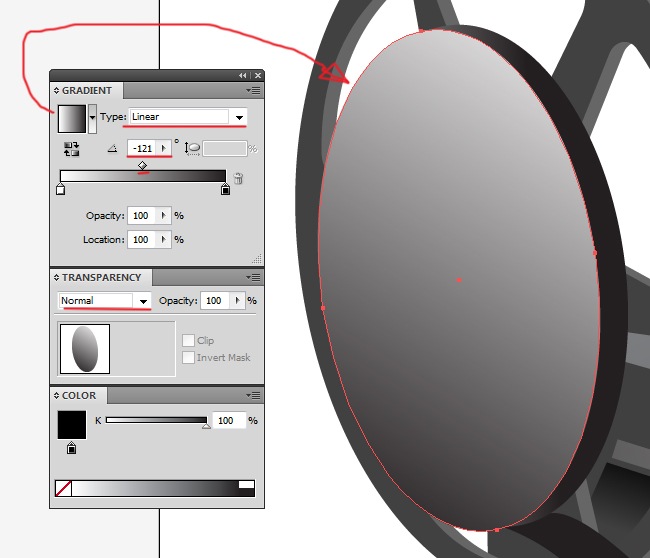
Copy paste the ellipse and switch its fill values to linear type and –121 angle.
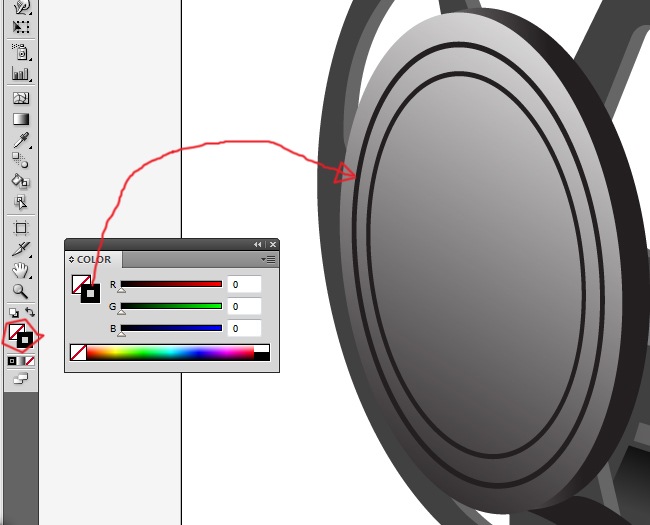
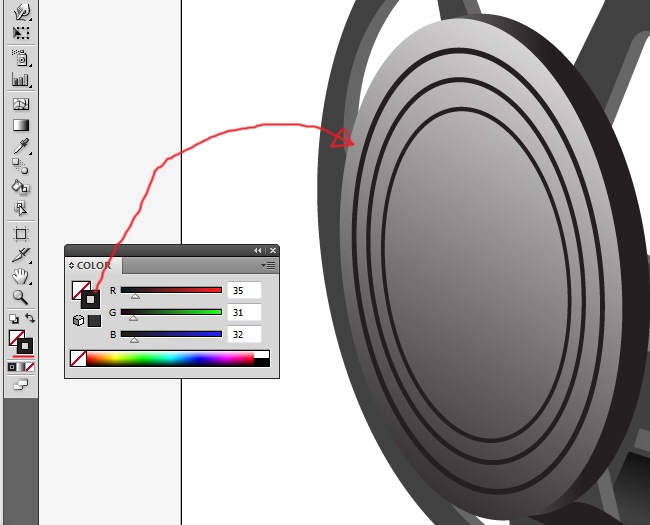
Copy paste (Ctrl + C, Ctrl + F) this ellipse and reduce its size, then clear the fill and instead assign to it a random color (we are going to change it later).
Copy paste this ellipse and reduce it size, we are generating a concentric pattern.
And again, copy paste and reduce its size, this is the final copy we need to make.
With the next trick we’re going to turn this strokes into fills. Select the three ellipses that need to be changed, then go to Object>Expand and check the Stroke option, after that click OK.
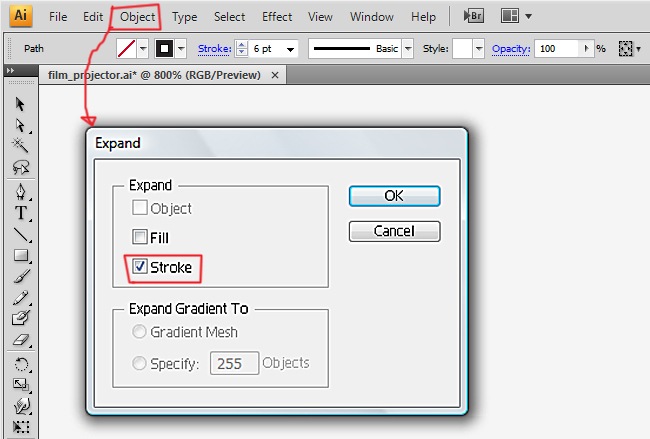
And now you have the exactly same ellipses but instead of being strokes they’re now fills, which allow us to make some great things.
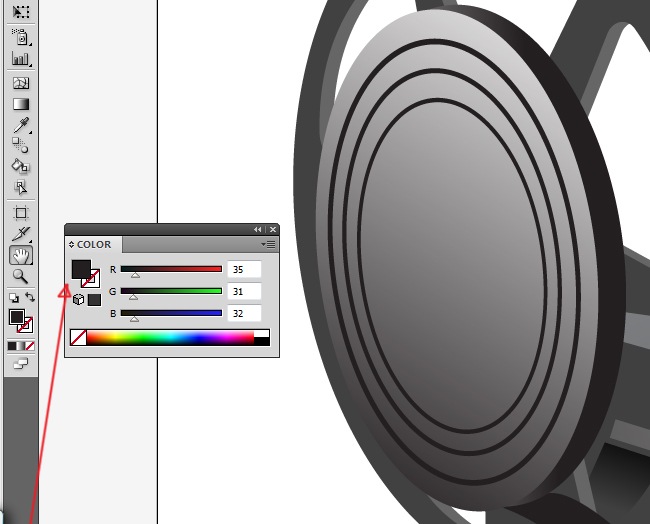
Select the ellipses and proceed to change the fill properties to a two color gradient, screen blending mode, radial type, 0 angle and 103.5 aspect radio.

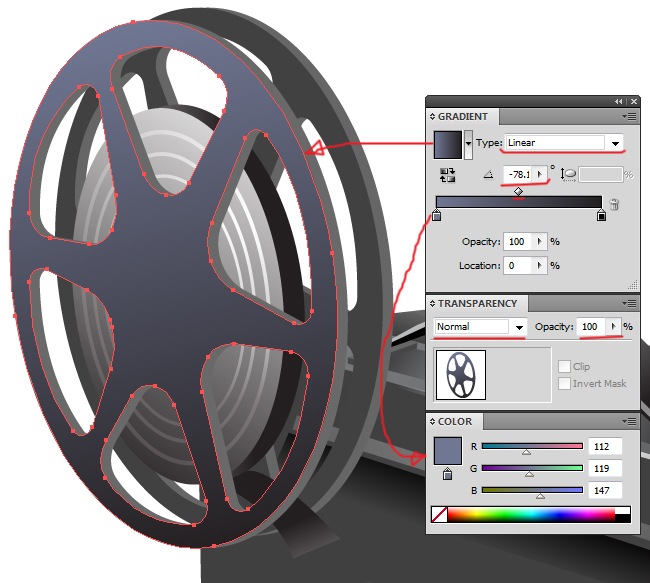
OK, we need you to select the two initial parts of the reel (the ones we did using the pathfinder) and copy paste them, make sure that they’re placed on top of the rest.

Select the front object (the darker one) and change its fill towards a two color gradient (purple to black), linear type and –78 angle.
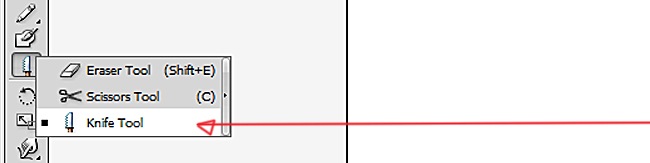
Copy this shape and paste it on front (Ctrl + C, Ctrl + F), now we need to use the knife tool, pass it through the middle part of the object so you can get two separate objects.
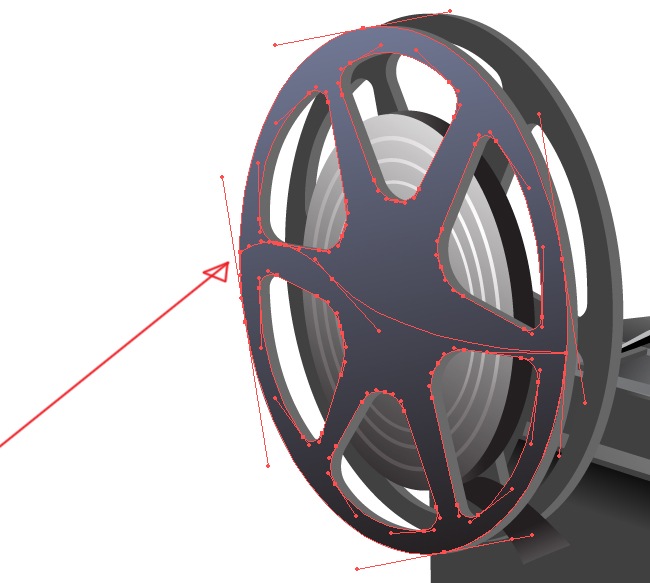
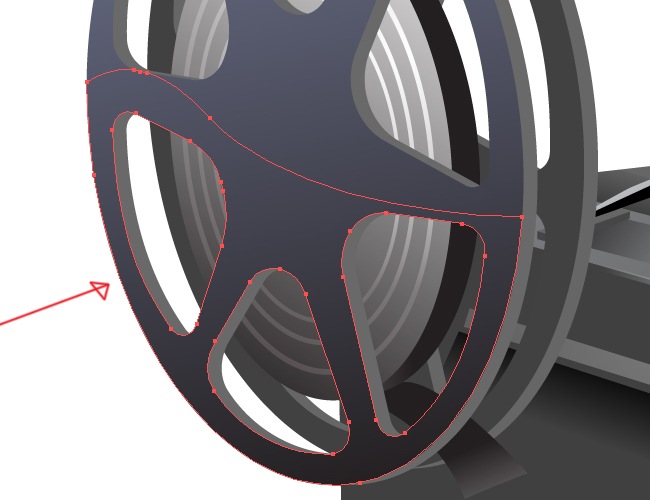
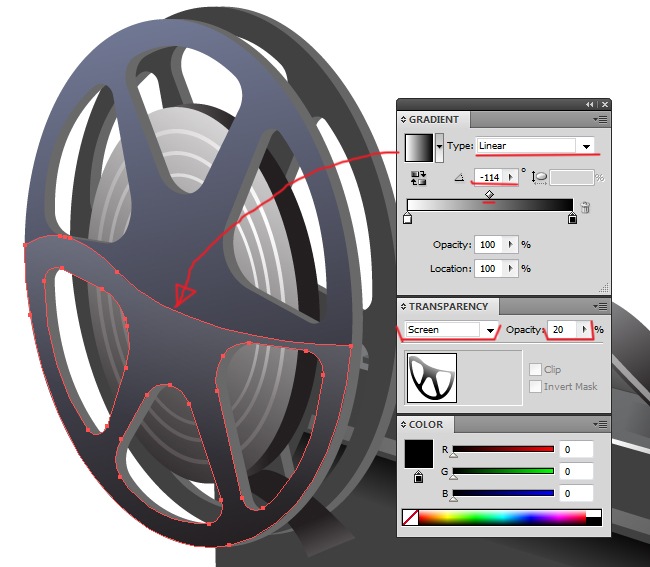
Delete the superior part of the element that we just cut.
And now we need to fill this object, use a two color gradient, linear type, –114 angle, screen blending mode and 20 % opacity.
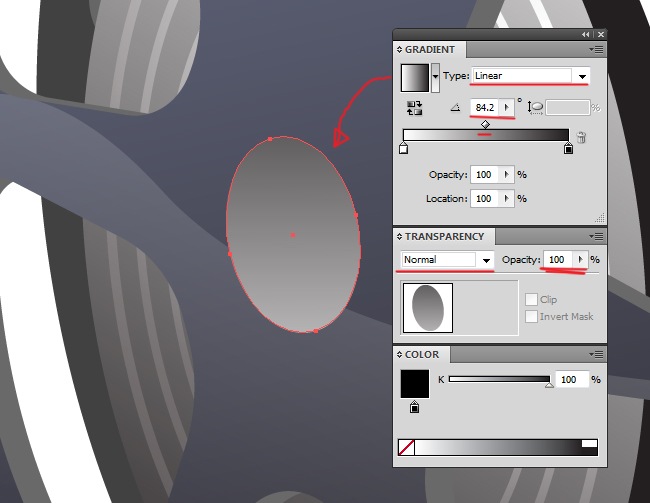
We need to fix our reel because until this moment there’s nothing holding it, draw an ellipse for that purpose.
Use the basic 2 color gradient for the fill, linear type and 84.2 angle.
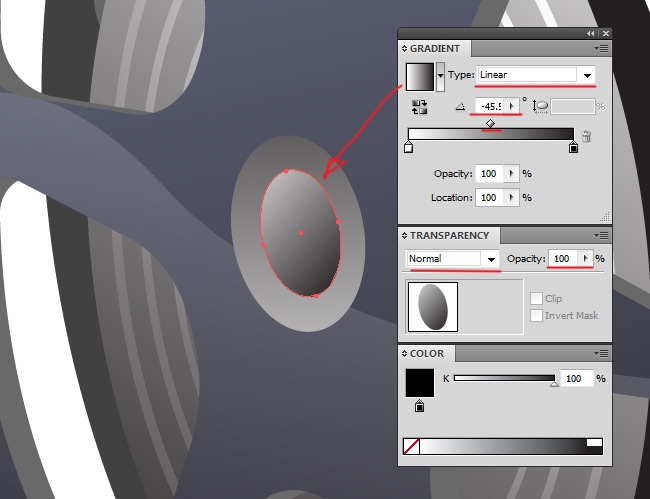
Copy paste (Ctrl + C, Ctrl + F) that ellipse and switch the fill to 77.7 angle.
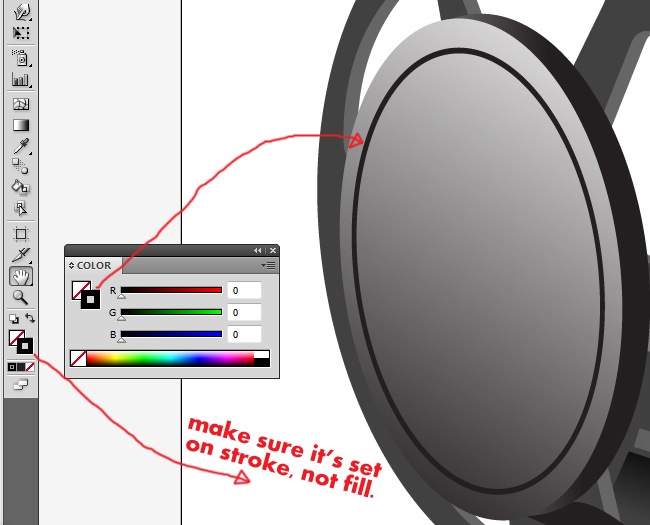
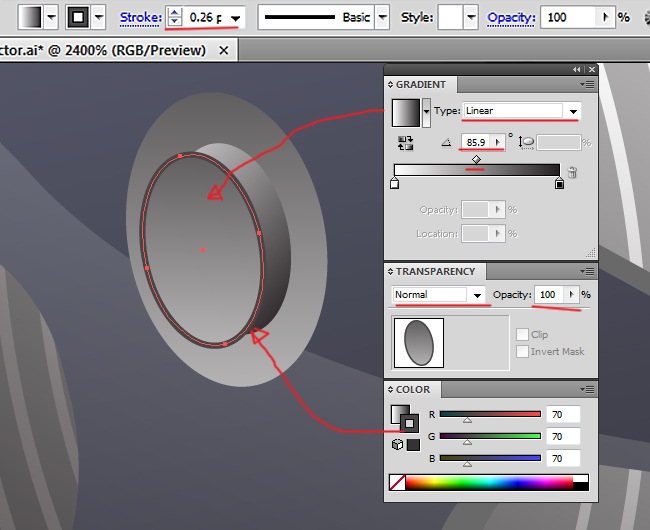
Copy paste this ellipse (Ctrl + C, Ctrl + F) and move it to the left, then give it a black stroke of 0,26 pt and a basic color gradient, linear type and 85.9 angle.
Maybe we should put some tiny detail to the tape’s tail.
And fill it with a solid color, perhaps black is a good choice.
And for an extra volume we draw a small shape on top of this last one.
Fill it with a lighter tone.
7. Other details and buttons
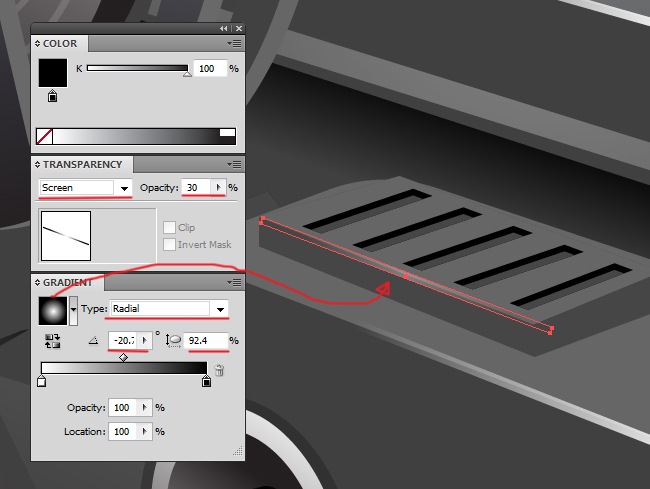
This following shape is a large one, start by tracing it with the pen tool.
Fill with a solid color (75 % black).
Draw a new shape to generate the actual volume.
Fill with a 60 % black.

And close this volume by making the frontal side.
Use the 2 color gradient for the filling, linear type, 151 angle and multiply blending mode.
One detailed object comes next, although it’s easy to do.
Fill with 72.55 % black.

And the next shape goes like this.
Just fill it with a 60 % black.

And now we need to make two initial elements, let’s start with this one.
Use a 100 % black for the filling.

Then comes the shadow.
Use a 72.55 % black for the filling.
And now select the whole element and copy it, then paste a total of 4 duplicates.
A new ellipse is needed, it’s time to make the projector’s lens.
Linear type, 90 angle and multiply blending mode are the values to be assigned to to this shape.
We need a 3 color gradient for the next shape, first of all let’s draw it.
And now, the two color extremes must be black and the center an average gray.
Now comes an ellipse.
And the fill parameters should be linear type and –104 angle.

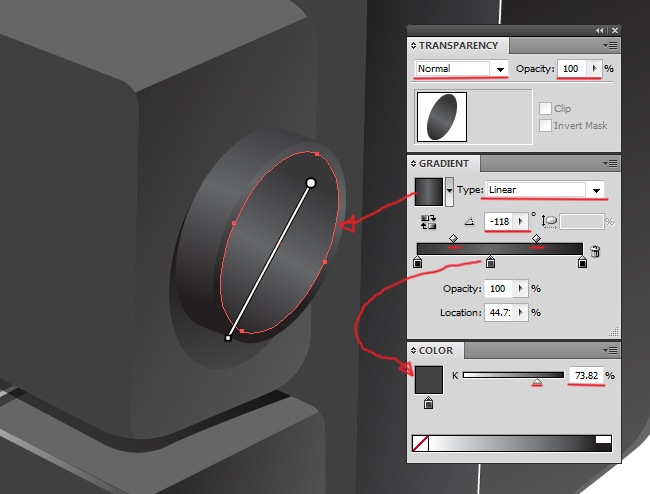
Copy paste the ellipse (Ctrl + C, Ctrl + F) and reduce its size a little bit, then change the fill parameters to –118 angle.
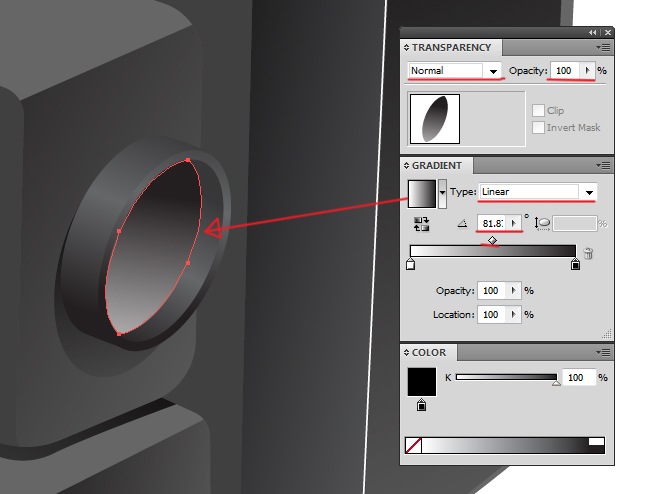
We need a few more details in order to complete the lens, first grab the pen tool.
And use the basic gradient to fill the object, linear type and 81.8 angle.
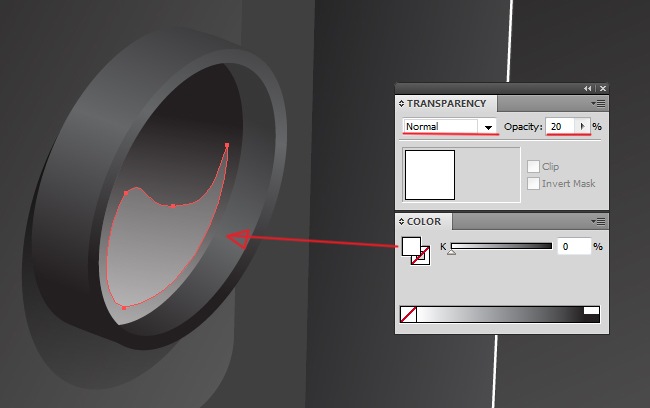
Now a glow shape, easy task.
Fill it with pure white and reduce the opacity to 20 %.
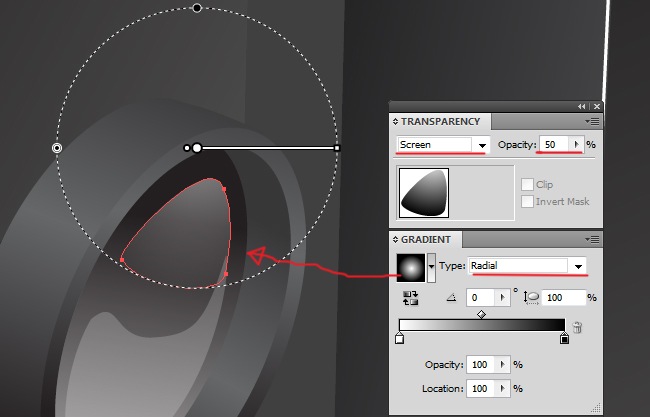
Next shape goes above the last highlight we did.
Fill with a radial type gradient, screen blending mode, 50 % opacity and 0 angle, remember that you can move the gradient’s center by clicking G and sliding the gradient handler.
Let’s speed things up, we still have a lot to do, draw the next element.
The parameters for this fill are multiply blending mode, linear type and 148 angle.
And the next one.
Fill this object with a 84 % black.
These two were the main shadows, now we need the large object.
Filling must be composed of a 2 color gradient, linear type and –104 angle.
After making the large object we proceed making the frontal part.
The filling parameters are linear type and 126 angle.
Perhaps we need to give some extra volume by making a new shape in the top part of this button.
Fill the element using a 2 color gradient, linear type and –70 angle.
It’s looking kind of plane, let’s add an additional shadow.
Use a solid color for the filling (84 % black) and reduce the opacity to 50 %.
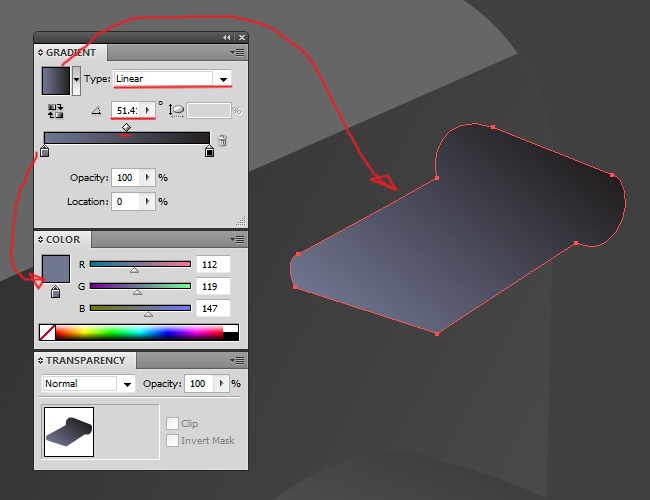
The next button goes above the lens.
The color standards are linear type and 51.4 angle.
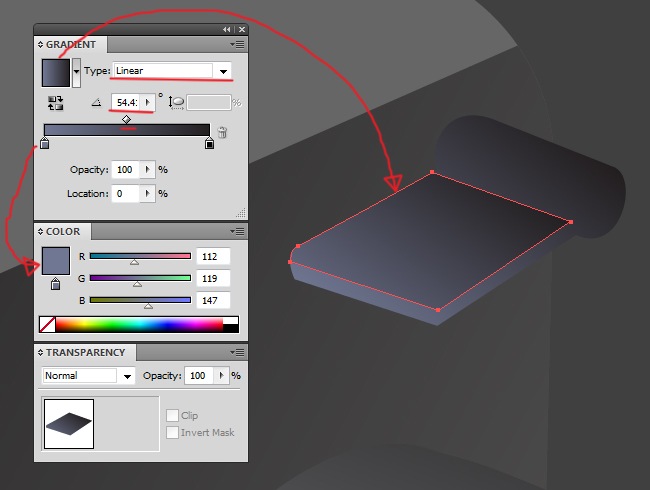
To generate the volume we simply need to add a couple of things.
Set the fill values to linear type and 54,4 angle.
Using the ellipse tool, we add the final touch to this button.
The values are going to be linear type, 164 angle and multiply blending mode.
And the last button of this section goes between the two that we’ve already done.
Use a 75 % black for the fill.
Then comes the shadow, because we are making a realistic icon it’s imperative to pay attention to the light / shadows properties.
Just use a 84 % black, that will handle it.

And the highlight.
This object has a gradient on its fill, linear type, –51 angle, screen blending mode and 50 % opacity.
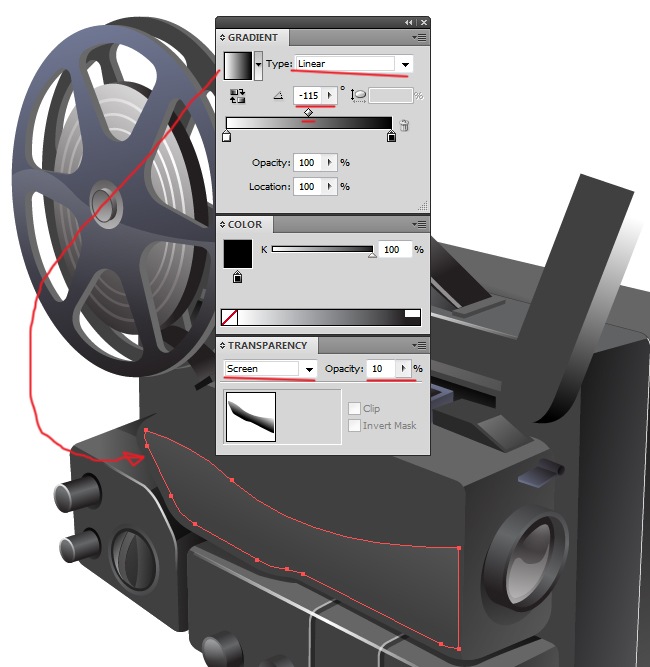
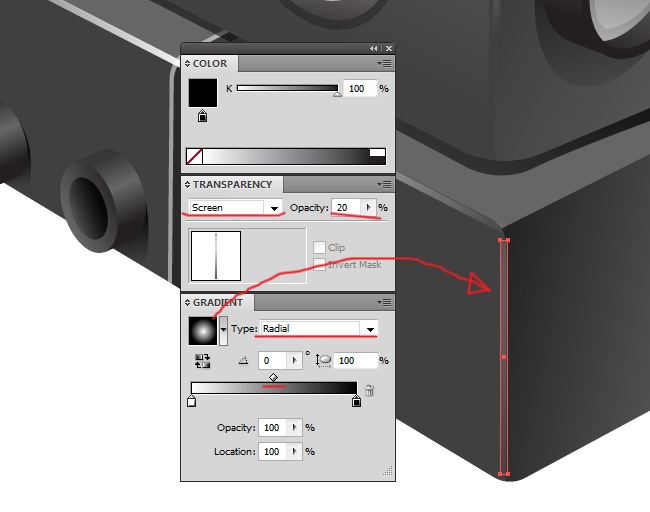
We need a highlight on the side of our film projector, easy thing to do.
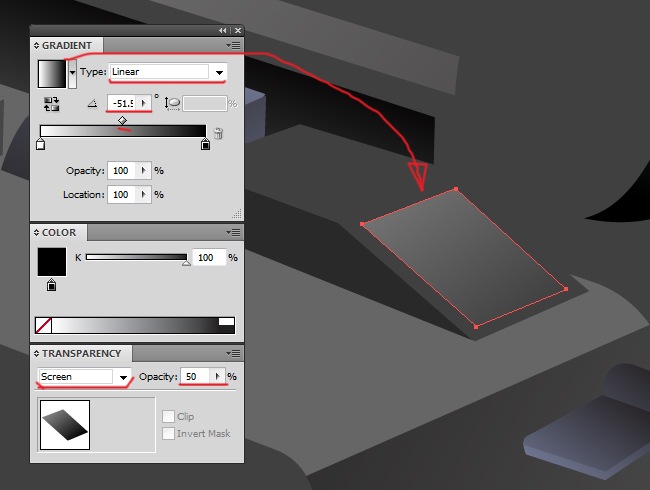
And for the fill properties we have: Linear type, –115 angle, screen blending mode and 10 % opacity.
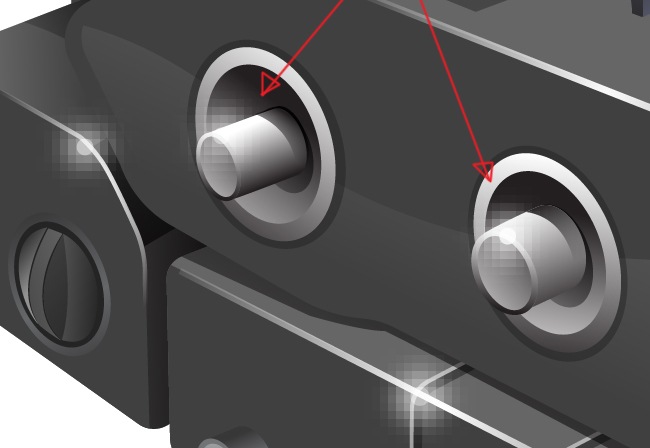
A few more buttons to improve our icon’s details, use the ellipse tool for start.
Filling with a solid color (92 % black) and 35 % opacity.
Copy the ellipse and place it left to the original.
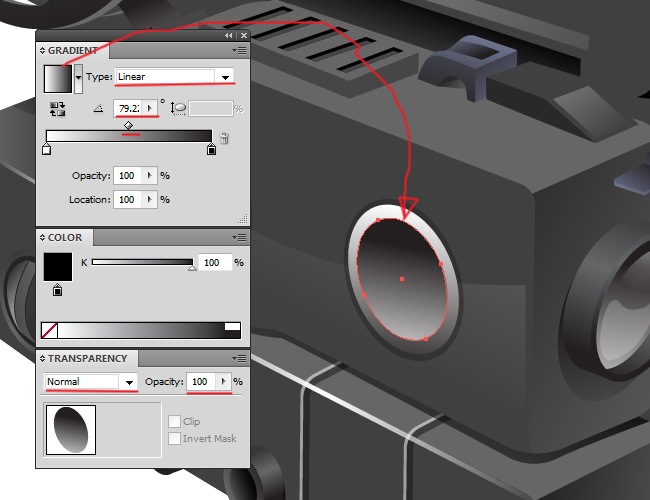
Copy paste (Ctrl + C, Ctrl + F) the right side ellipse and reduce its size a little bit, then change the fill properties to a 2 color gradient, linear type and –98 angle.

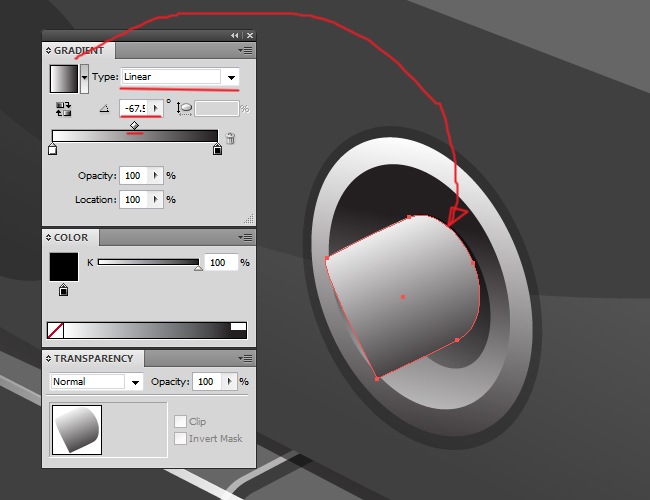
Again, copy paste the ellipse and reduce its size, then adjust the fill properties to linear type and 79.2 angle.
And repeat the process, copy paste this ellipse, reduce its size and modify the fill values to multiply blending mode, linear type and 42.6 angle.

Don’t worry, we are getting closer to the end, one more figure using the pen tool.
Linear type and –67 angle are the fill values for this shape.
Once again grab the ellipse tool.
And the fill values are the following: Linear type and 37.9 angle.

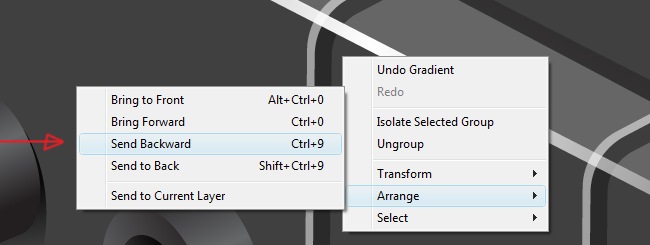
Copy the ellipse but this time paste it behind the original, you can simply right click>arrange and select send backward, then increase its size a little bit and change the filling values to linear type and –102 angle.
One last shadow to the button and we are done with it.
Fill this shadow with the two color gradient we’ve been using, linear type, 114 angle and multiply blending mode.
The button to the left is practically identical, it only changes in terms of scale and perspective. The ellipse steps are the same, you can check the fill values above, so you know how to get up to this part.

And now things change as we told you, so grab your pen tool.
No further changes to the fill, just linear type and –67 angle.
Now comes an ellipse, you know what to do.
The filling values are linear type and 44.5 angle.
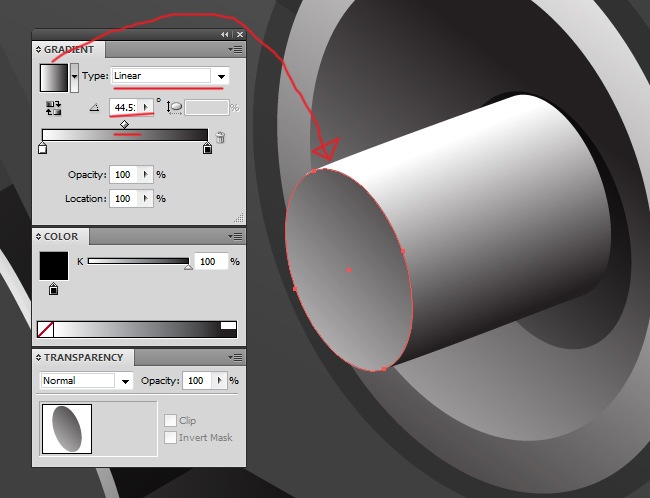
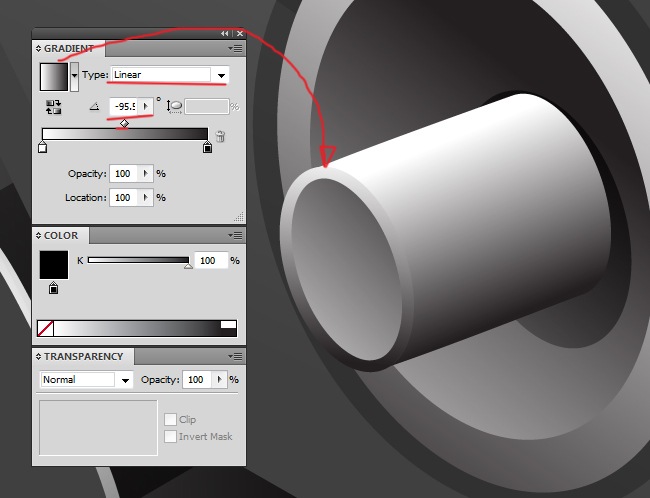
Copy paste the ellipse, move it backwards, increase its size and adjust the fill values to linear and –95 angle.
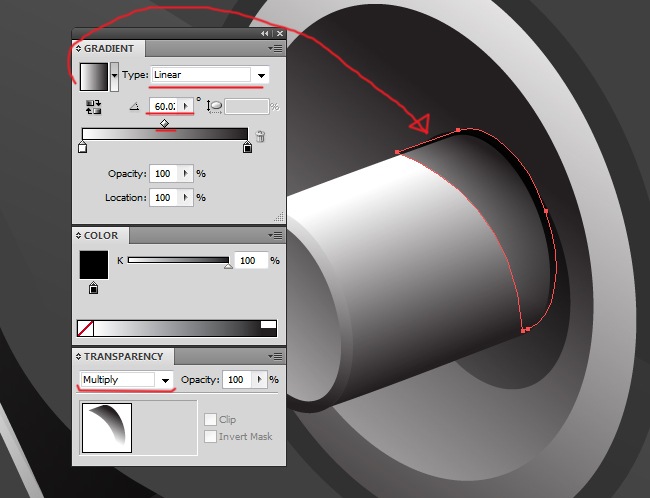
Now the button’s shadow, take the pen tool and trace it.
And adjust the fill parameters to linear type, 60 angle and multiply blending mode.
8. The second Reel
Both reels are almost identical, you only need to make a few changes. Copy paste the one that we already have, increase its size and finally, clear the tape’s tail.
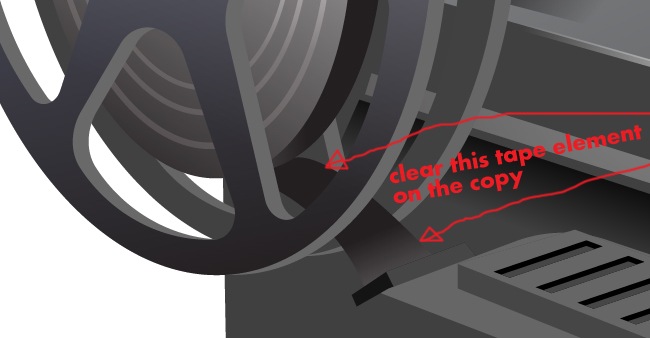
After clearing this element, select the front element that we made using the knife tool and change it a little bit so it won’t look exactly like the original. Now your reel’s copy must be looking like this.

Now we need to connect the tape from one reel to the other, that takes just a couple of shapes, so grab your pen tool.
Fill the element with a solid color (92 % black).
And the highlight of course.
The fill values for this one are linear type and 37 angle.
9. Final steps, adding highlights
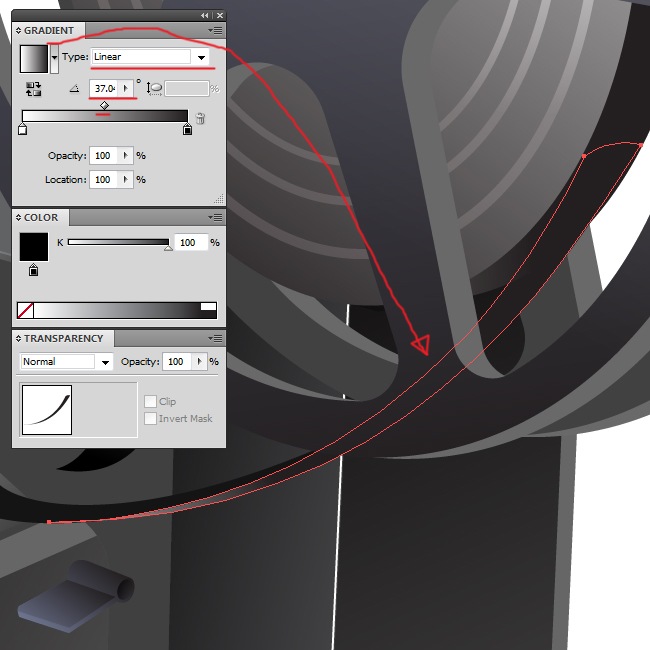
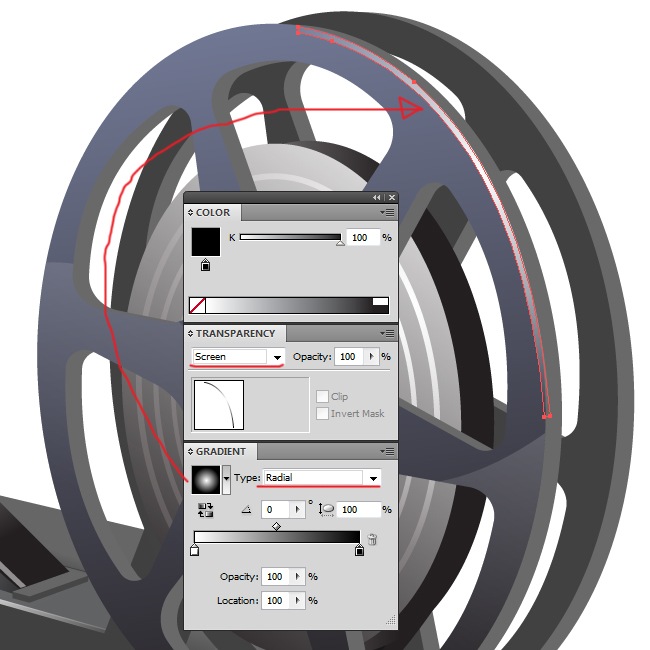
OK guys, we are practically done with our film projector, the remaining elements are just highlights and details, so hurry up and let’s finish it, grab your pen tool and trace the following shape.
Fill using a 2 color gradient, radial type and screen blending mode.
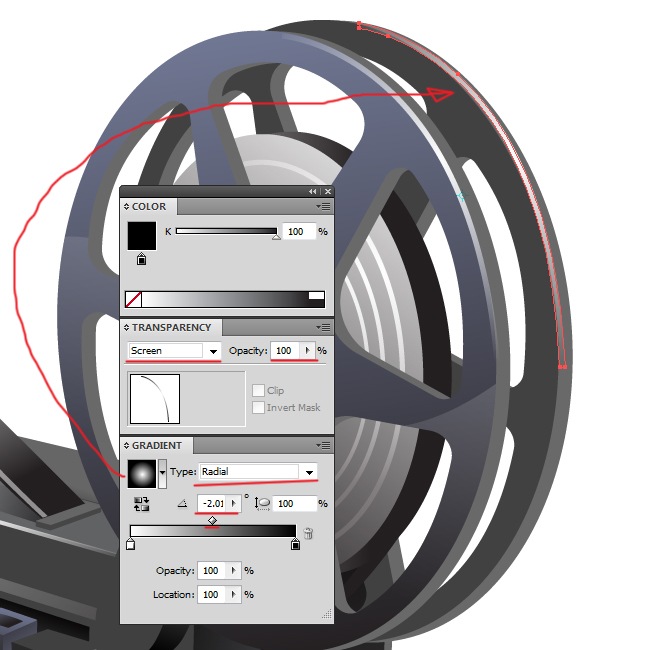
Next highlight goes like this.
The fill must be in screen blending mode, 20 % opacity and radial type.
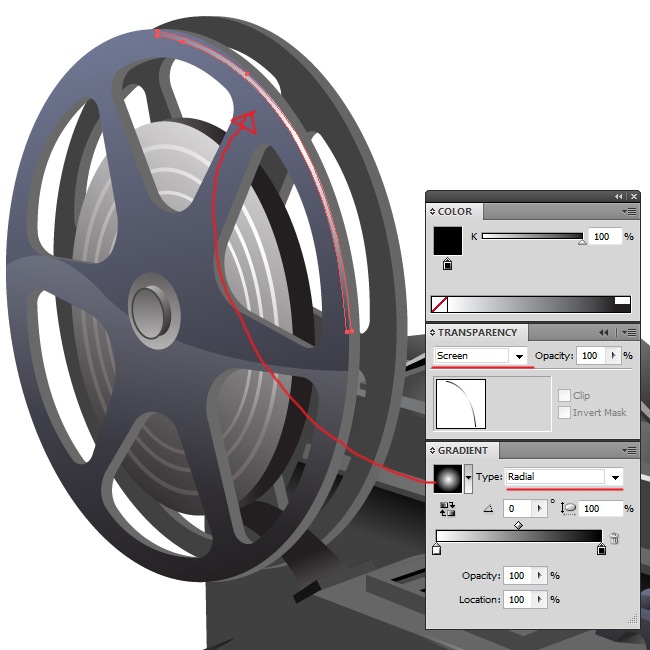
OK the next highlight goes over the right reel (the duplicate).
The fill goes in radial type and screen blending mode.
The next highlight goes at the right side of the last one.
The filling properties are screen blending mode, radial type and –2 angle.
Now we move to the left reel and draw the first highlight.
And fill it using the 2 color gradient, screen blending mode and radial type.
And then comes another highlight at the right side of this one.
The fill goes in screen blending mode, radial type and –5.11 angle.

Next highlight, we are almost done my friends.
Radial type, –20 angle, 92 aspect radio, screen blending mode and 30 % opacity.
Next goes over the lens.
Adjust the fill properties to screen blending mode and radial type.

And beneath this shape goes another one.
Fill this highlight with the 2 color gradient, screen blending mode and radial type.
Now go back to the right reel and draw a small ellipse.
Fill it with white and reduce its opacity to 70 %. Now we need to use a blur effect, go Effect>blur>Gaussian blur and play with the values until you get something you like.
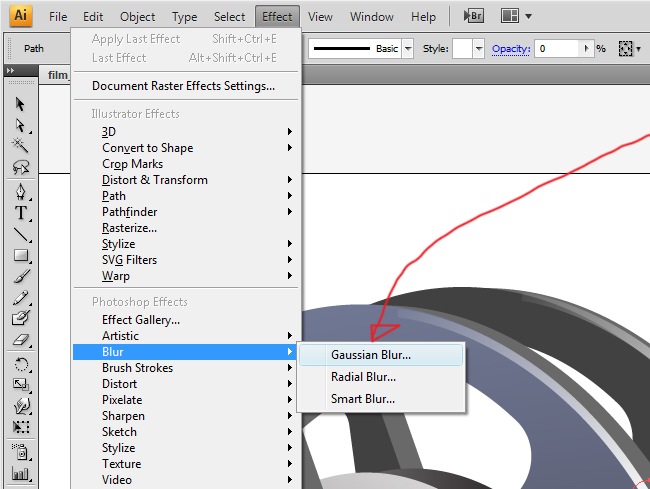
After playing with the Gaussian Blur we left our ellipse looking like this.
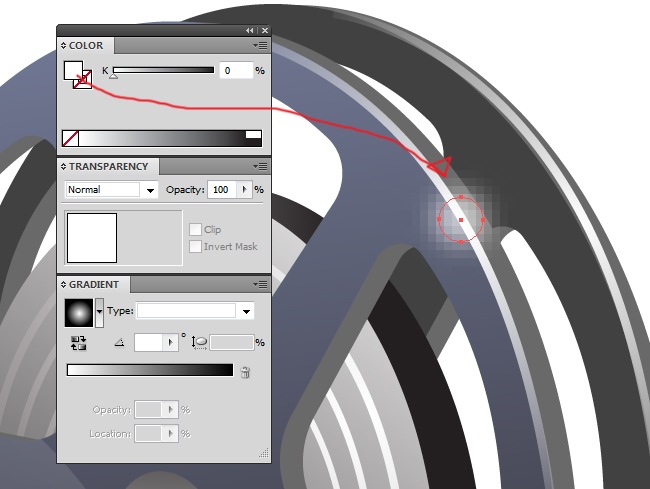
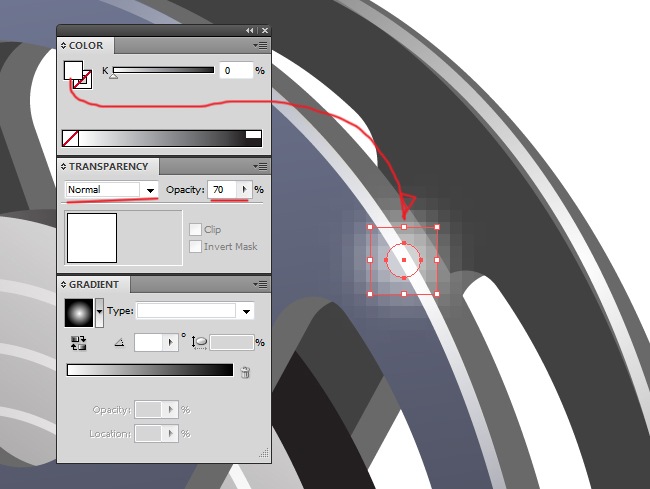
And now another ellipse above this last one.
Fill it also with white and reduce the opacity to 70 %.
Copy paste (Ctrl + C, Ctrl + F) both ellipses and place it in top of the left reel, perhaps you need to perform some scale adjustment.

Keep copy pasting, place the next one close to the lens. If you see different, try to adjust it.
The next copy goes at the bottom of the icon.
And the next copy goes towards the left side.
And the next couple of copies goes over the buttons.
And place the next highlight over the lens.
And the final highlight is not a copy, you need to use the pen tool.
Use a white tone for the filling.
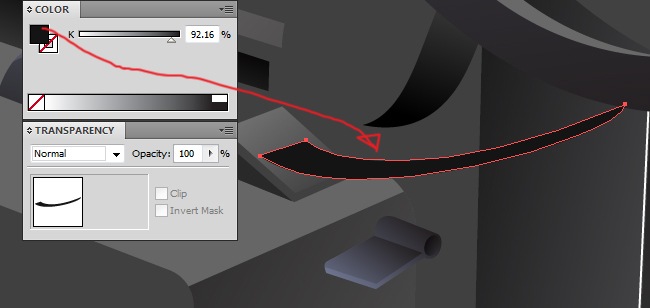
The final thing to do is the light, grab your pen tool and draw the shape.
Fill the object with a yellow tone at 50 % of opacity.

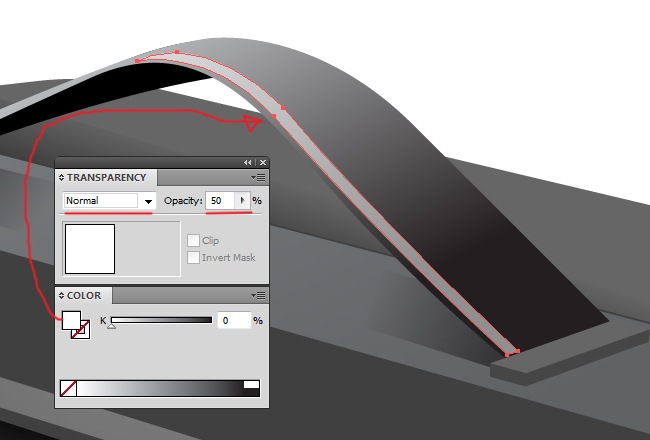
And now we need an opacity mask. Draw the following shape using the pen tool.
Fill it with a 2 color gradient, linear type and –26 angle.
Now click on the right button of the transparency window (having both shapes selected to keep the yellow tone) and select make Opacity Mask.

And you will notice something pretty cool that will conclude the light element.

Voilá, our icon has been completed. It’s been a long journey across gradients, stroke shapes and more, we covered every step with careful detail so you don’t have any doubts while making it, let us know your opinion about this and other tutorials. We will keep providing you with the best.


