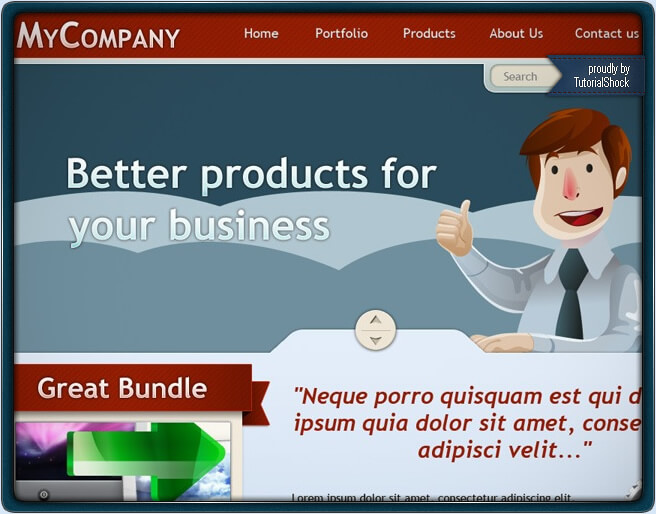
Hello folks, welcome to a great new tutorial. Today we will guide you across the making of a beautiful and elegant template, ideal for all your business and company applications; we will take a look over every single element that is part of this template and will fully explain it, from gradient properties to the effects, you will find all the necessary information to complete this great template, we suggest you to prepare a lot of coffee and gather many bags of chips, also prepare all your favorite artists tracks to pass the time. OK now that we are all set it’s time to begin, so please open your Photoshop.
1. Plan your design
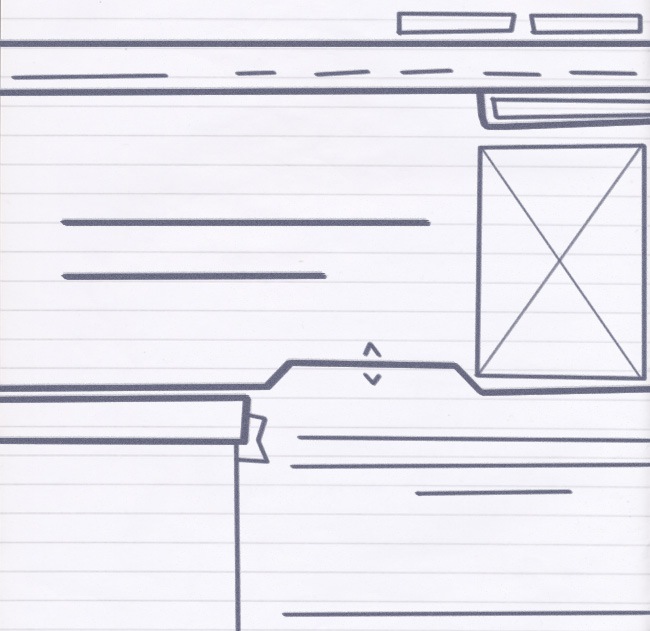
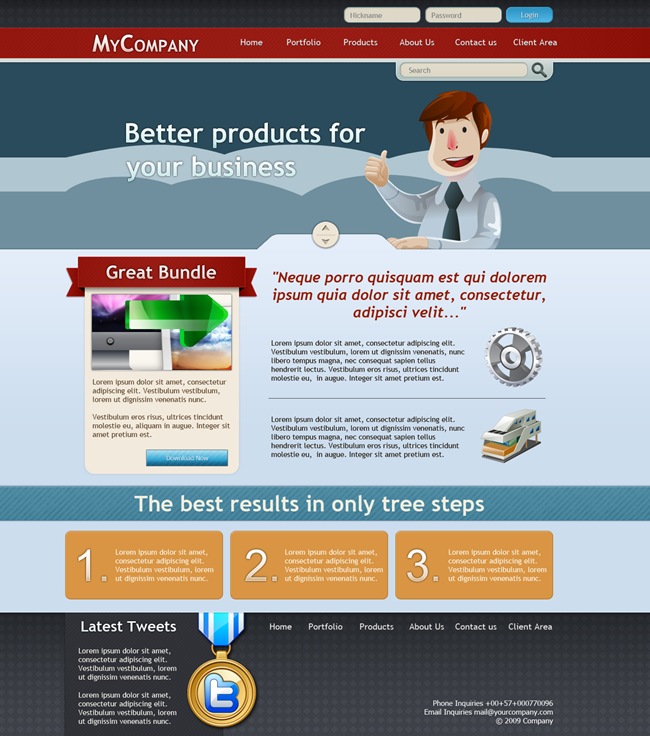
It’s important to make an initial mockup or sketch of how your template is going to look like, it’s just a diagramming of the structure, so there’s no need to make any complex illustrations or things like that.
2. Create your Photoshop file
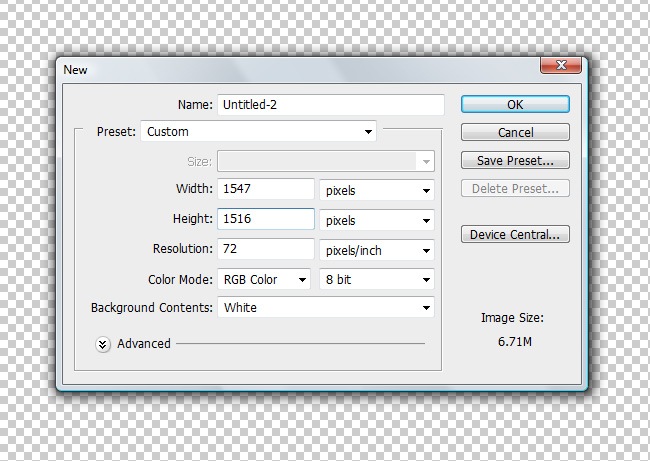
When you make a web template, it’s important to always respect the minimum width of 960 pixels, beyond that you can use any proportions you want, on this case our file is going to have a working space of 1547 x 1516 pixels, RGB color mode and 72 dpi.
3. Start making the background
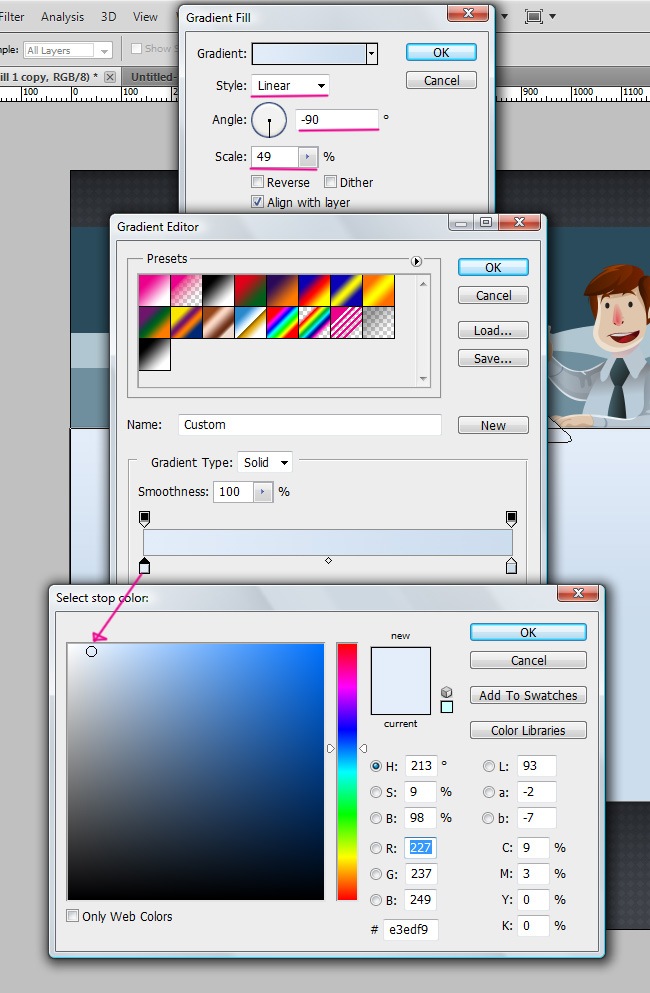
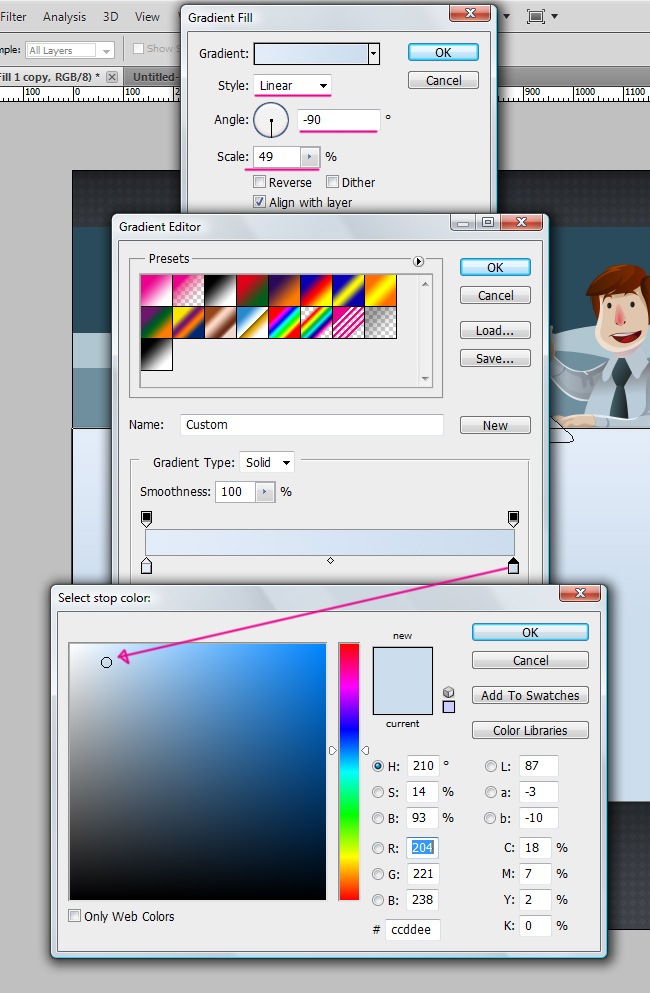
For start our design, we will begin with the creation of the background, to do that you need to go to the Layers window and insert a gradient fill.
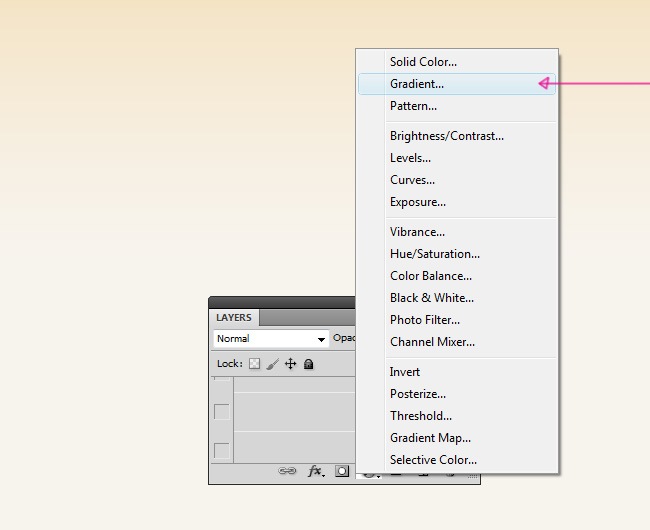
And follow the next parameters in order to fulfill the gradient:
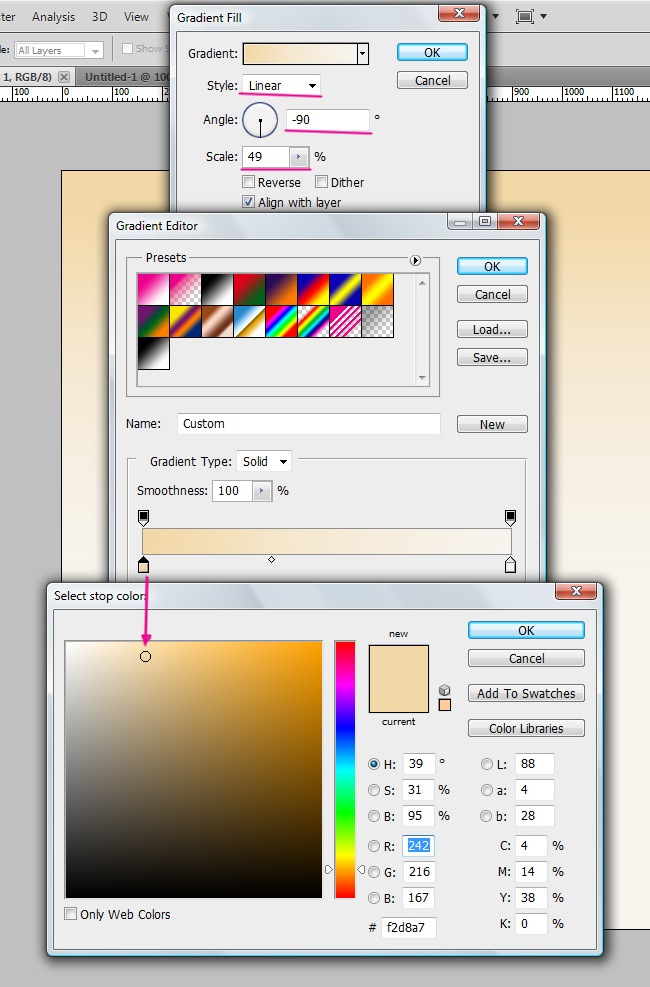

This background will work as the main layer where we will be placing everything else from now on.

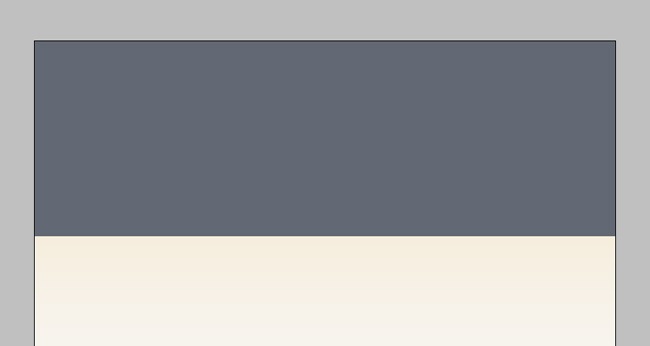
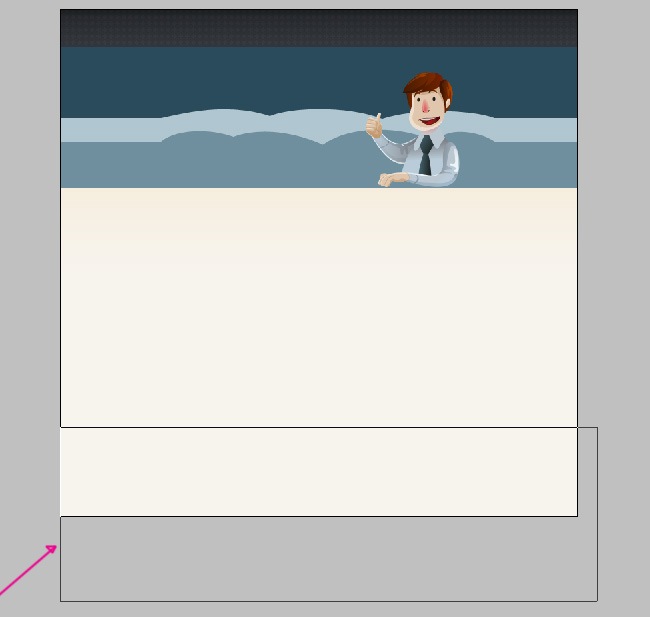
4. Design the header and footer
Select the rectangle tool and trace the following shape so we can mask our next fill.

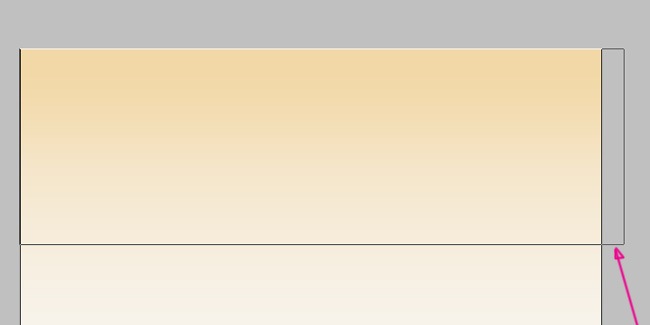
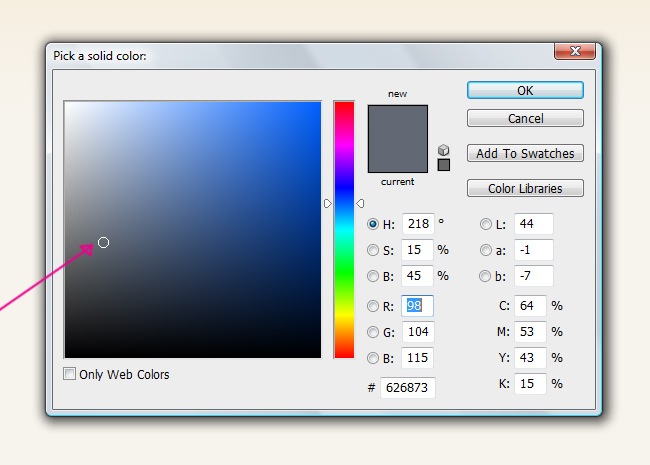
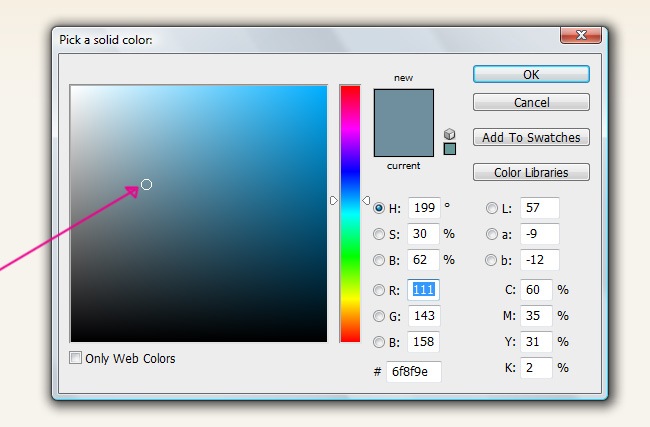
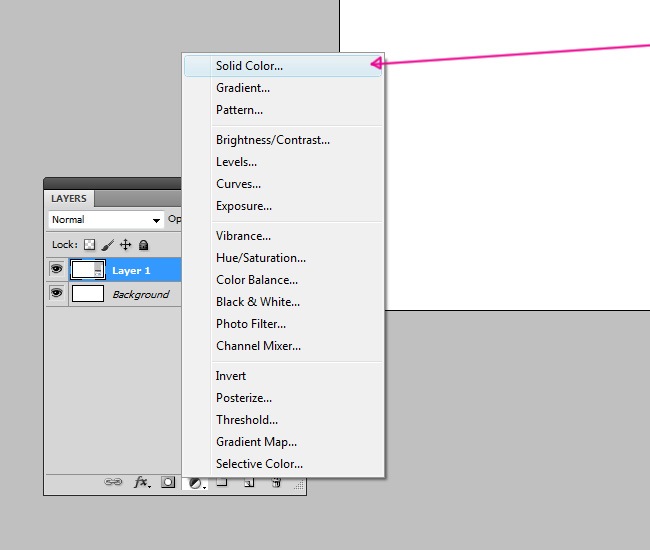
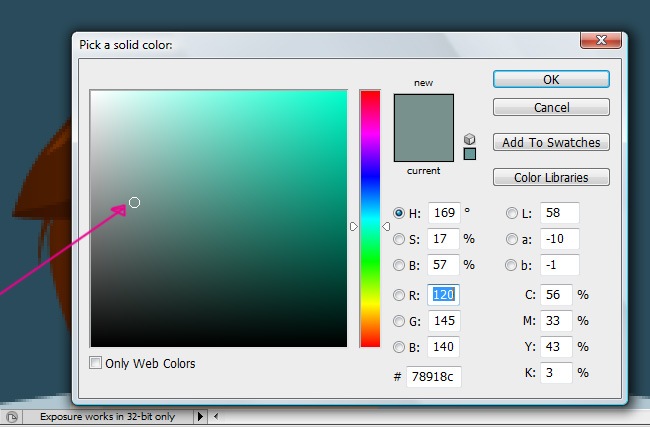
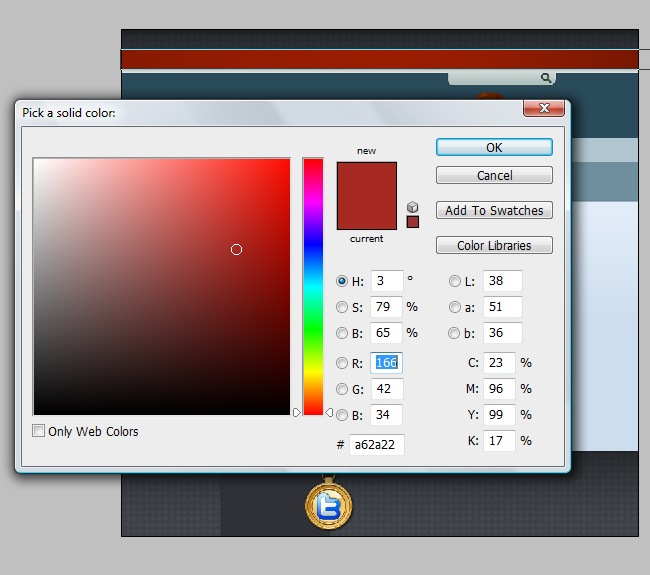
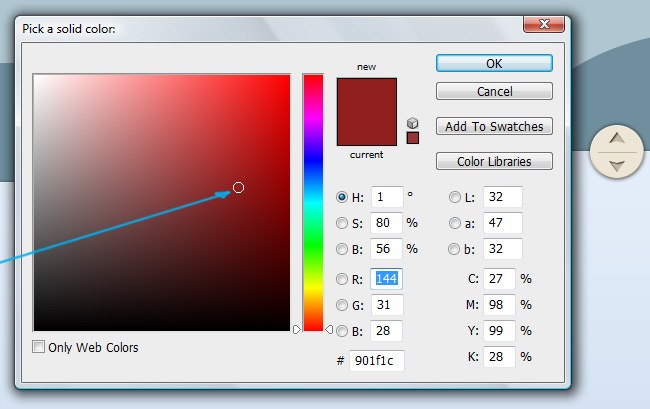
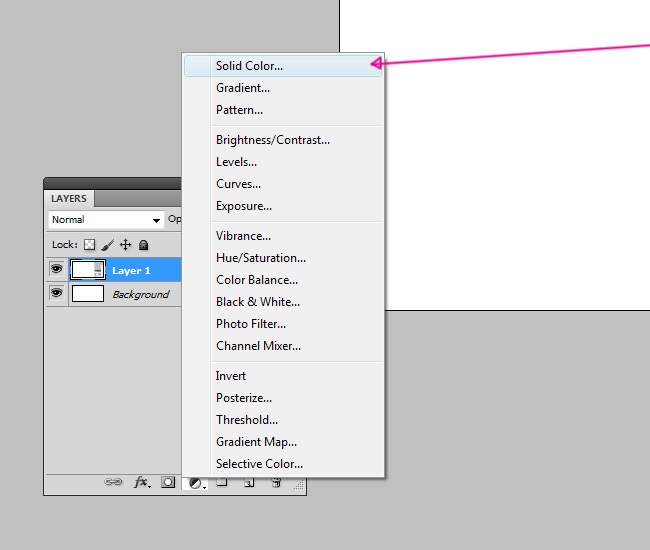
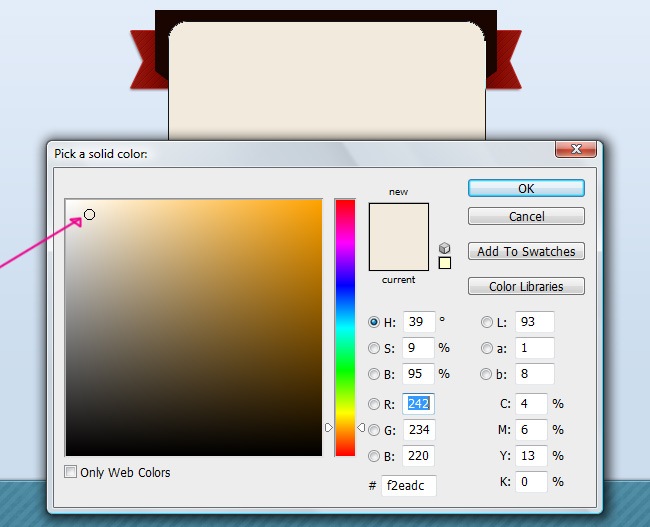
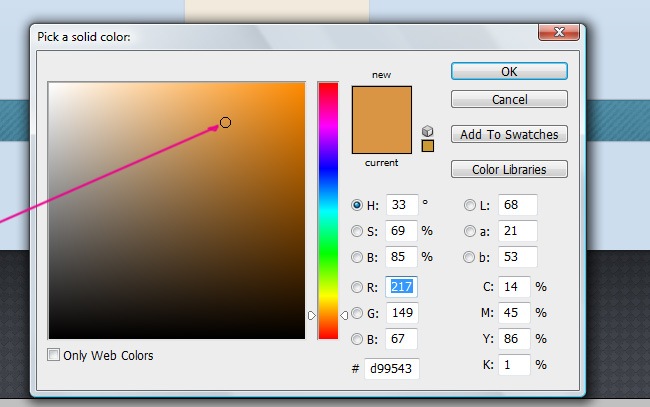
Having this set, let’s add a solid color fill from the Layers window.

The color is the following one:
So now we have the main object set, let’s take a look at it.
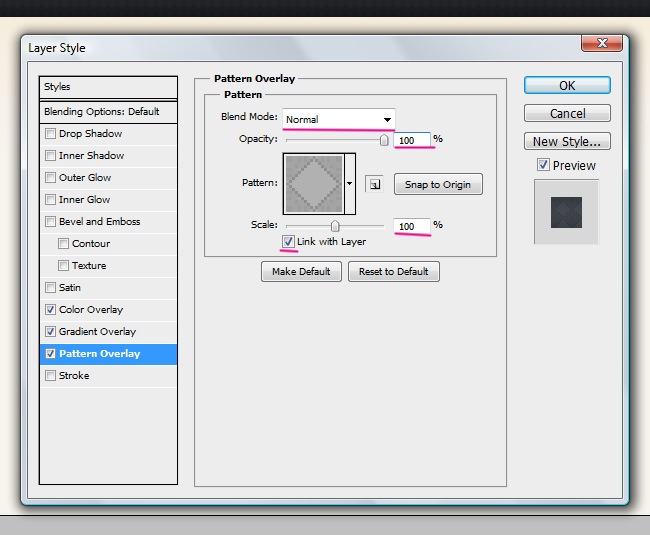
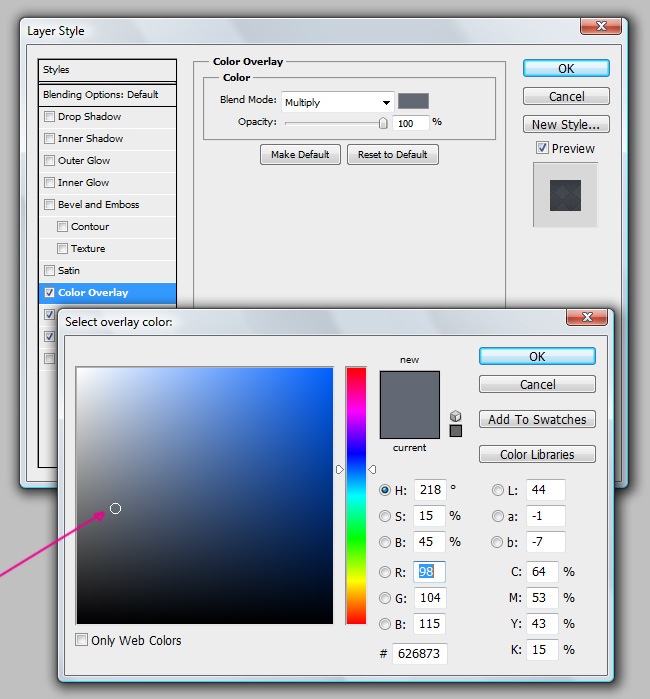
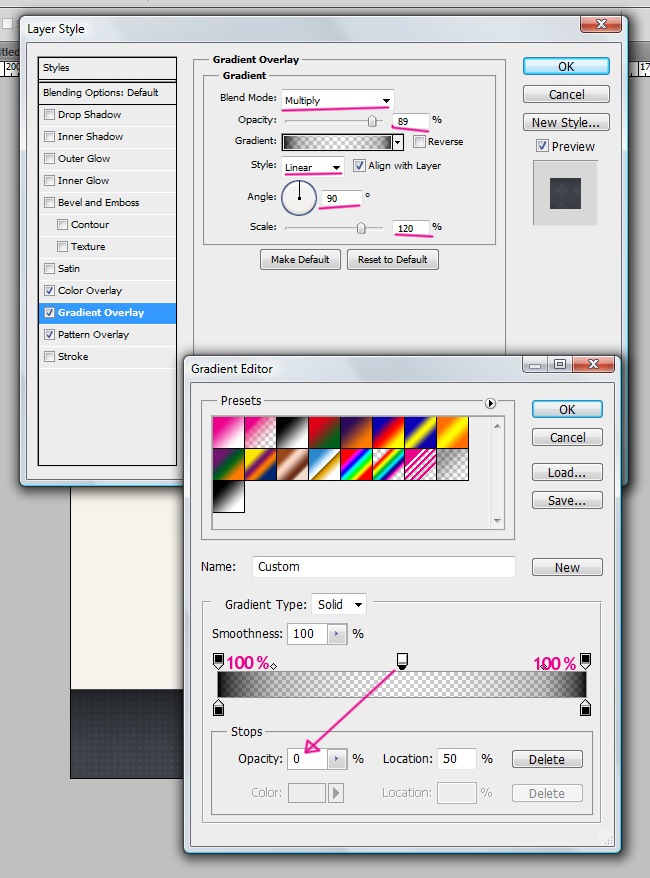
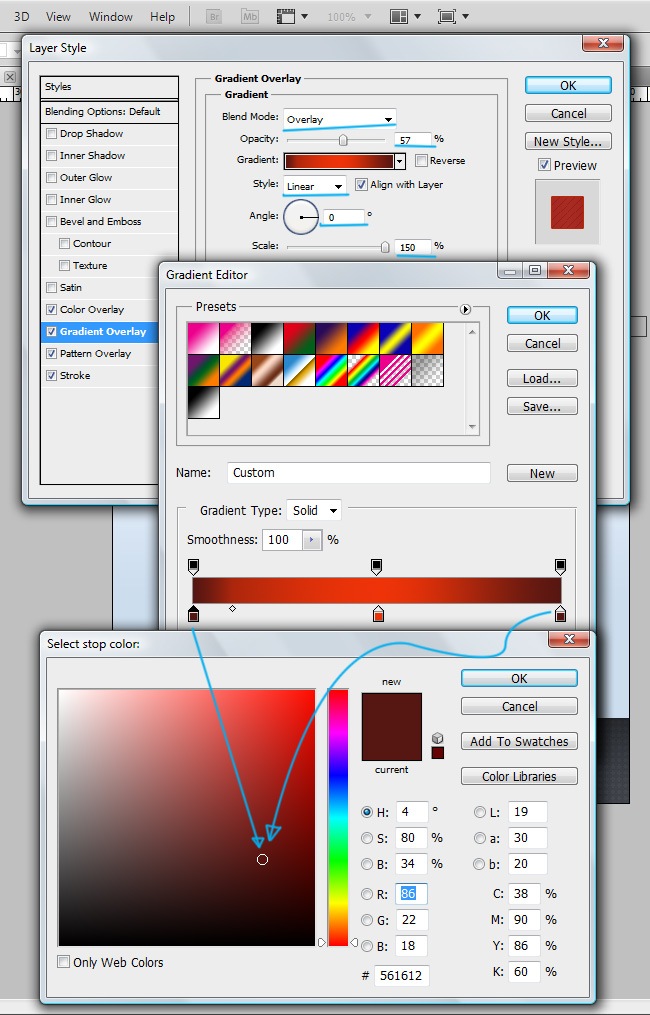
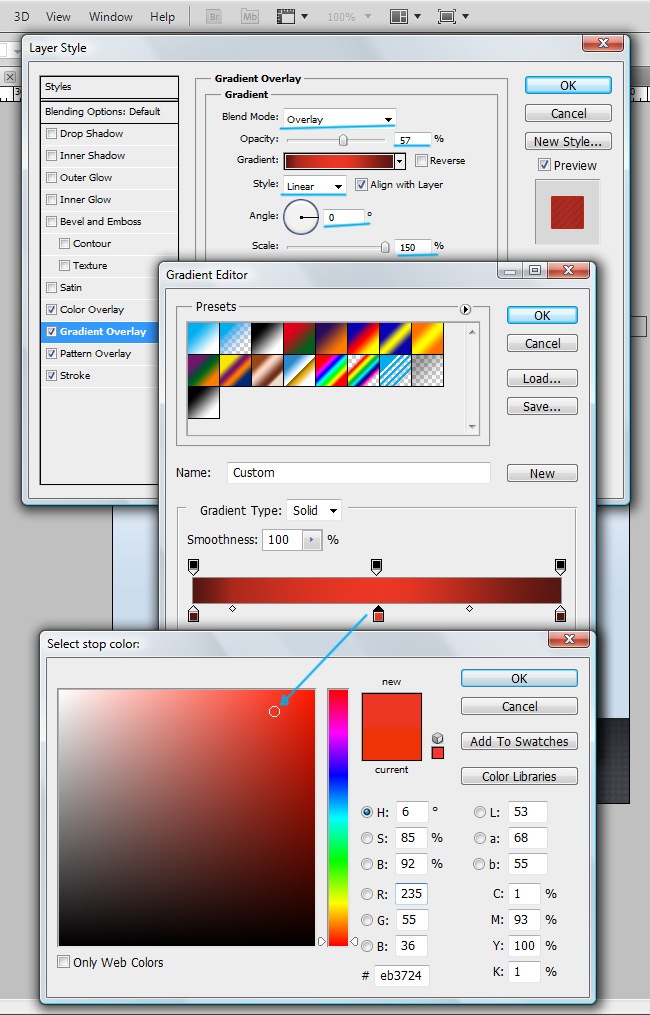
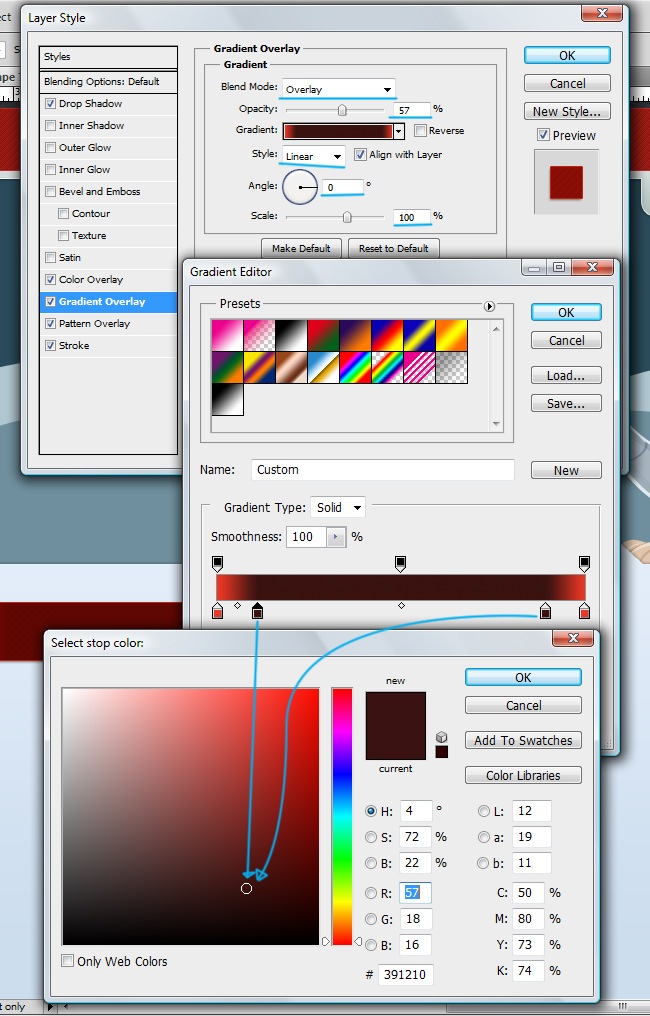
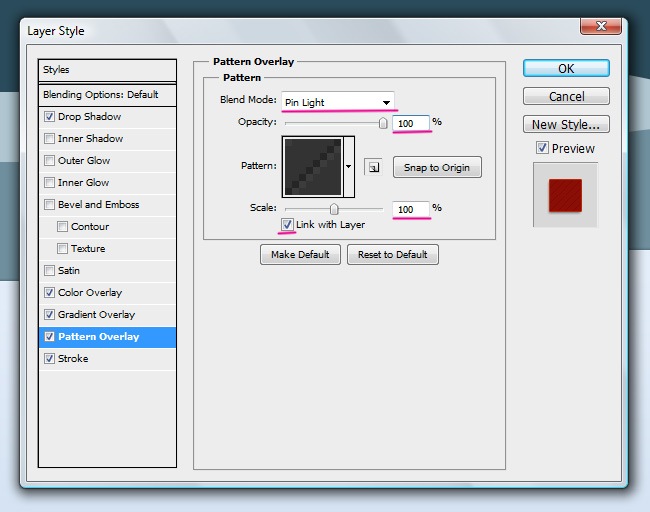
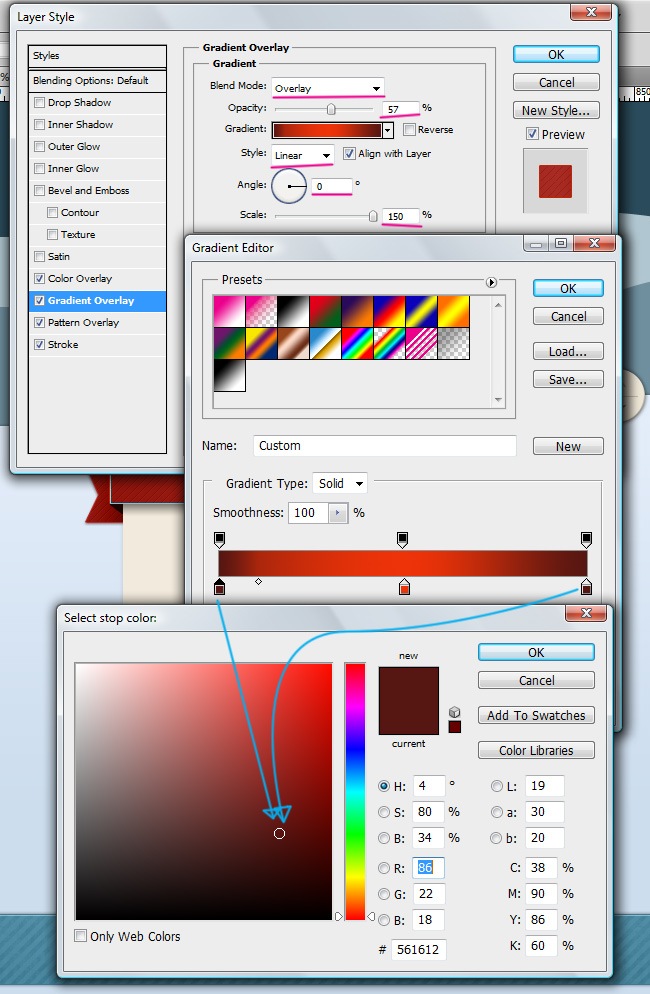
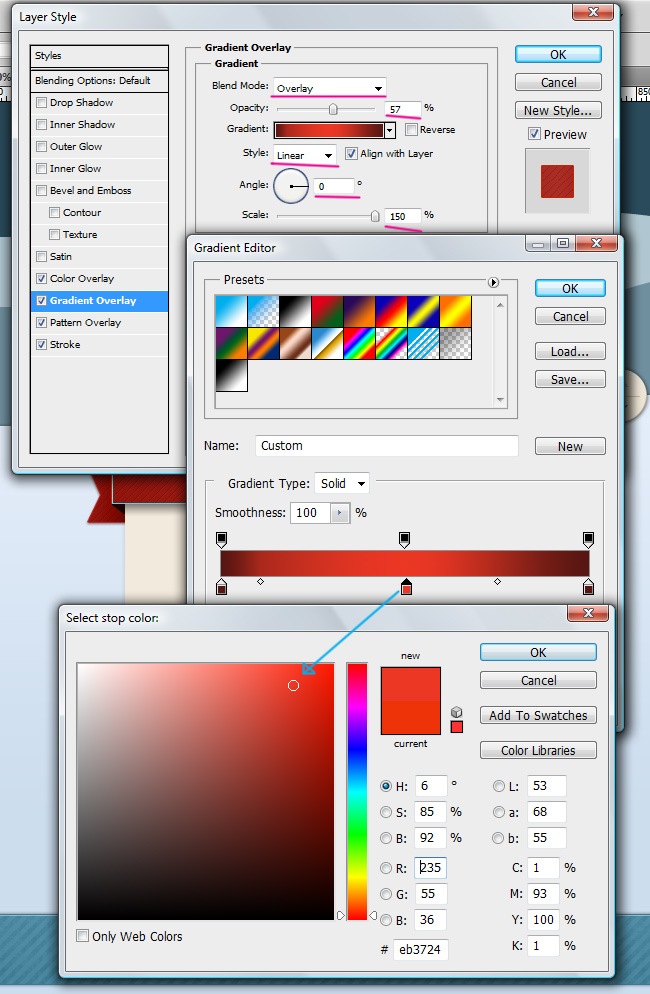
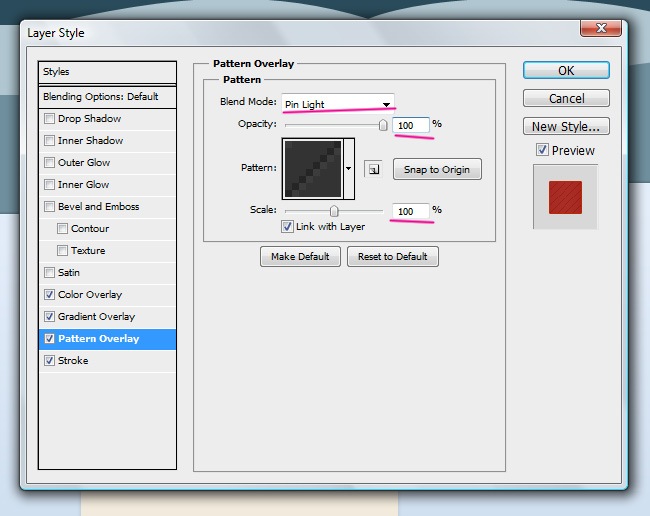
But that’s not it, now we need to add some effects to make our object more attractive, the effects that we’re going to utilize are Color Overlay, Gradient Overlay and Pattern Overlay. Pay attention to the following screenshots to perfectly duplicate our result.
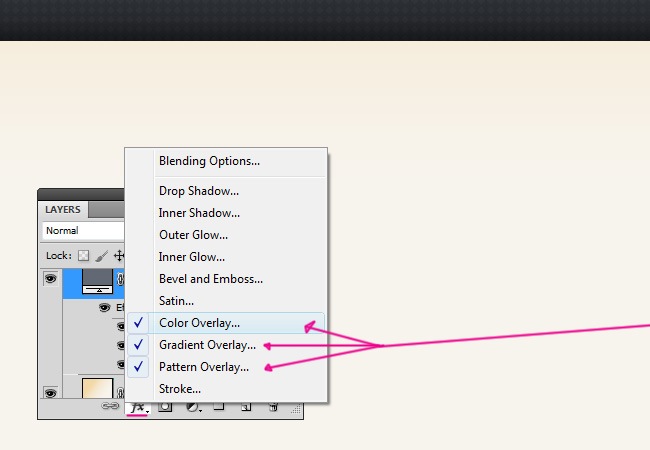
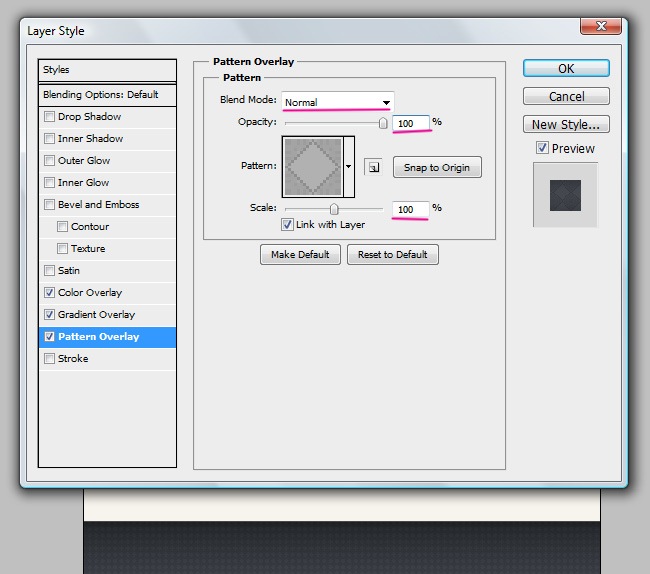
And the properties for each one of these effects are the following:
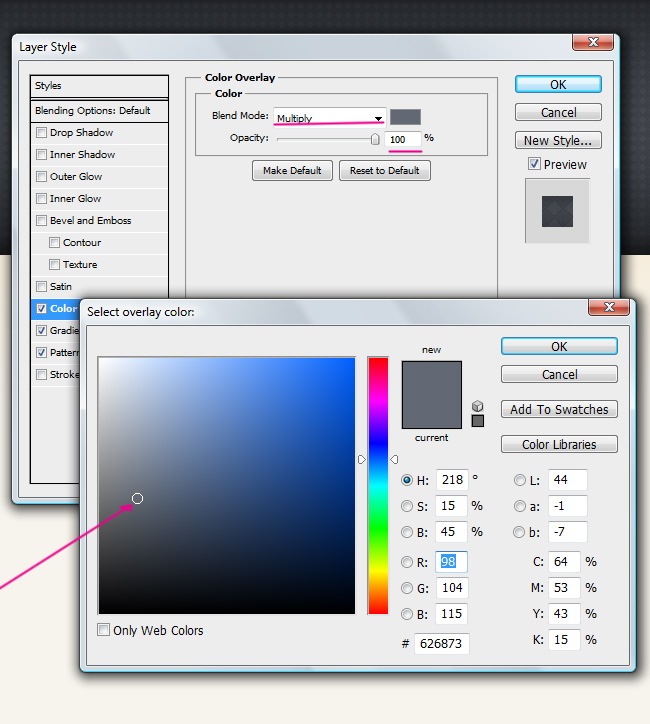
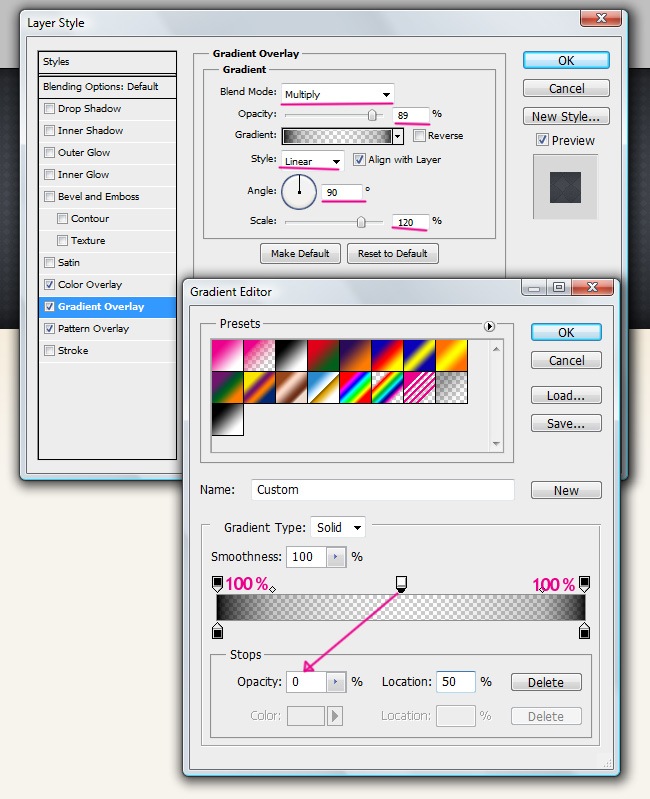
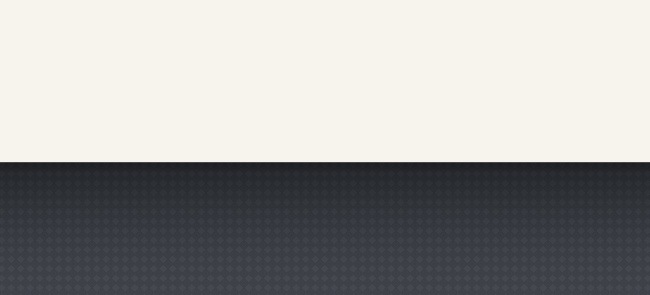
On the case of Pattern Overlay, we created a custom pattern (Create your design and then go to Edit>Define Pattern) like the one you will see on the next preview.
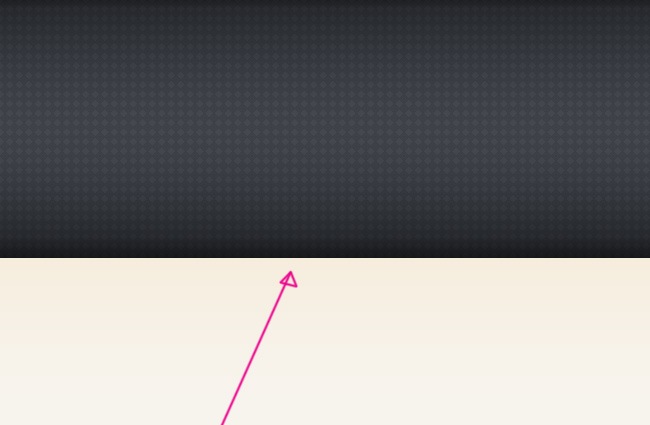
And our design now looks way nicer than before, let’s take a look to a preview.
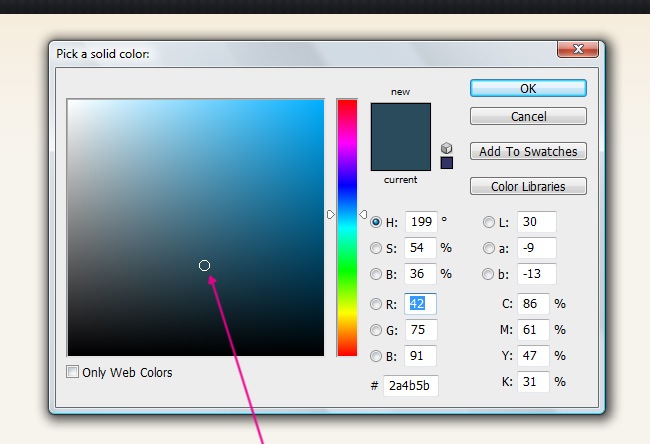
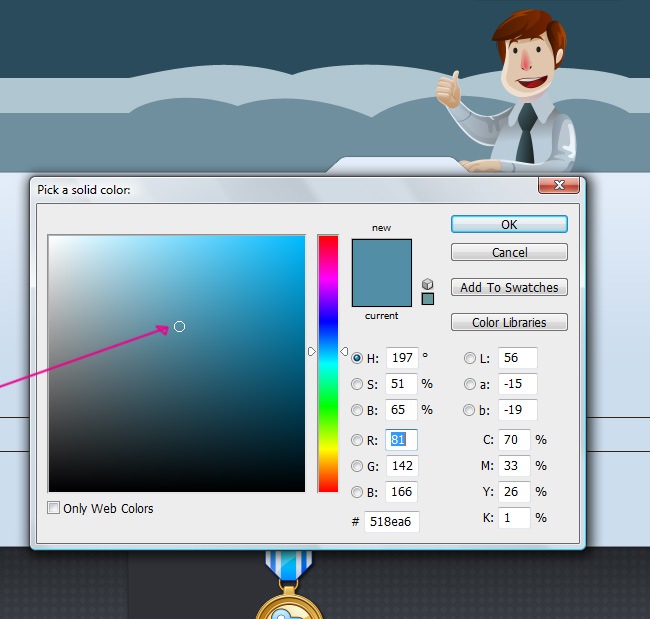
Grab your rectangle tool one more time and use it to make the following object:

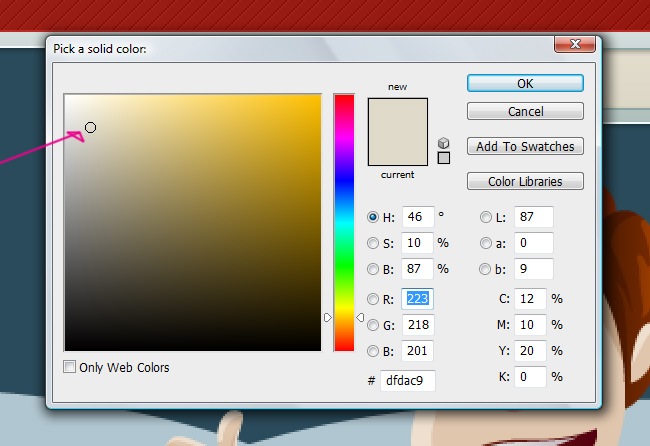
Now choose a solid color to fill the element.
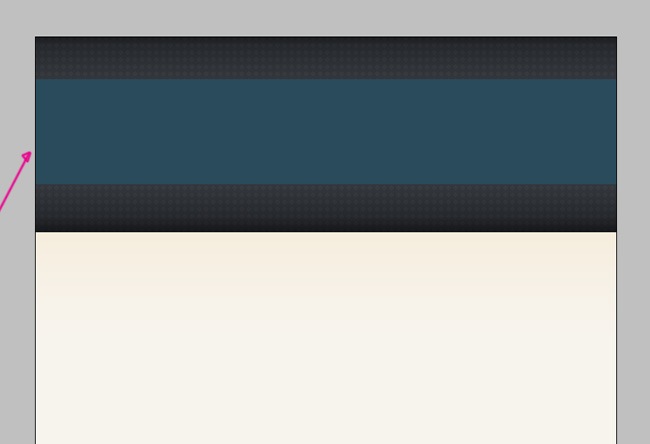
You’re doing great, so far we have made an initial approximation to our design.
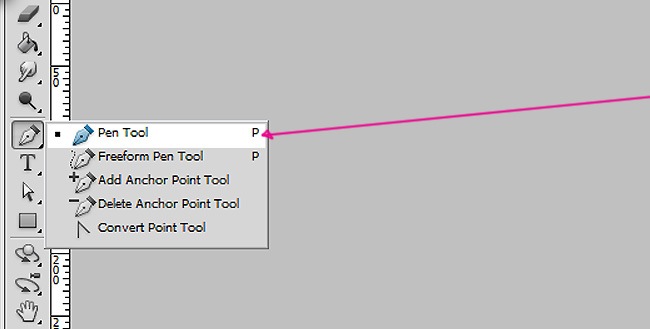
The next path cannot be created with the rectangle tool, we need something a little bit more precise, so select the pen tool.

This is the element that you need to draw with the pen tool:
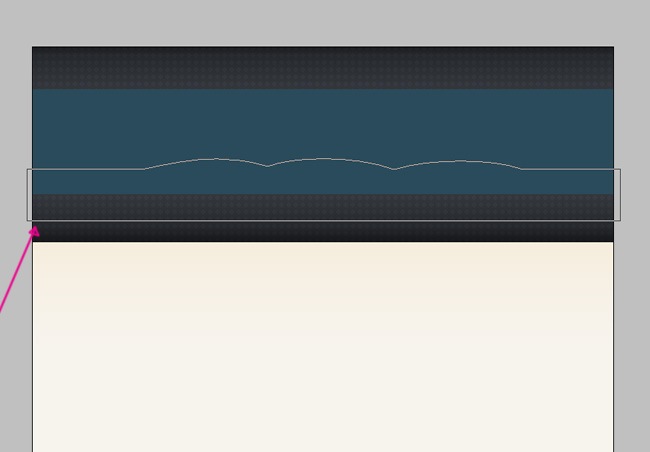
And let’s fill the path we just did using a solid color.
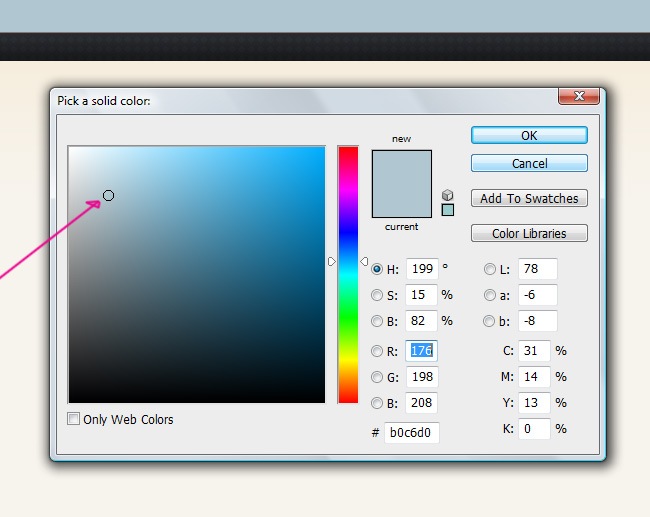
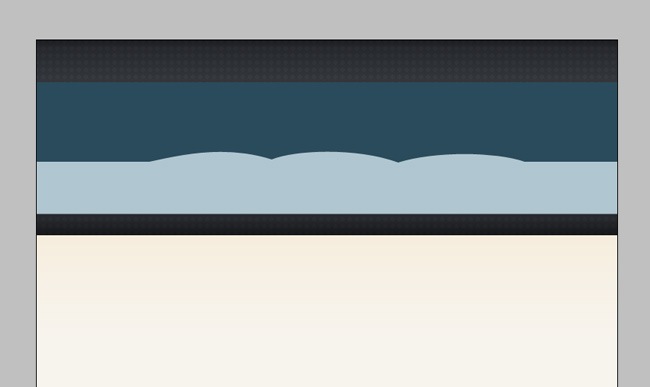
Next is another irregular shape made with the pen tool.
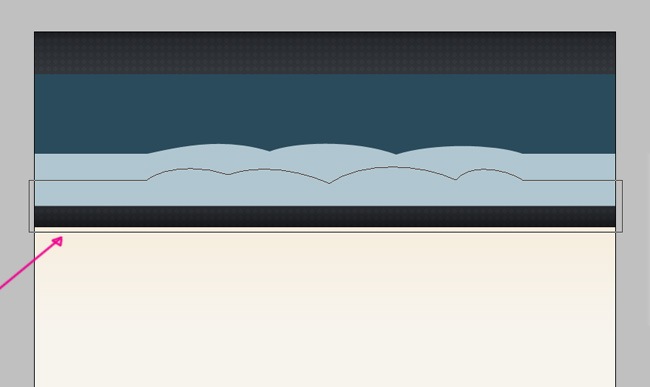
Fill the path using the following solid color:

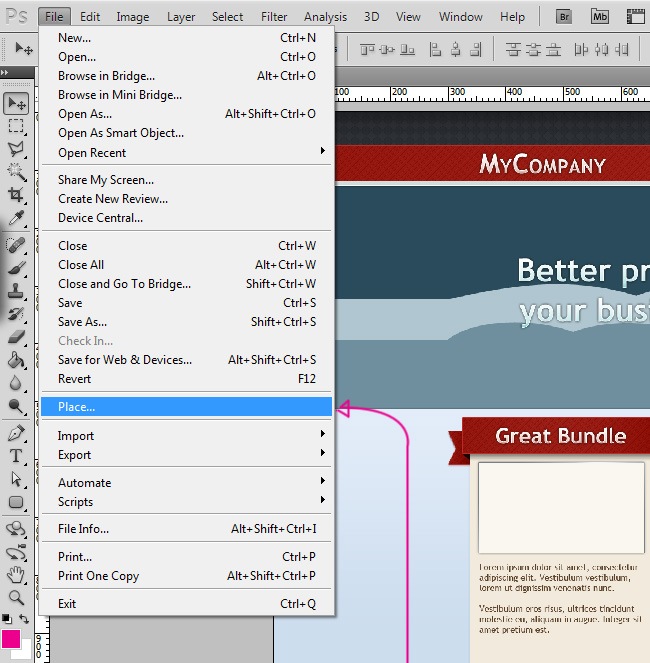
The next thing we did was to insert a custom character design from our archives, remember that you can either copy paste it directly from the program or go to File>Place to put it on the working space.

Grab the rectangle tool and draw the next shape that’s going to be the footer.

And similar to the first object we did, this one has alike parameters and color values, let’s start by adding a solid color to it.

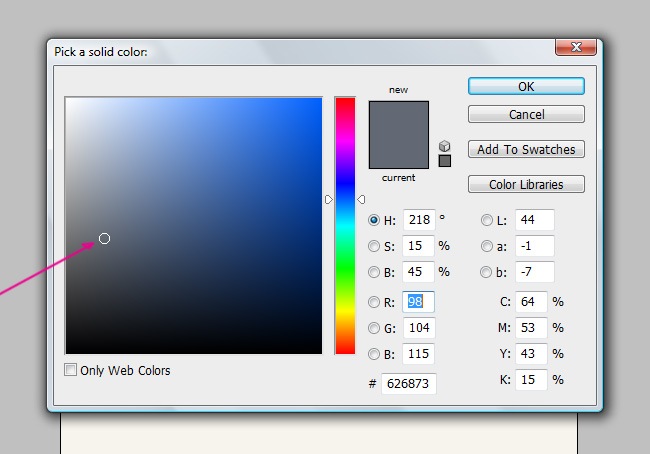
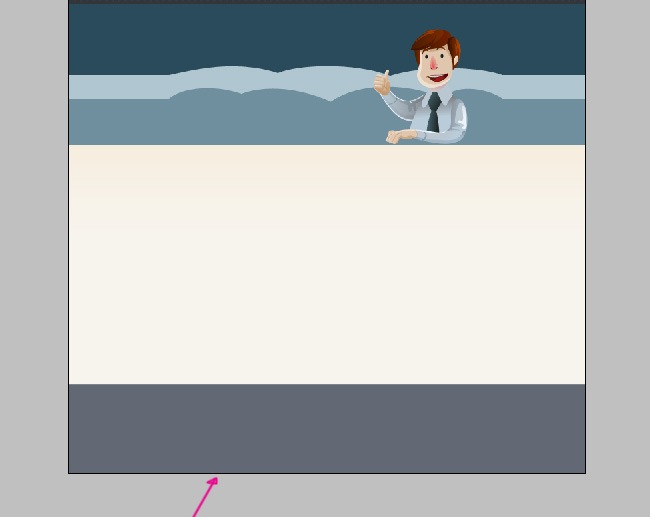
Good, now we have set the main layout for this object.
And now we need to add the same 3 effects that we used on the previous object, Color Overlay, Gradient Overlay and Pattern Overlay.
These are the parameters to follow on each one of the effects:
Same as before, we utilized a custom texture for the Pattern Overlay effect.
And there you have it, now our footer section is ready.
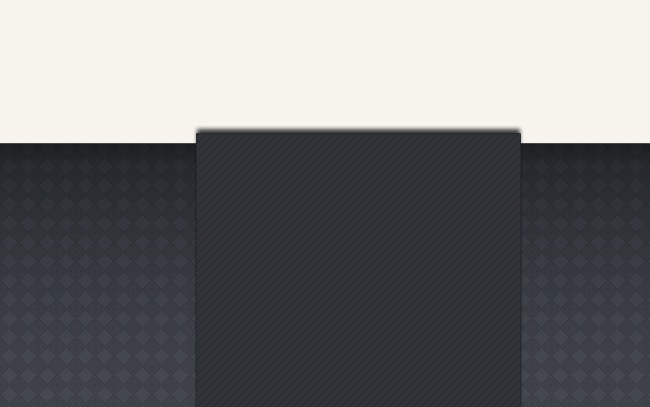
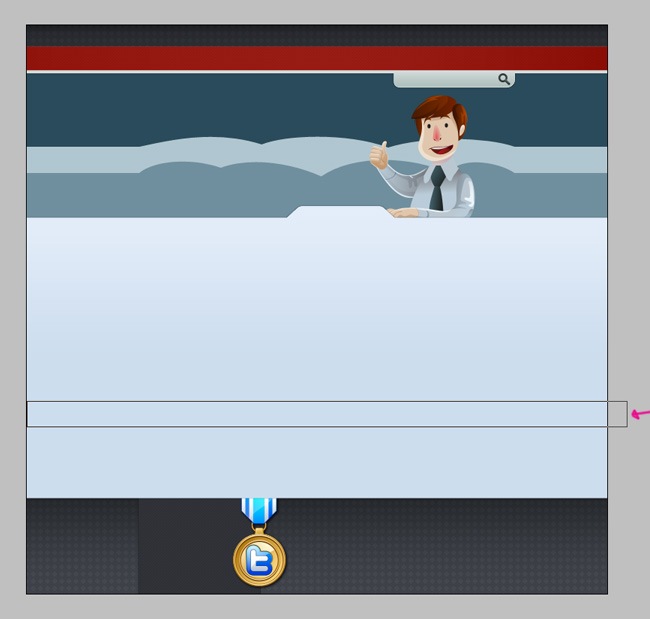
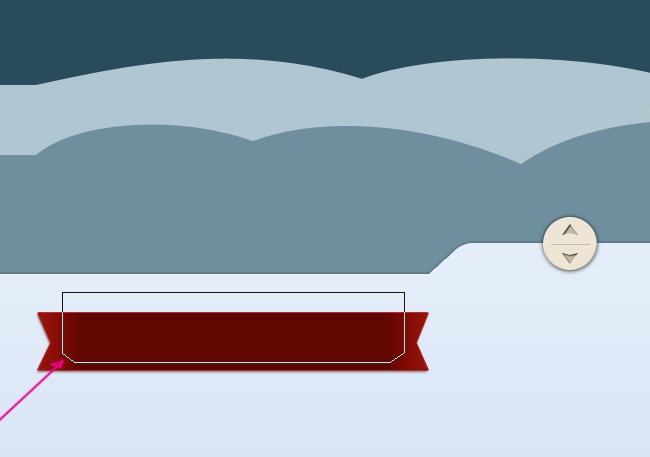
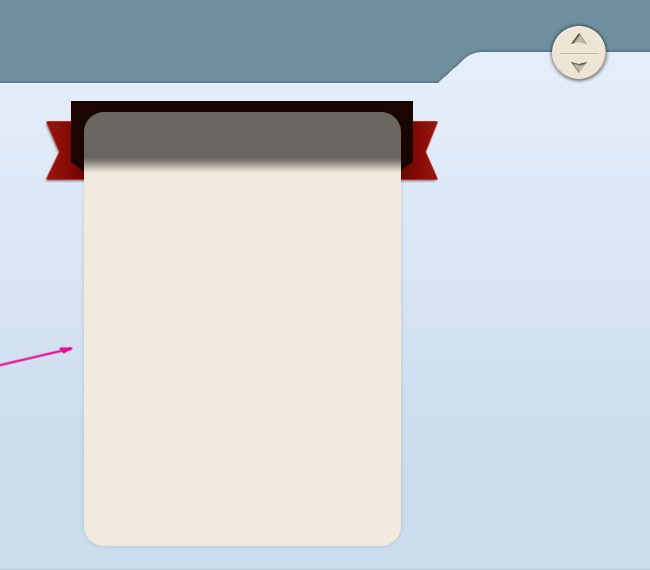
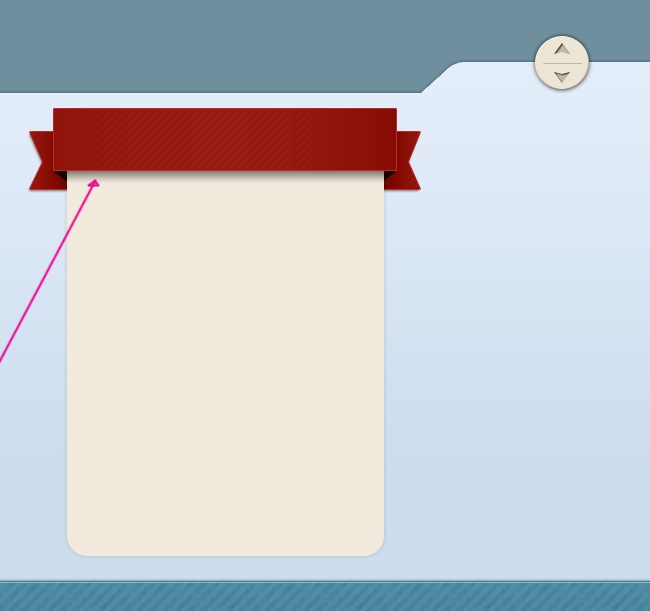
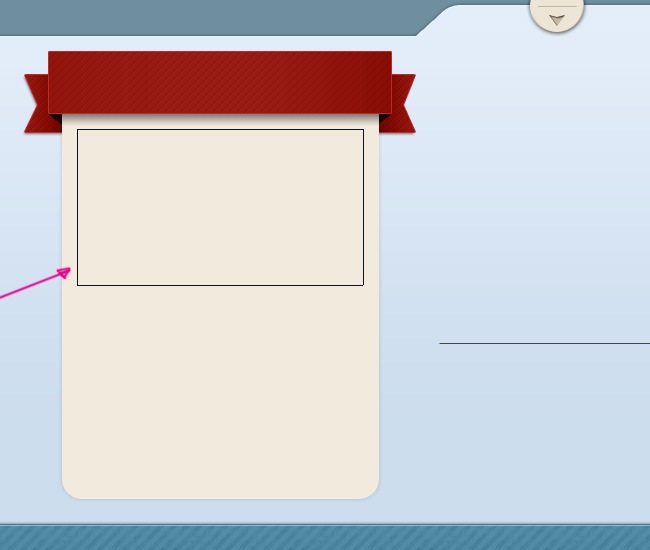
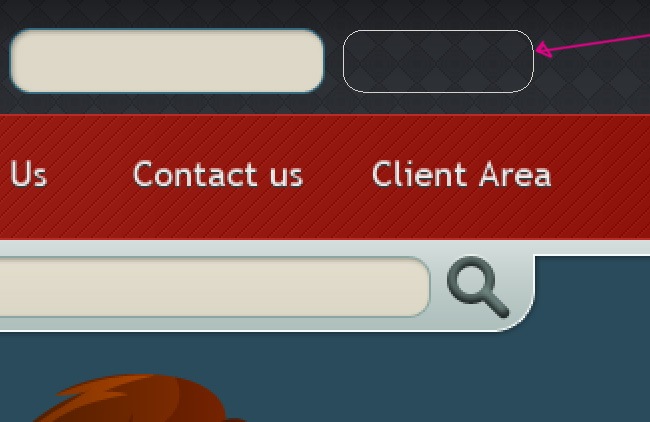
Now we are going to make a box on top of our footer, to do that select the rectangle tool and trace the starting object.

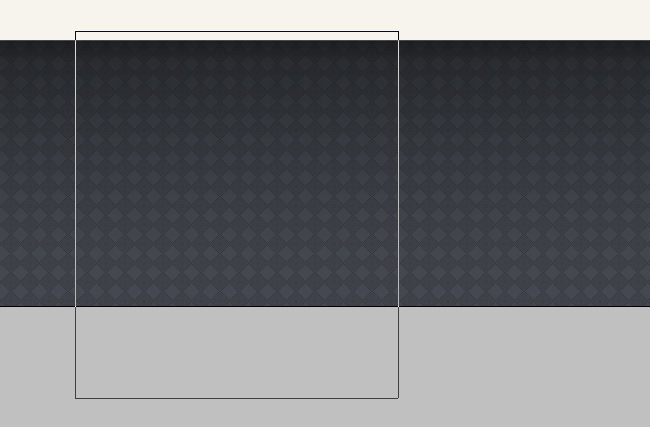
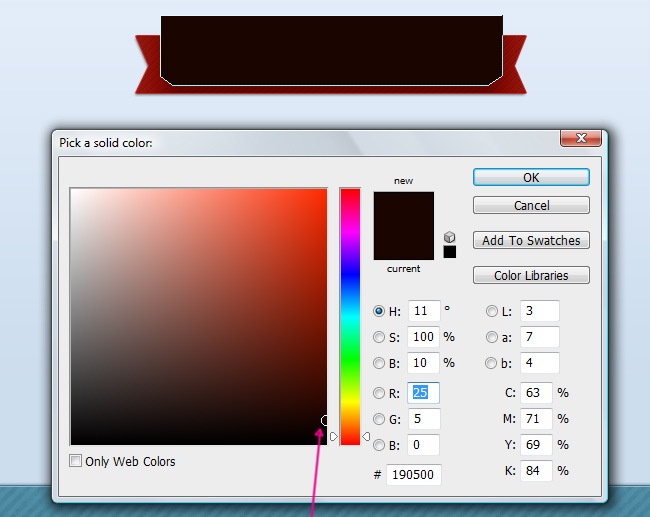
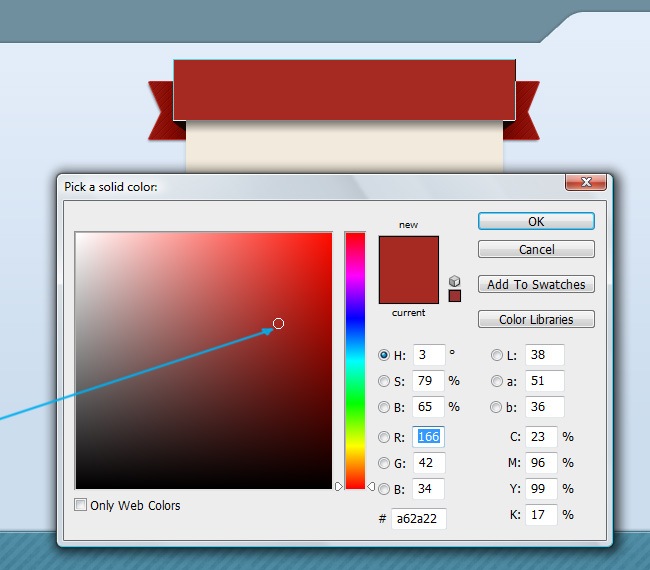
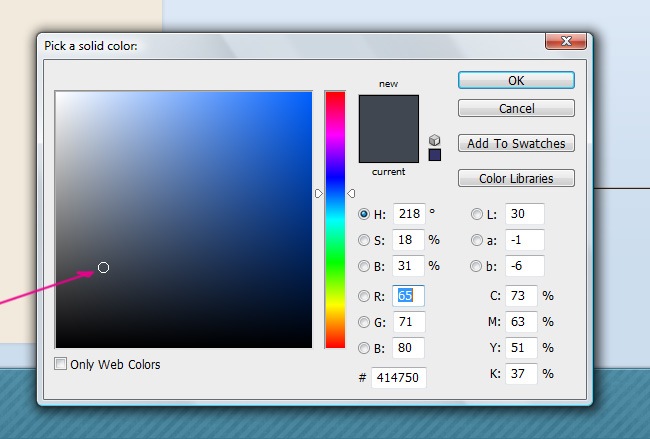
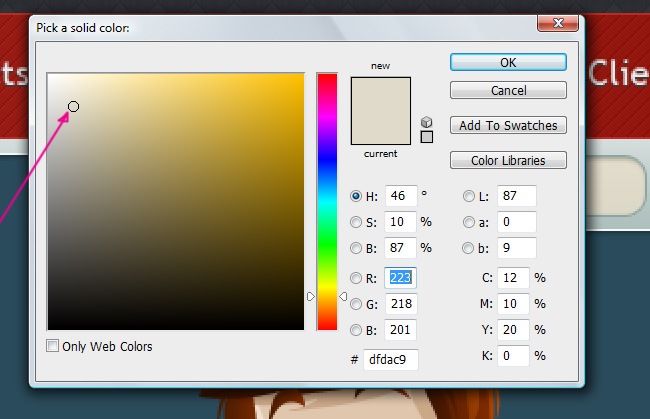
For start, let’s fill our shape with a solid color.


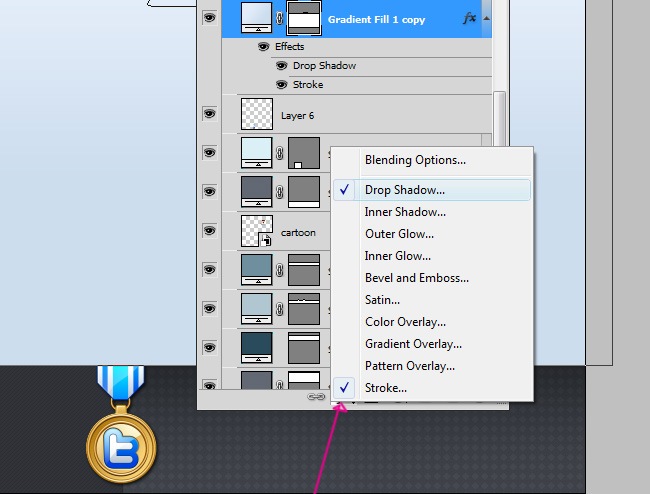
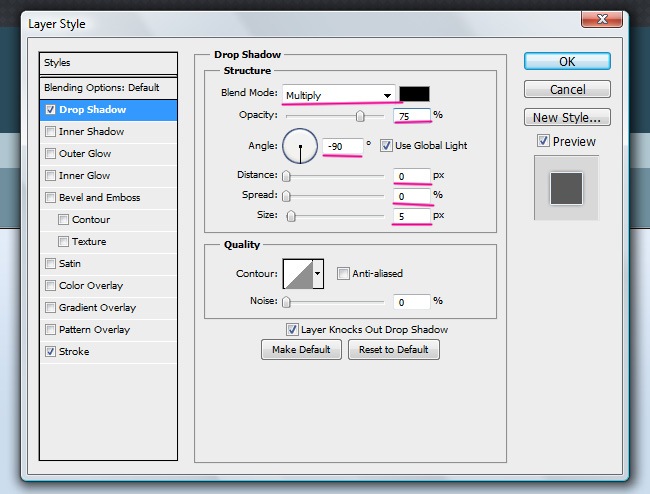
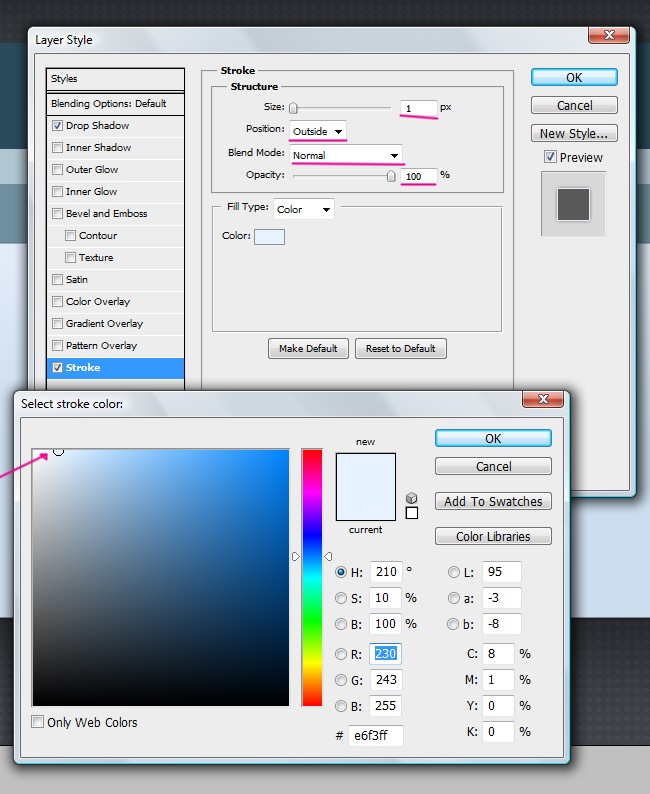
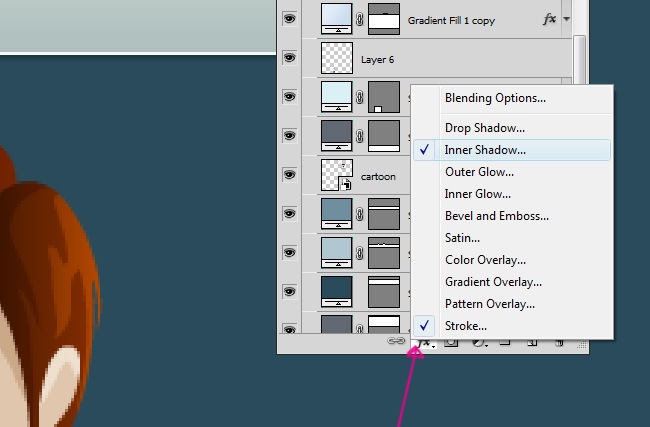
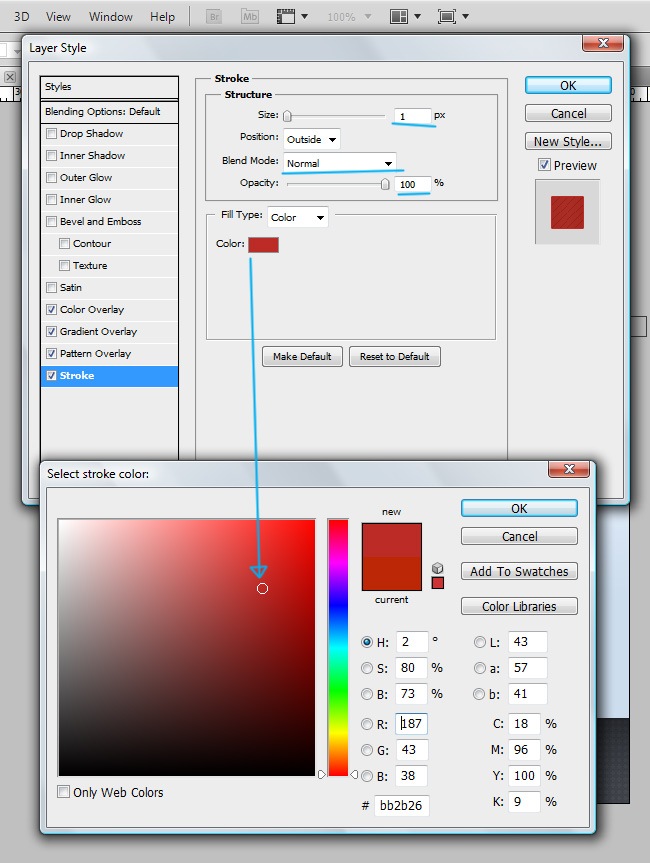
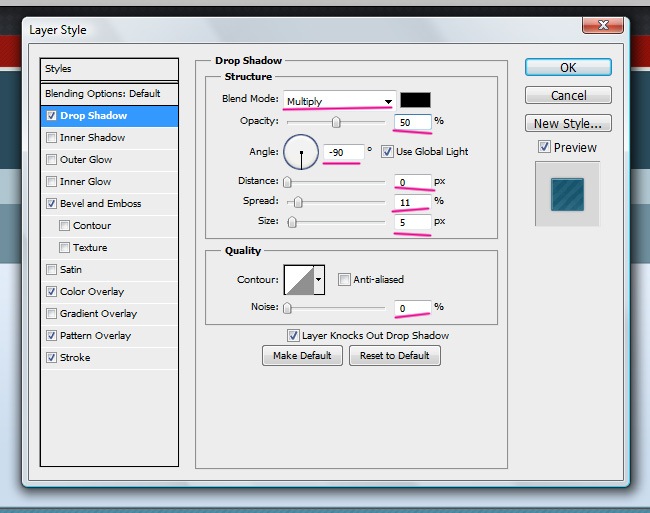
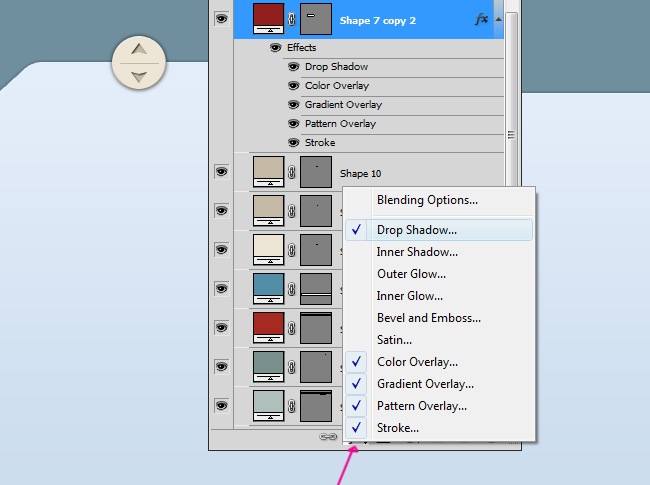
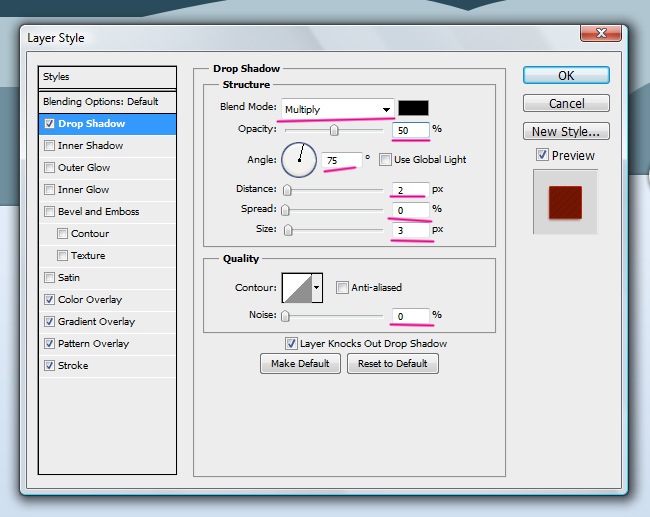
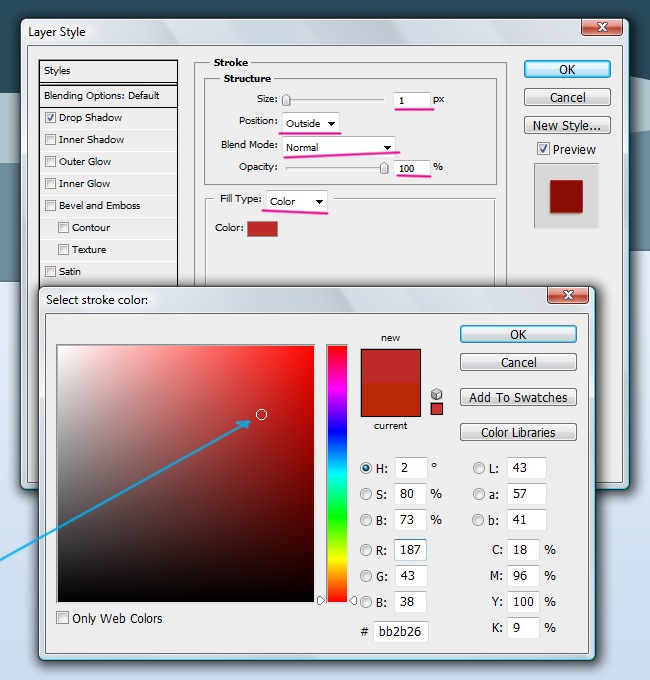
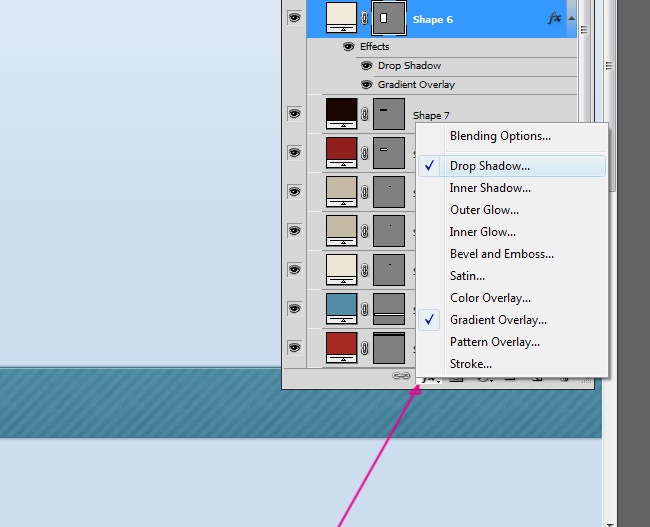
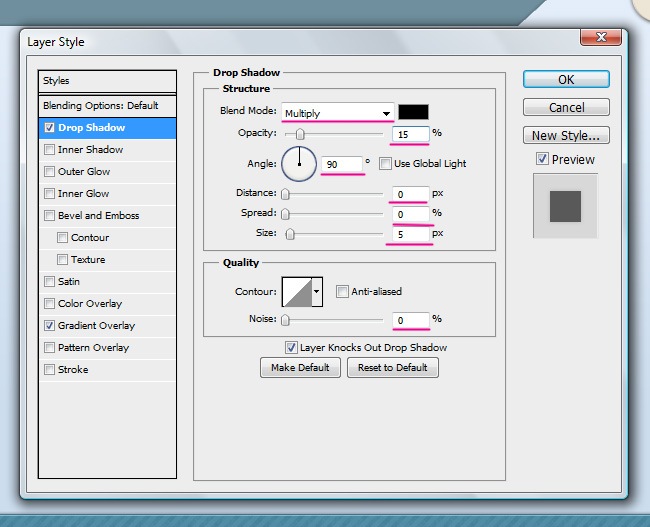
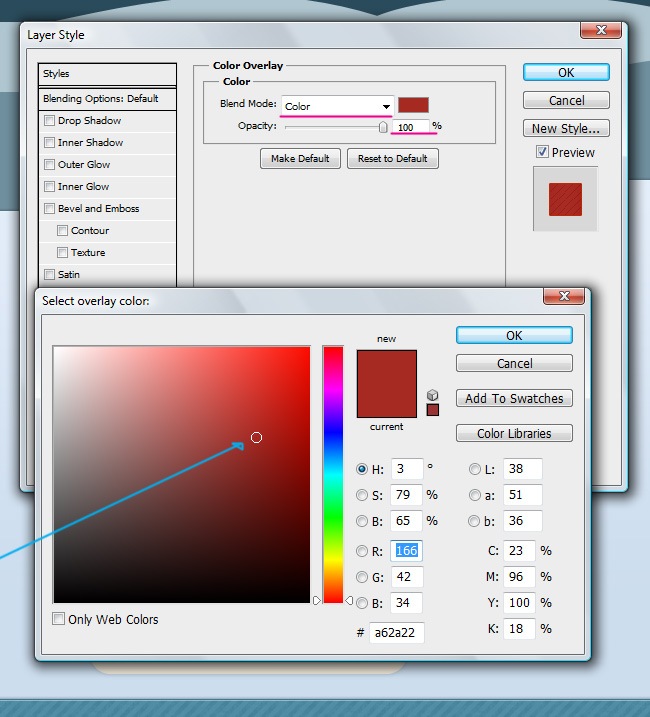
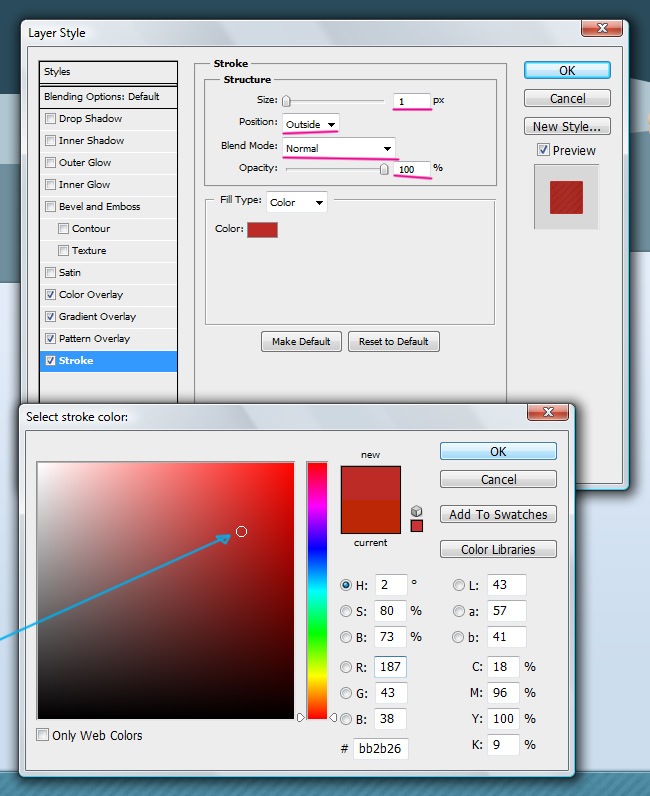
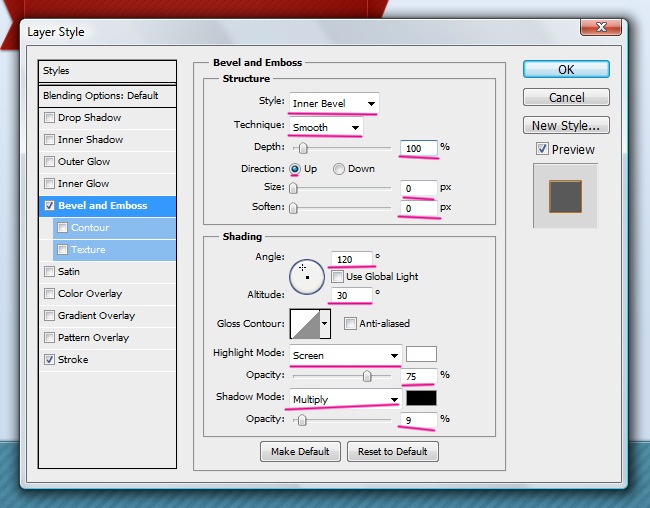
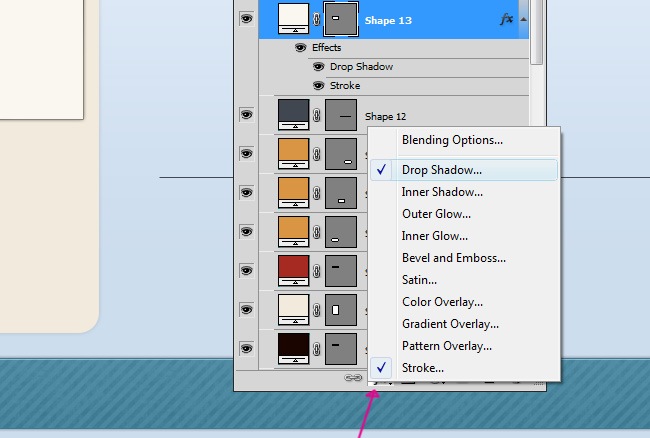
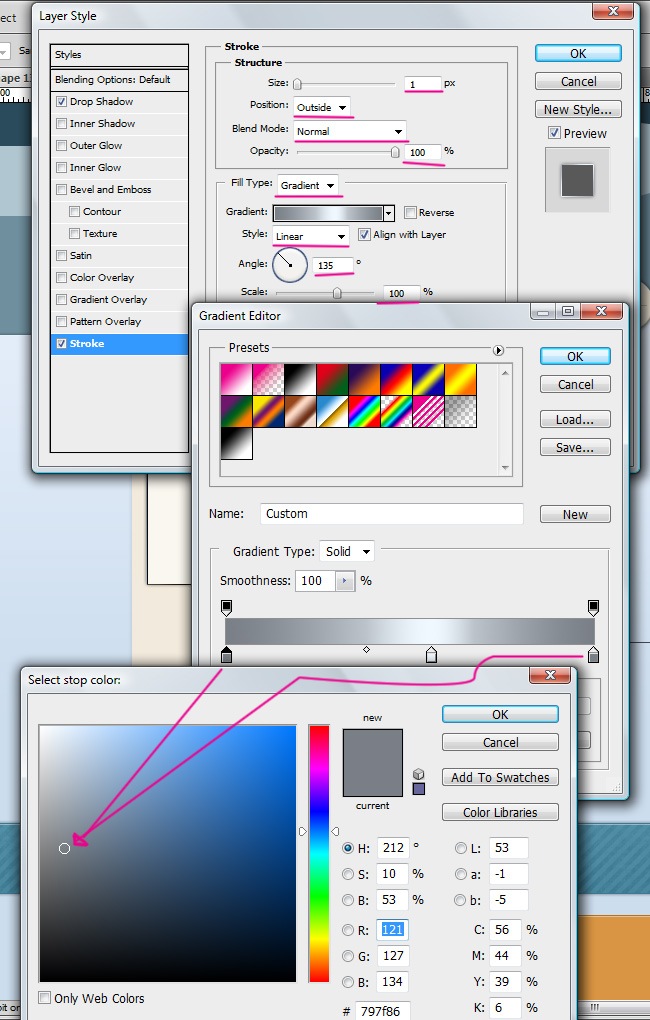
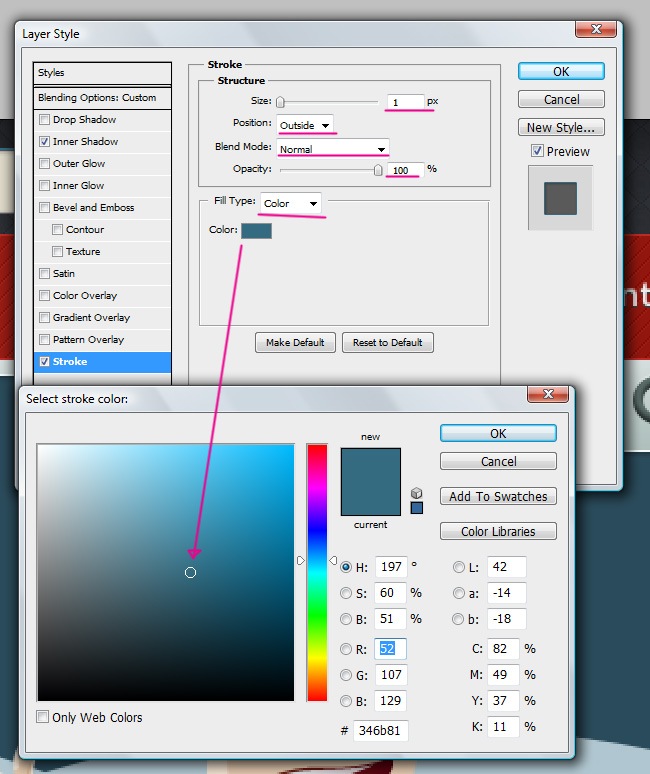
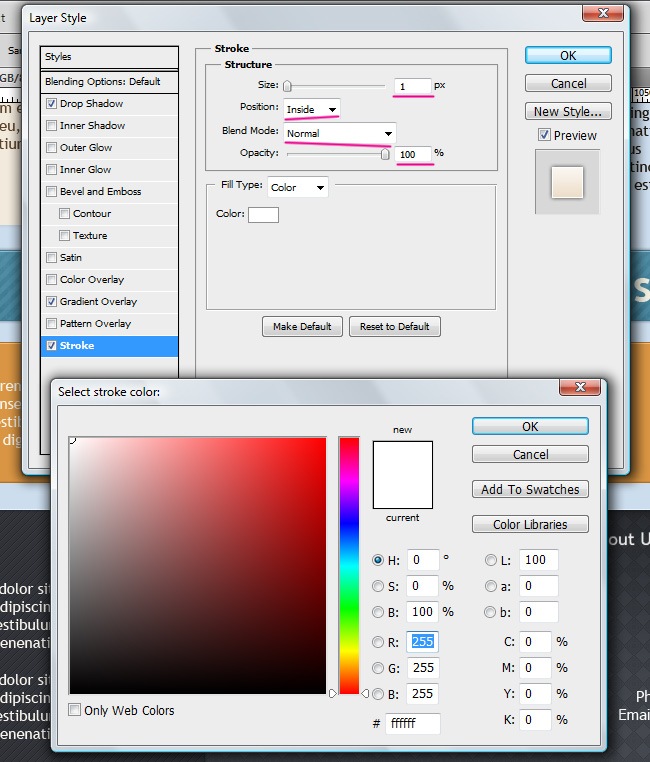
Having this set we can proceed with the effects, on this case the effects will be Drop Shadow, Color Overlay, Pattern Overlay and Stroke.
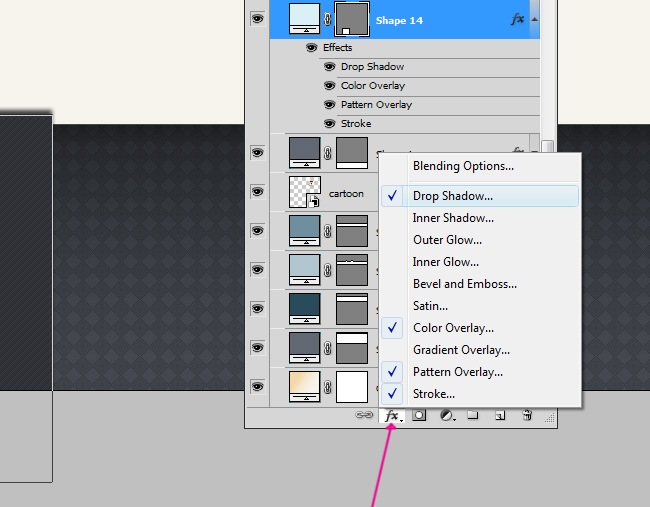
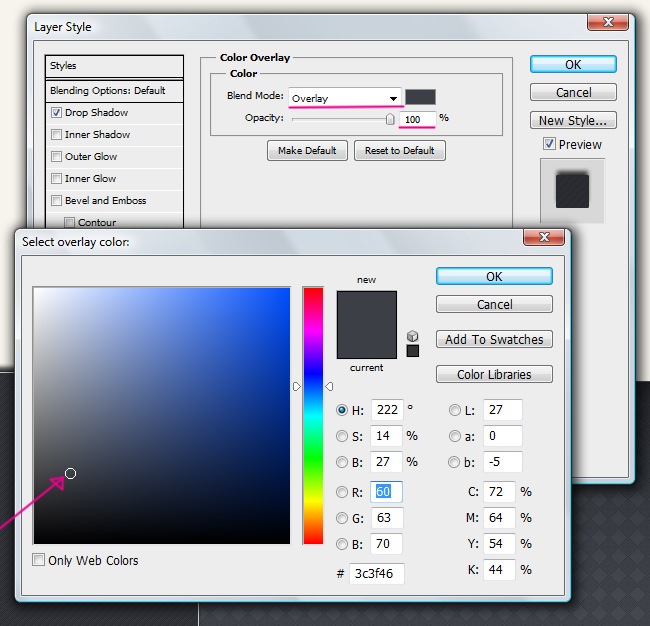
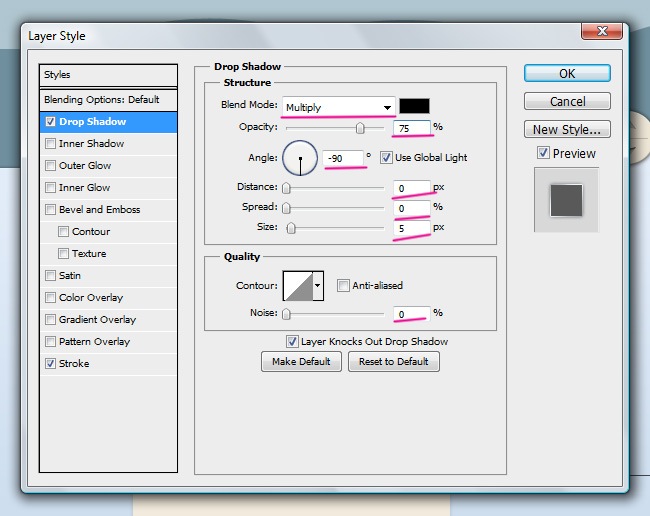
And now follow carefully the next screenshots to exactly replicate the same parameters of our design.

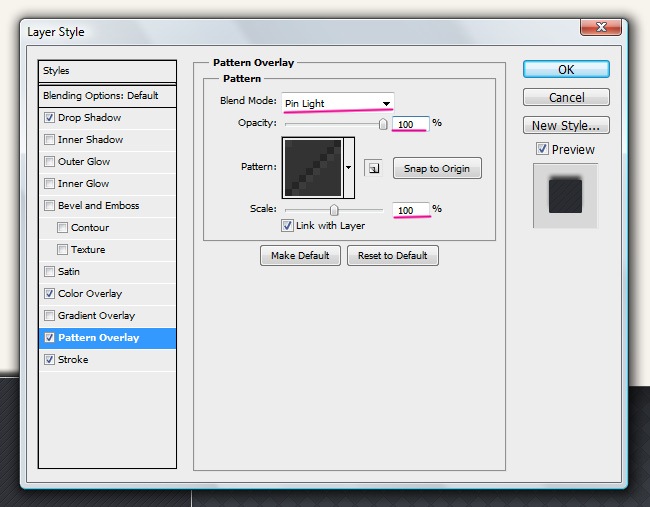
We changed the pattern for this box, though it’s also a custom design from our team.
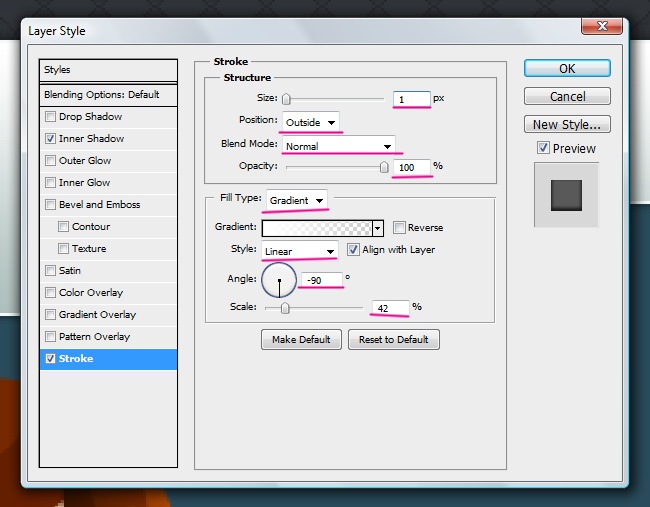
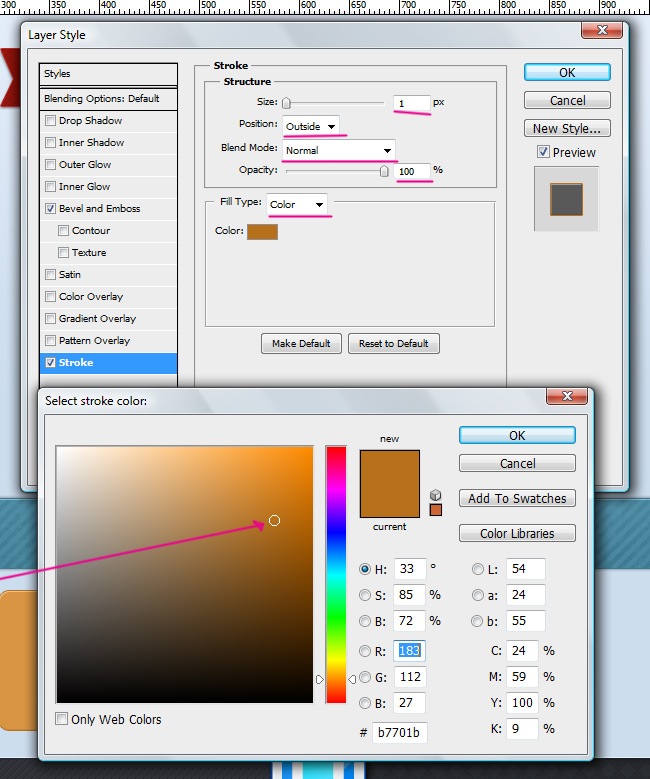
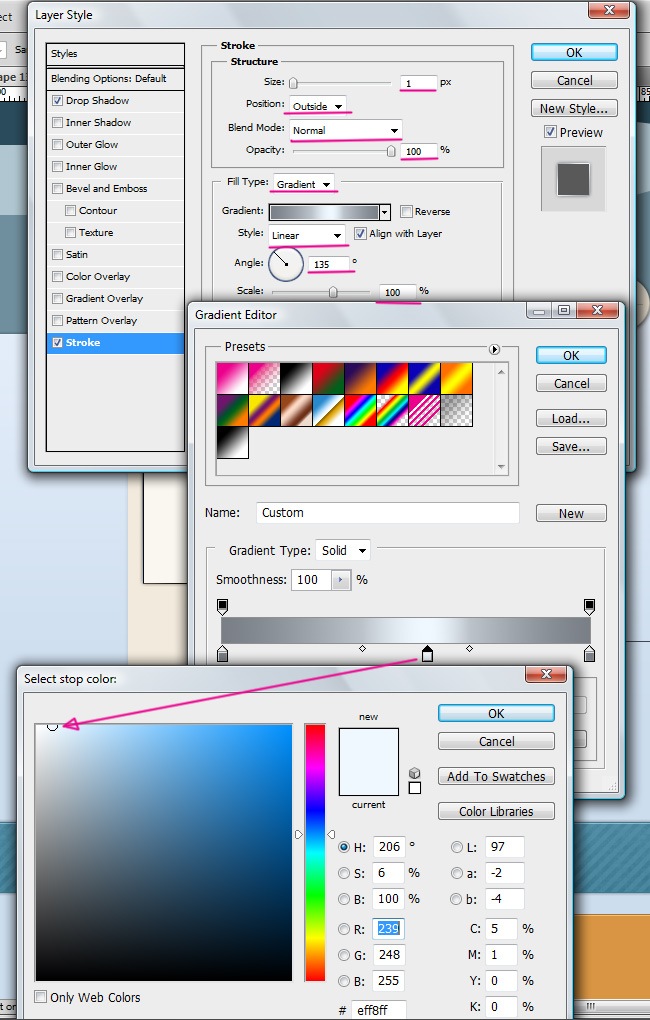
And finally the Stroke effect.
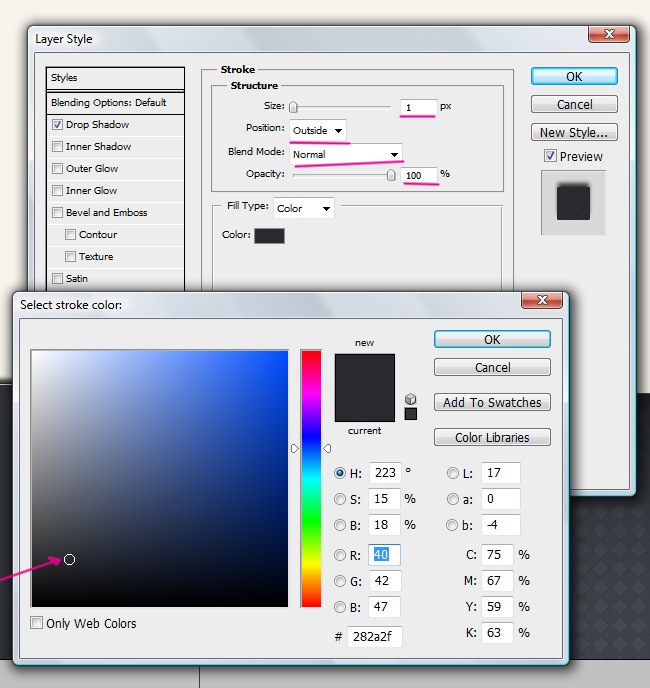
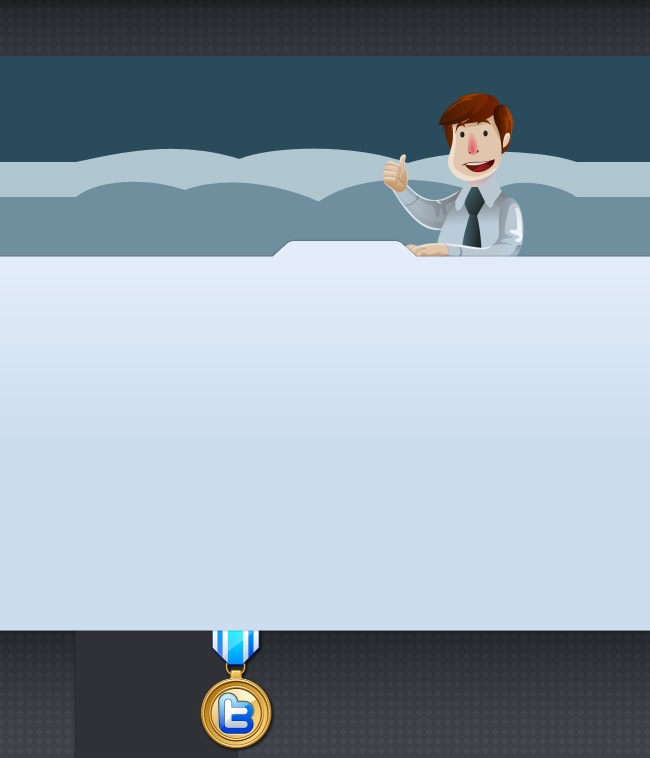
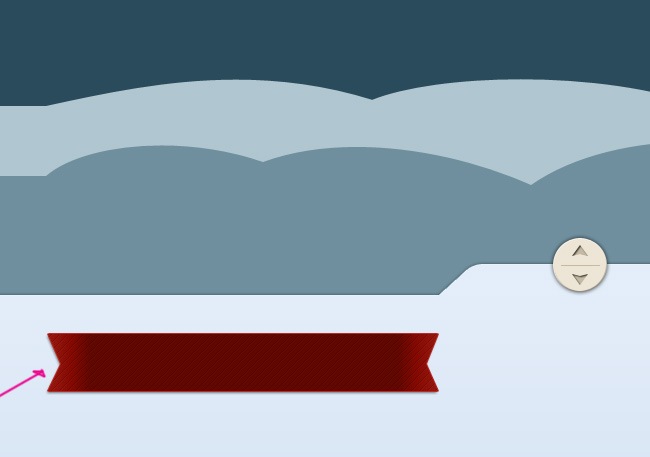
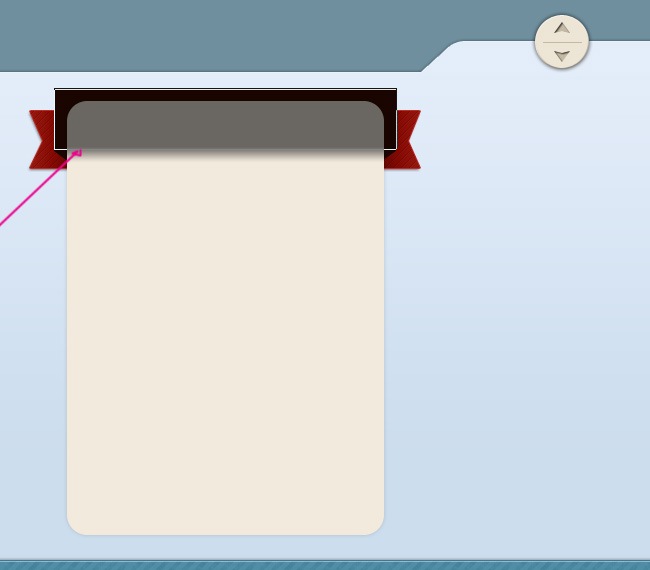
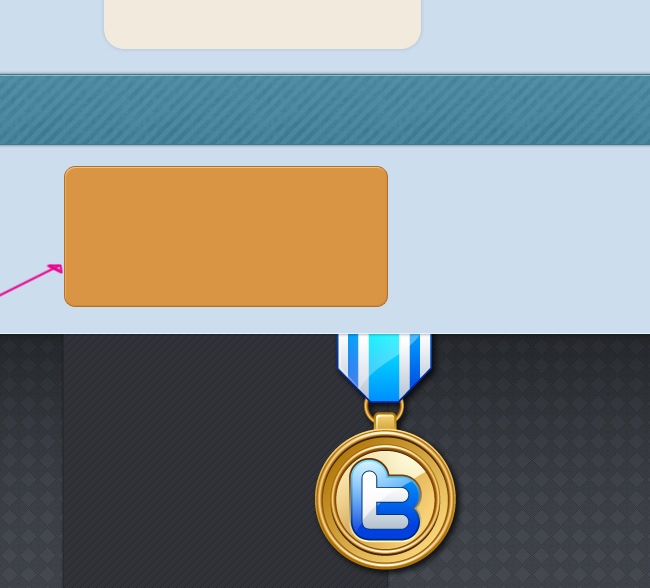
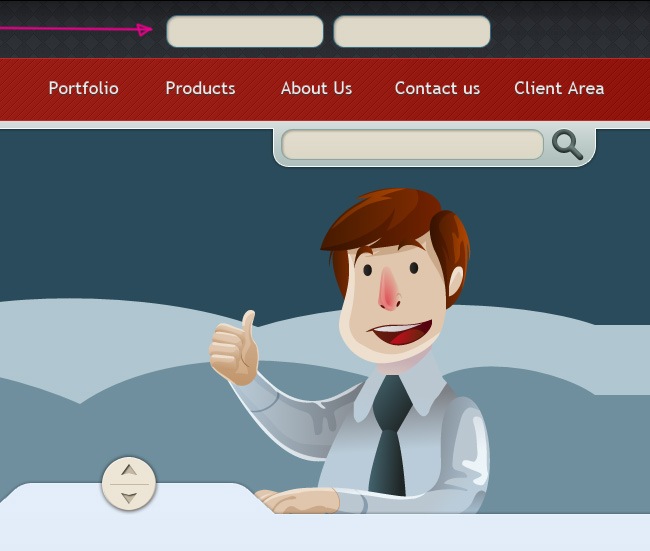
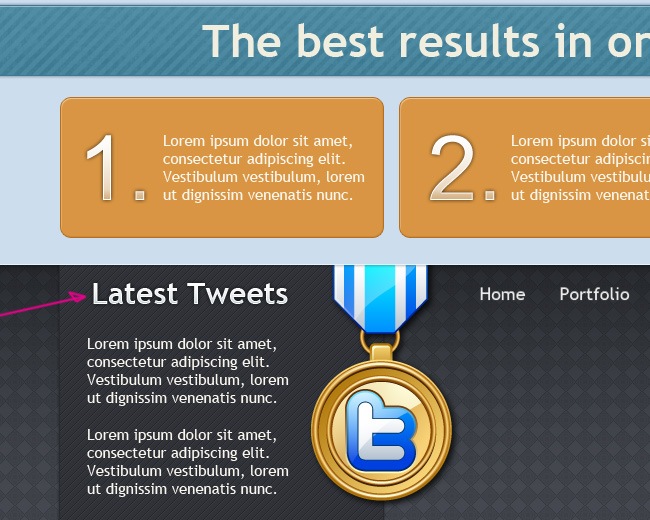
Our box looks awesome after adding these 4 effects, let’s take a look to it.
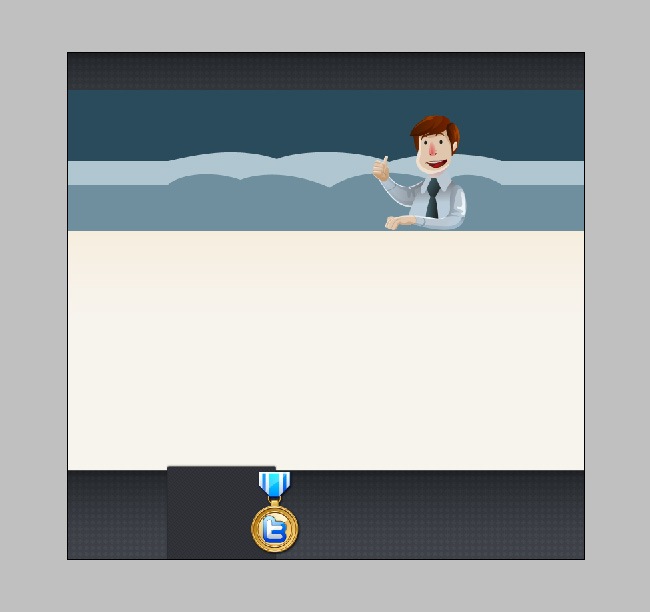
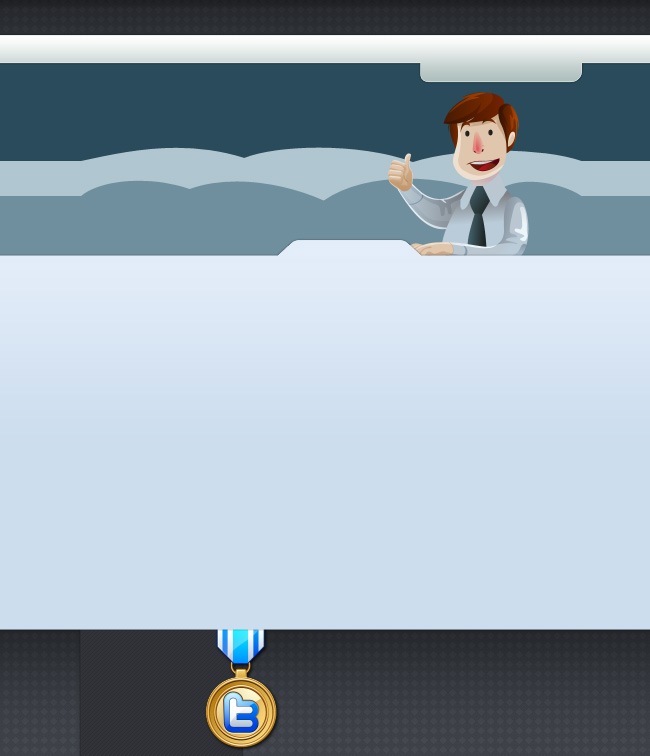
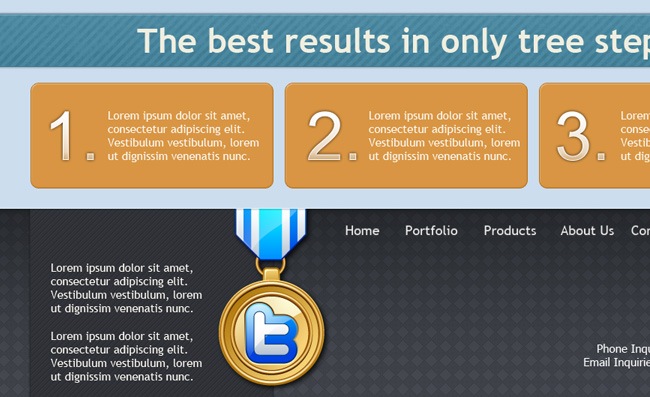
The next thing we did was to add another custom illustration, on this case a fancy Twitter badge.

This is a really nice detail that will prettify all the rest of our template.
5. Customize the content section
You will have to mix the rectangle and pen tools to create the next path.


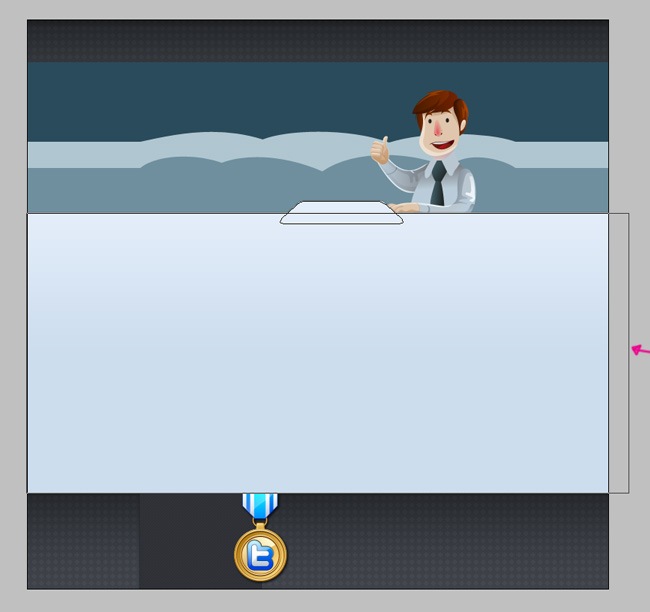
Then we need to add a gradient fill to our object.
On this case we will utilize two different effects, Drop Shadow and Stroke, let’s see how they work.
And the values for these effects are the following:
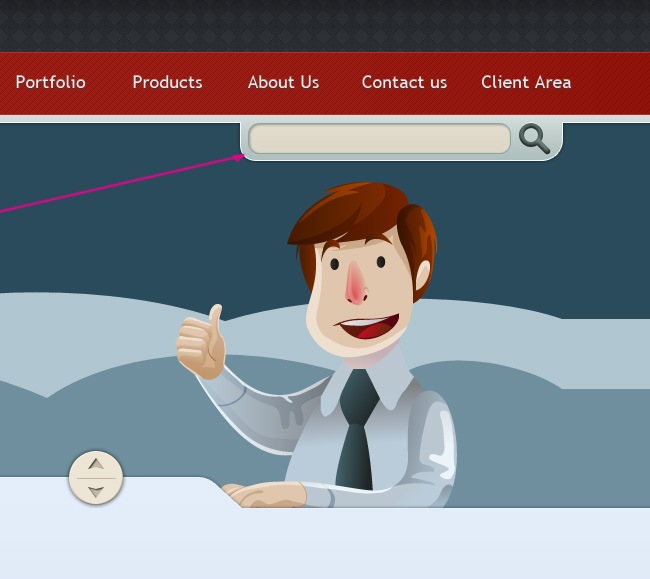
So far our web template is looking awesome, the general design is ready and now we must proceed with the details and additional objects.
One more combination of the pen and rectangle tools, on this case to create the top bar of the template.


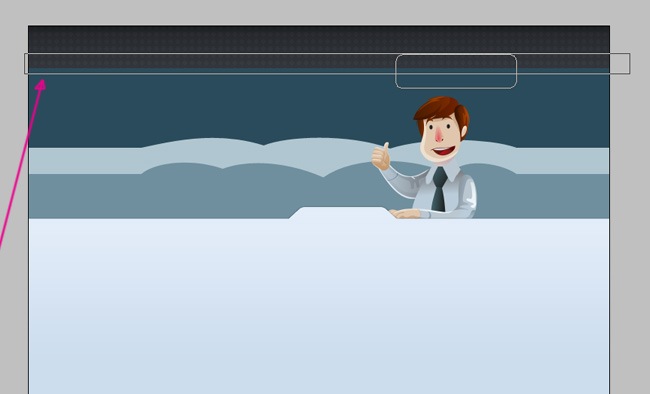
After completing the object, continue with the addition of a solid color fill.

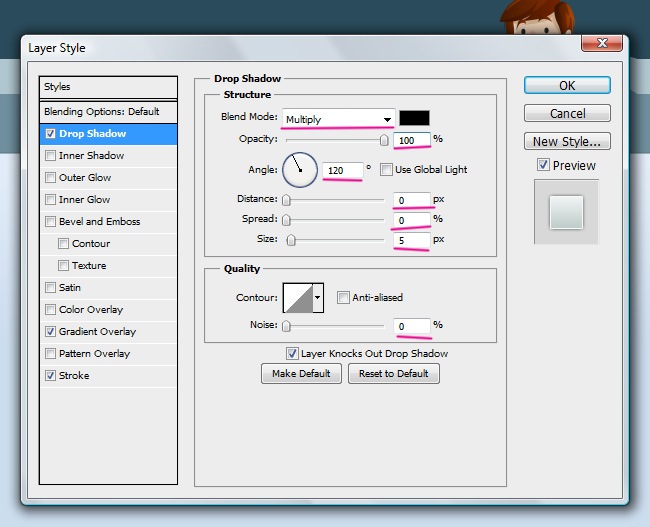
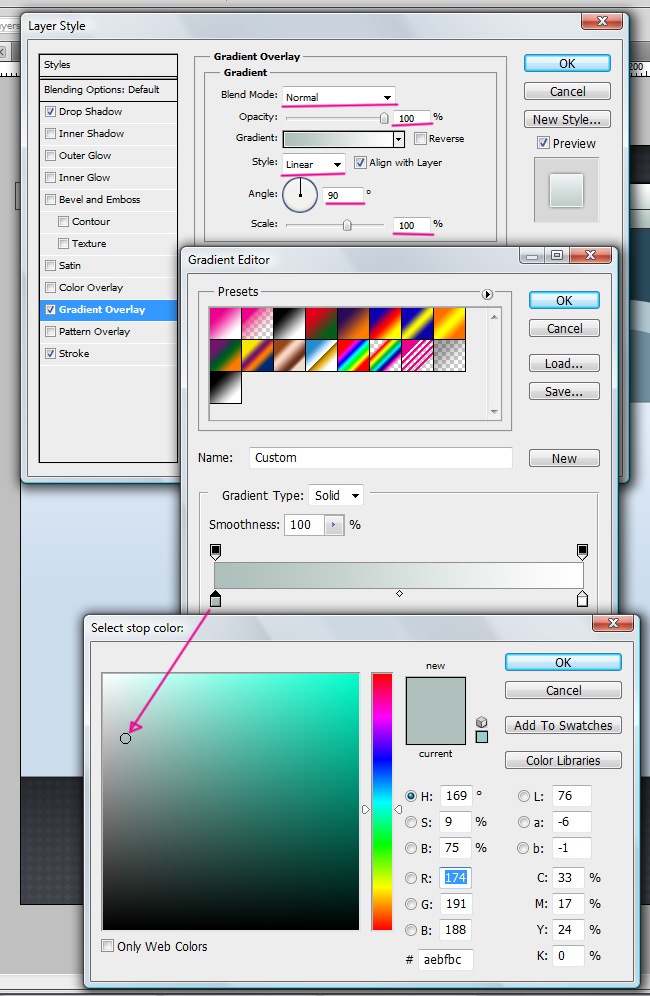
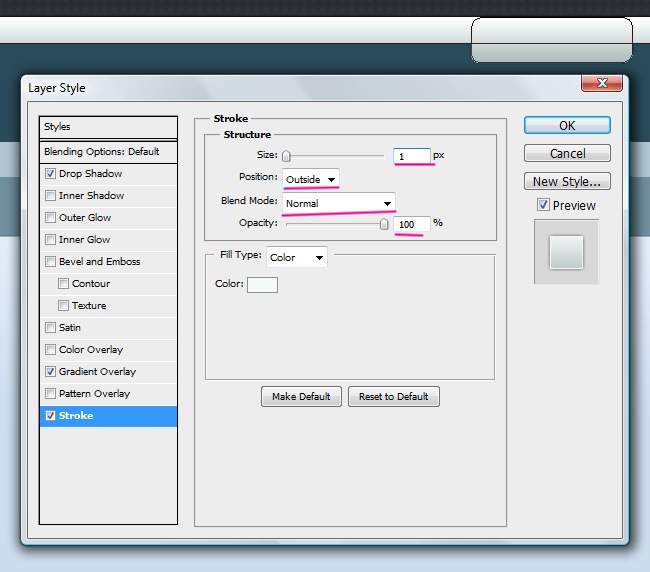
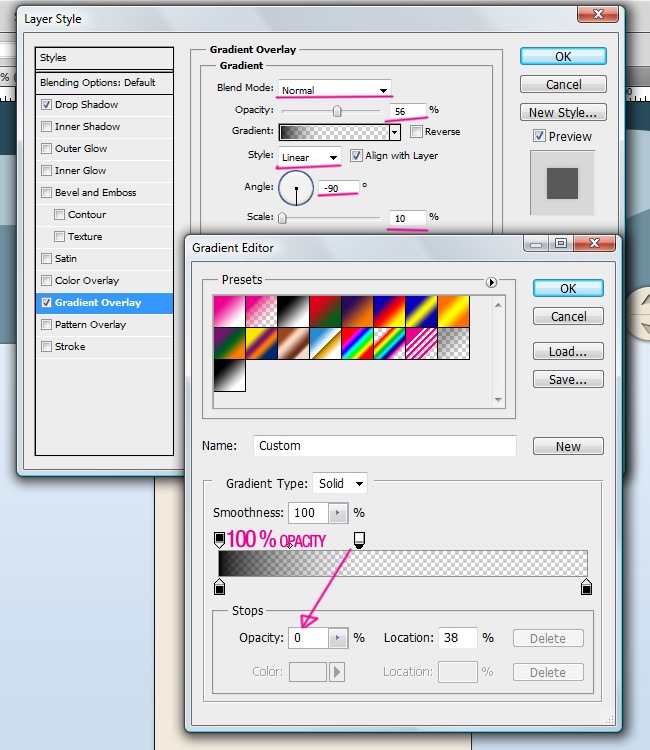
The effects for this object are Drop Shadow, Gradient Overlay and Stroke.
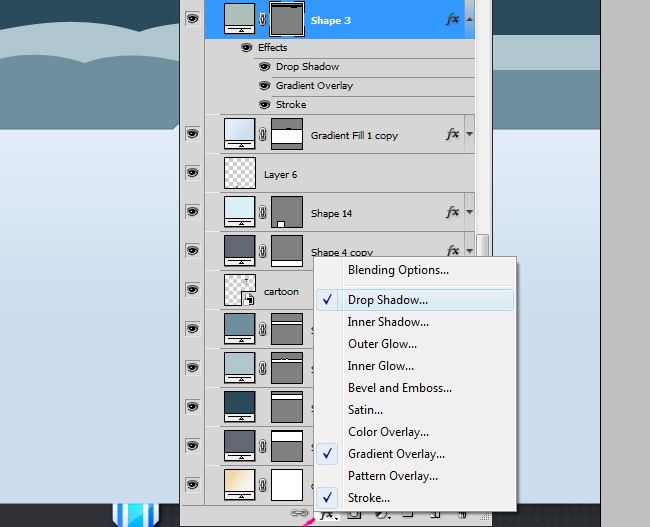
The next 3 screenshots will show you the parameters that you need to follow to complete these 3 effects.
That finishes the main top bar design, let’s see how it looks:
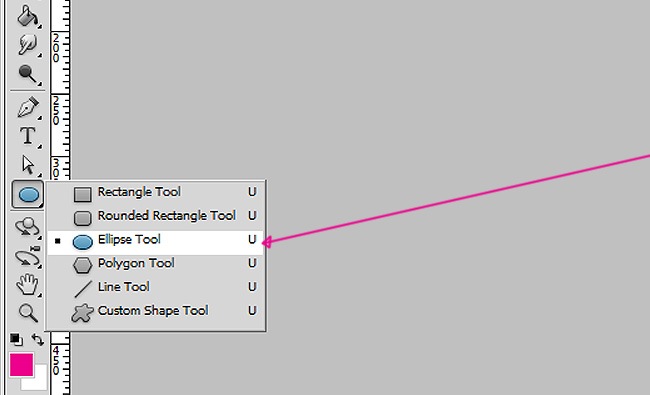
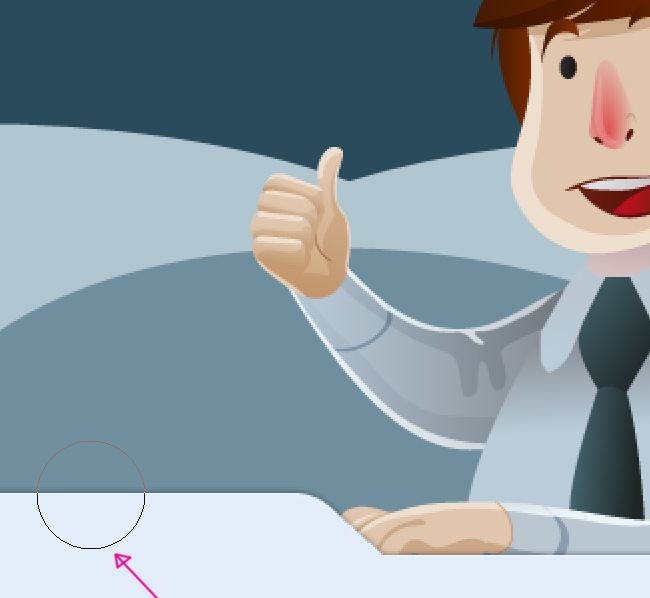
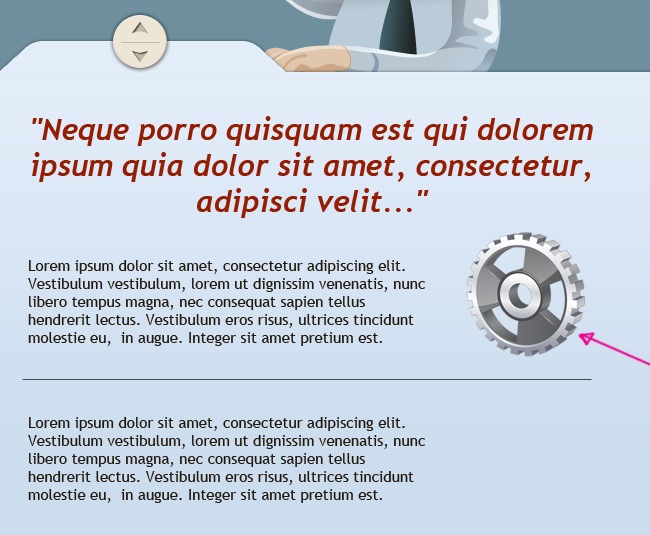
The next object is the zoom icon, you need to appropriate the ellipse tool and use it along with the pen tool in order to generate the path.

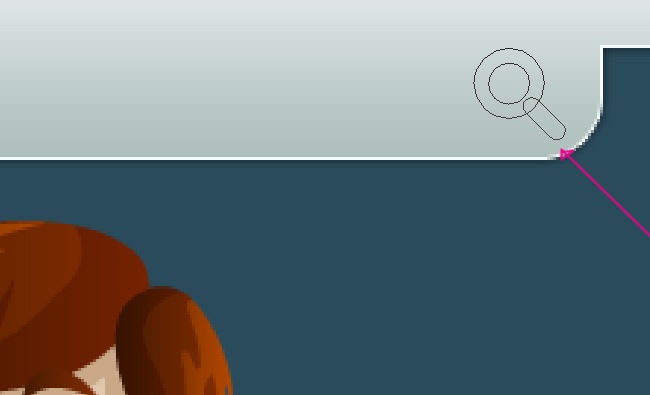
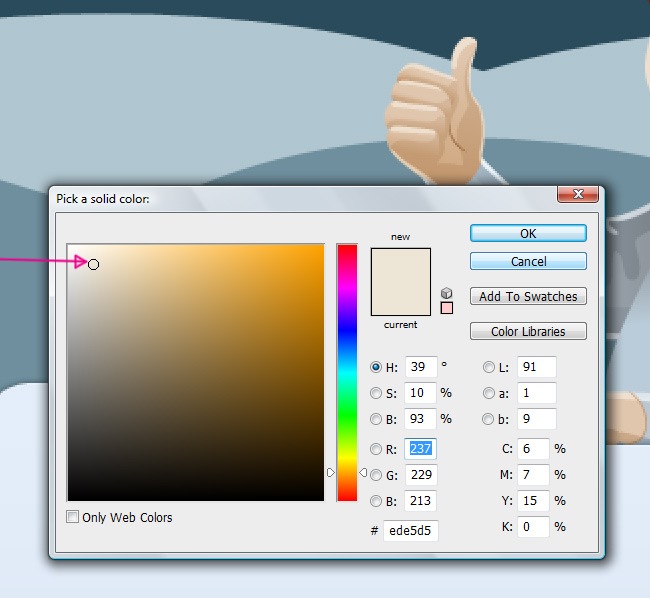
Use a solid color fill to start working with our zoom icon.
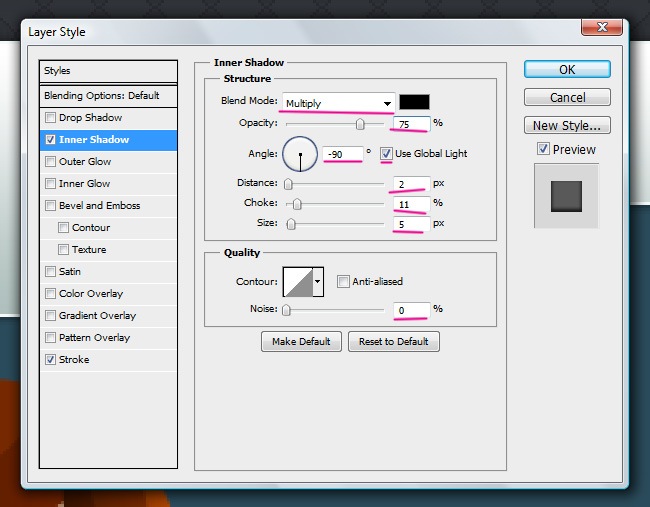
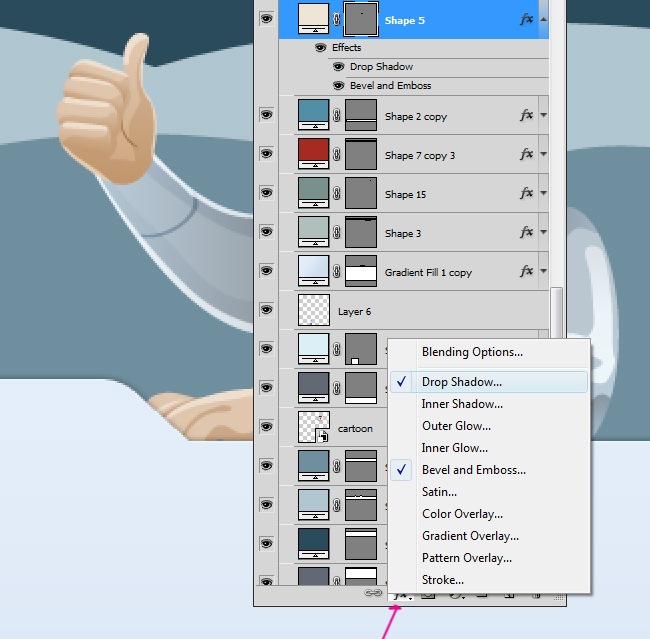
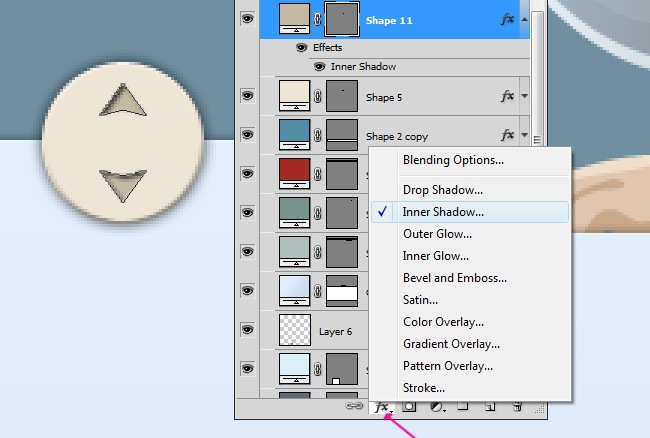
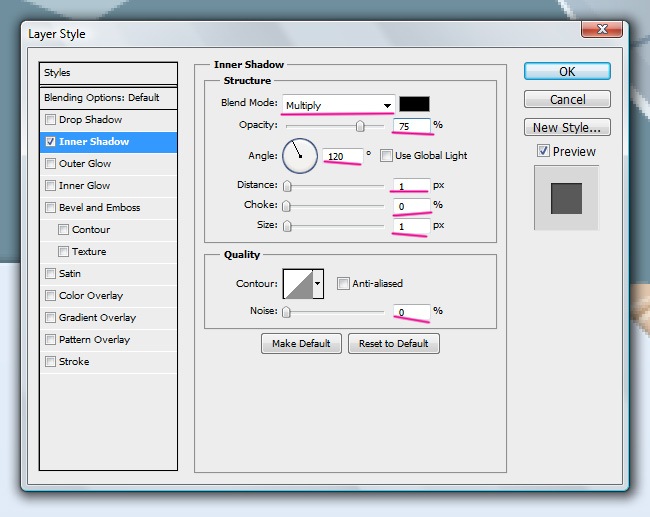
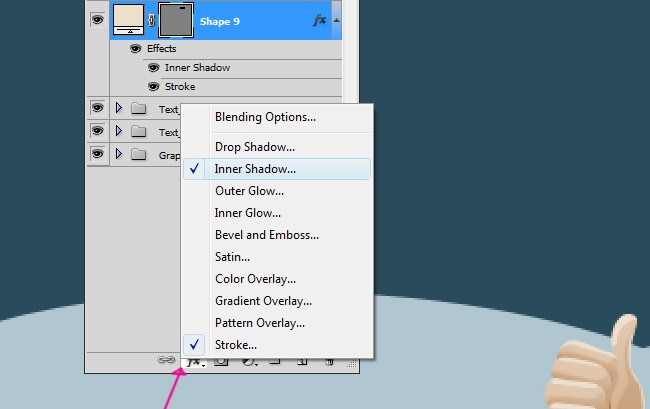
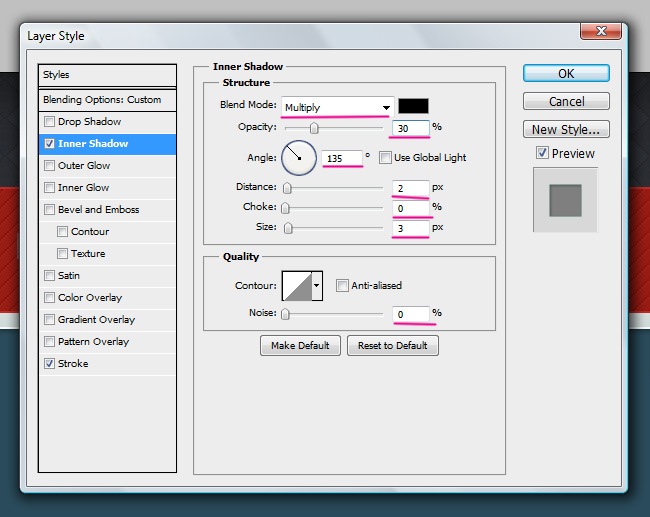
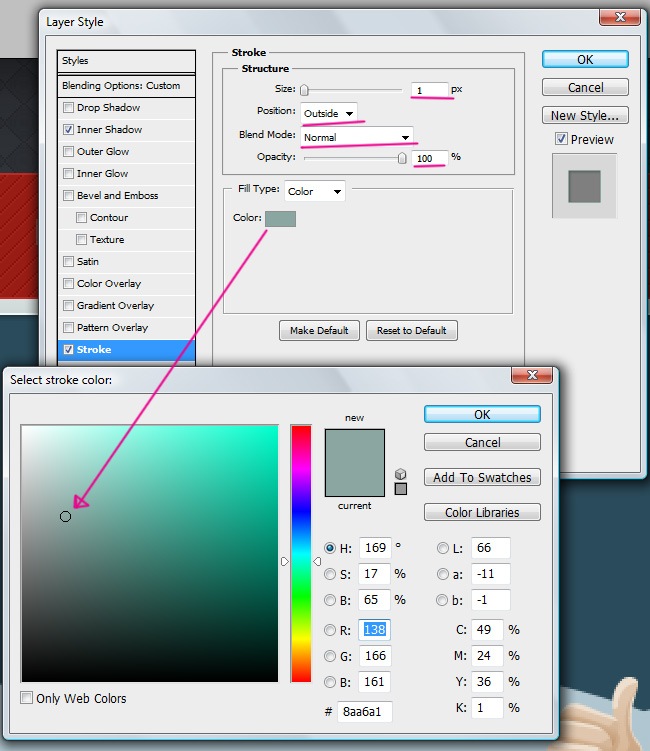
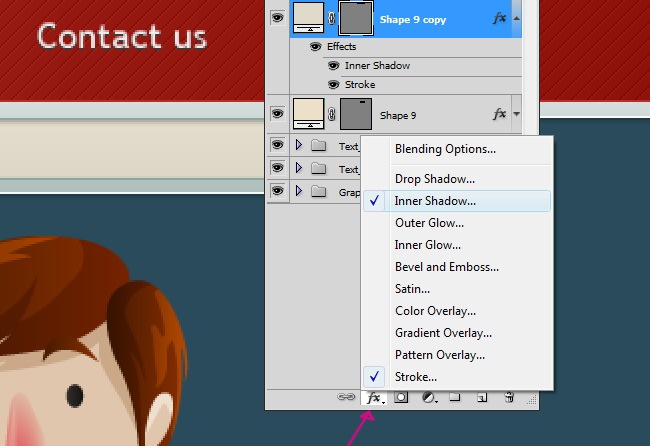
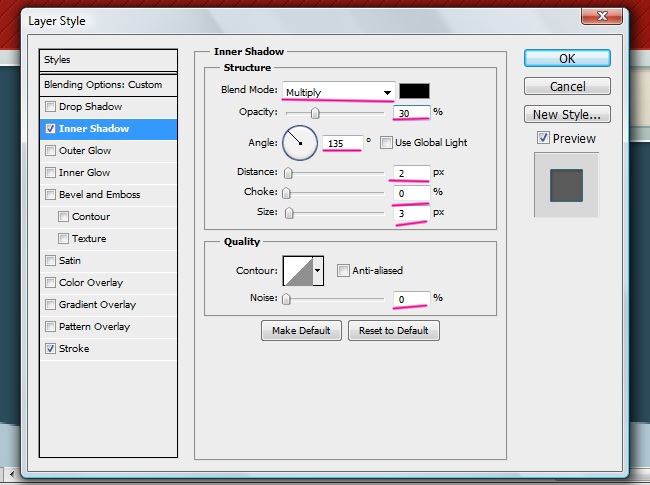
After doing this, continue adding two effects, Inner Shadow and Stroke.
These next two screenshots display the values that you must set for each one of the effects.
Now our zoom icon is ready to rumble.

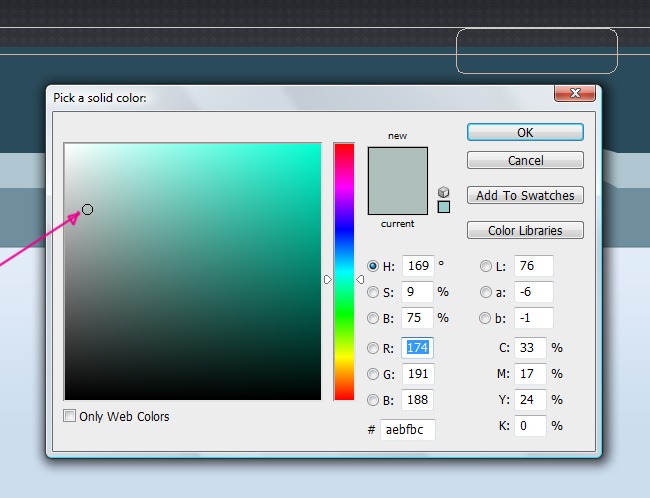
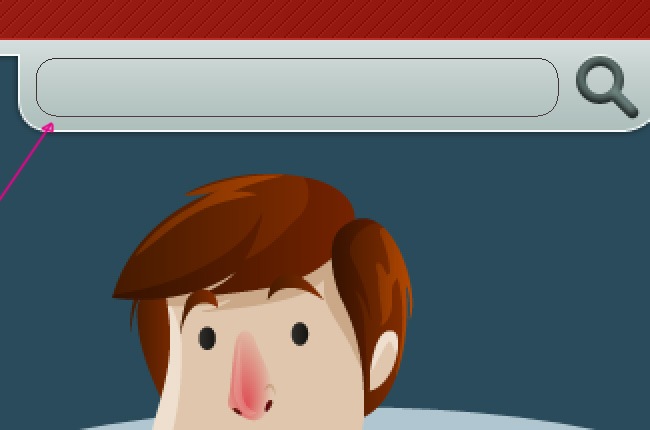
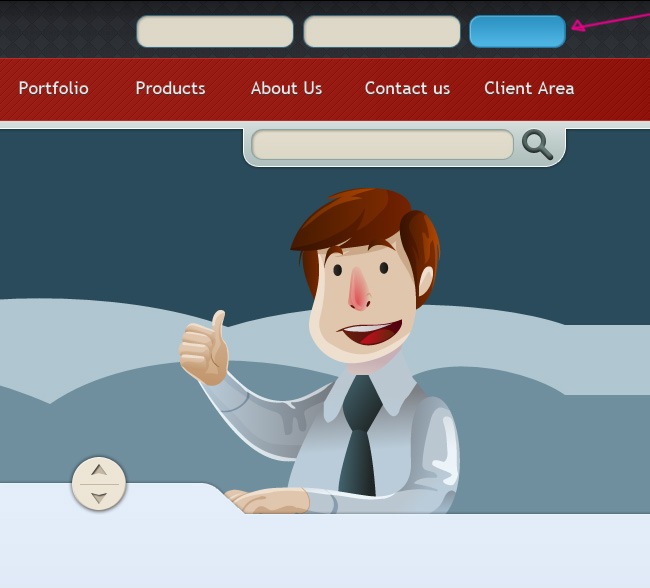
There must be another bar on top of the search bar to give it a better look, so grab your rectangle tool and draw the figure.
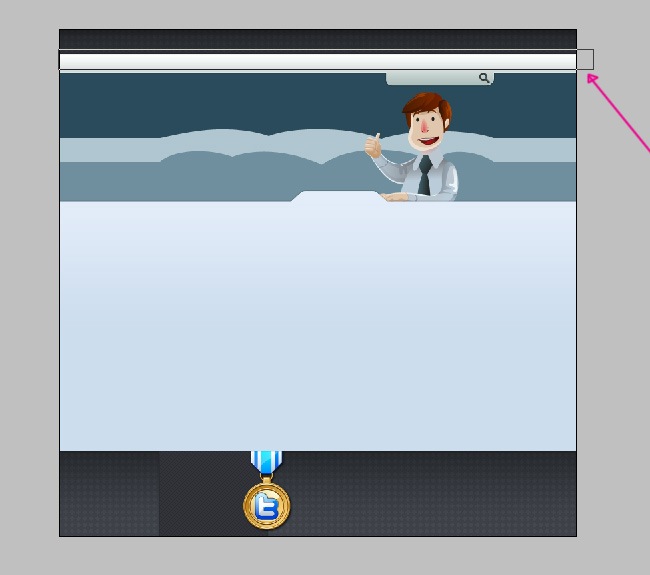
And now we filled utilizing a solid color fill.

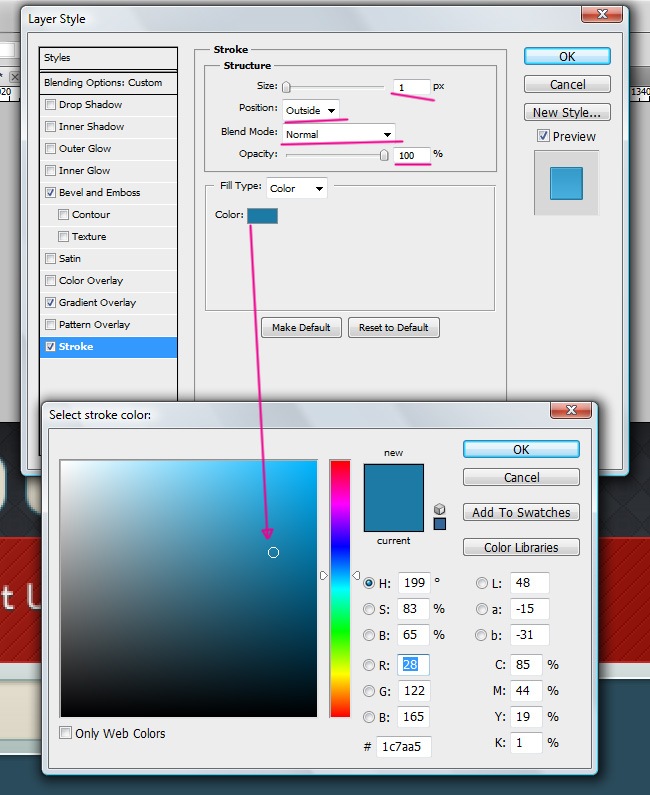
We will be using Color Overlay, Gradient Overlay, Pattern Overlay and Stroke to work with this bar.

These are the parameters for each one of the effects:

And our top bar looks awesome after completing its customization.

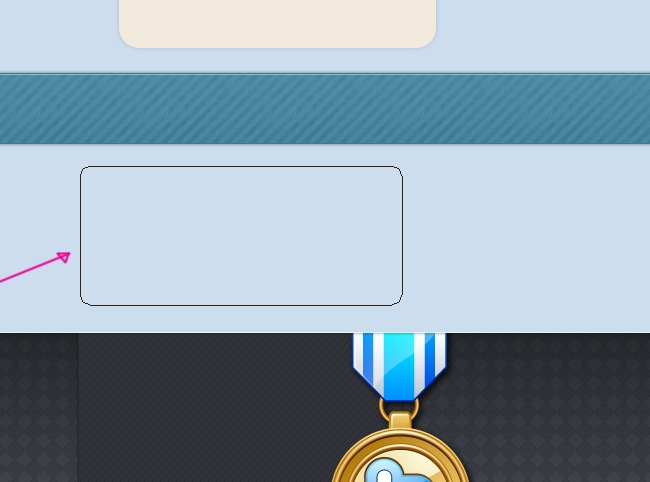
The next object is very similar, start by making it with the rectangle tool.

Then we select the solid color to fill our object.
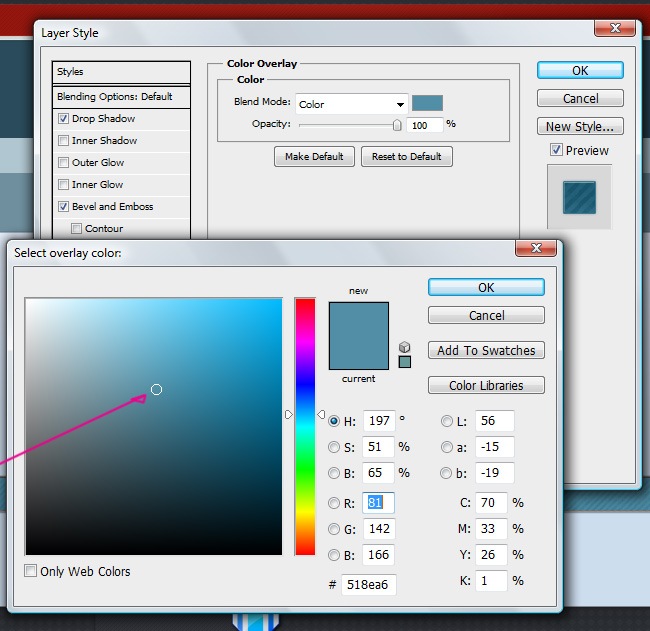
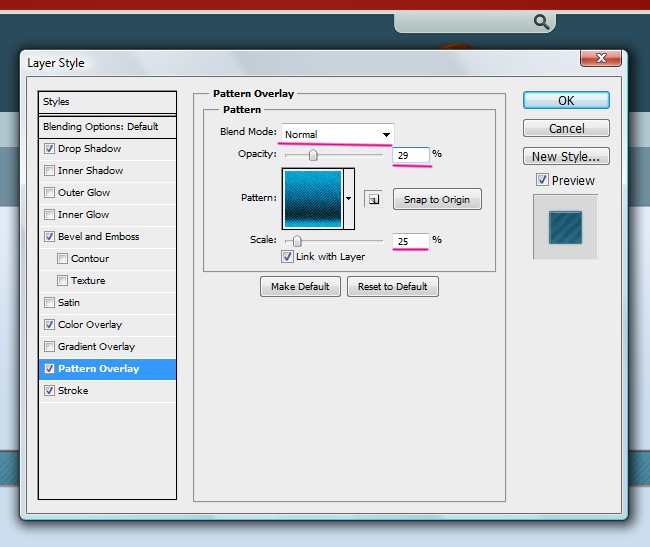
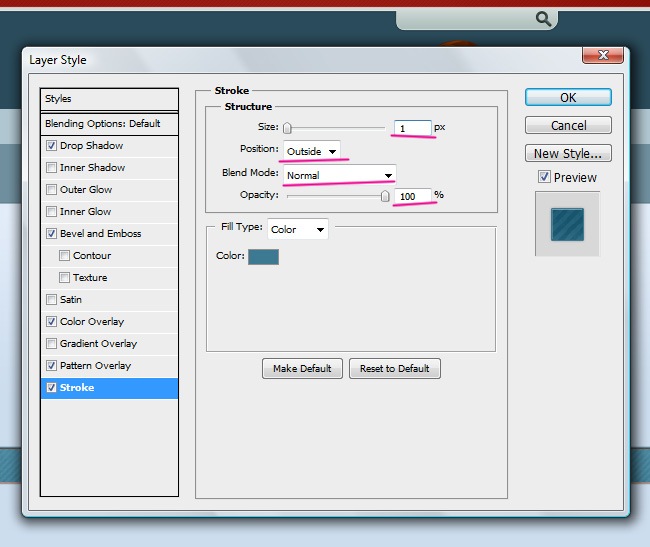
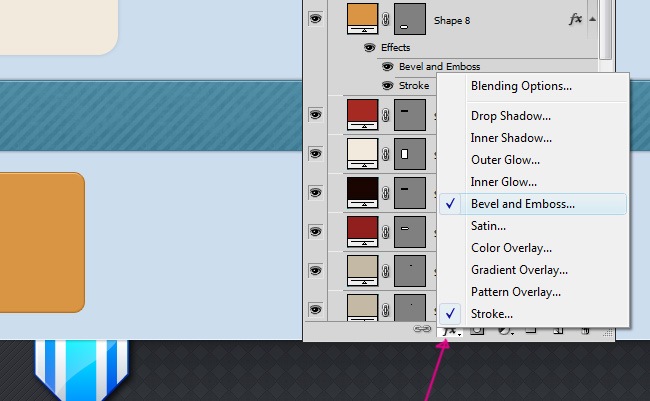
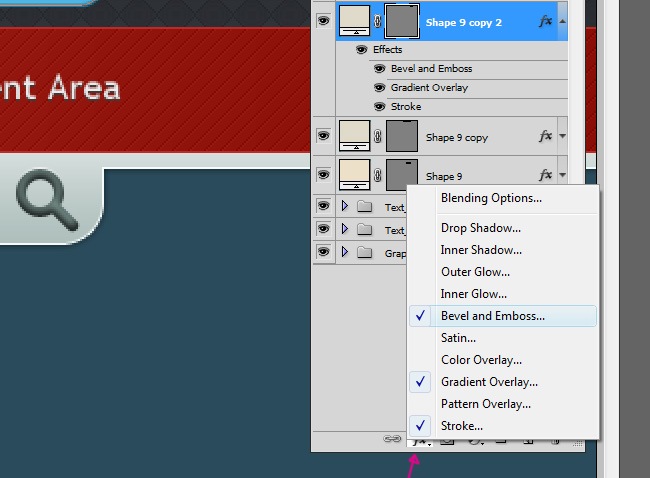
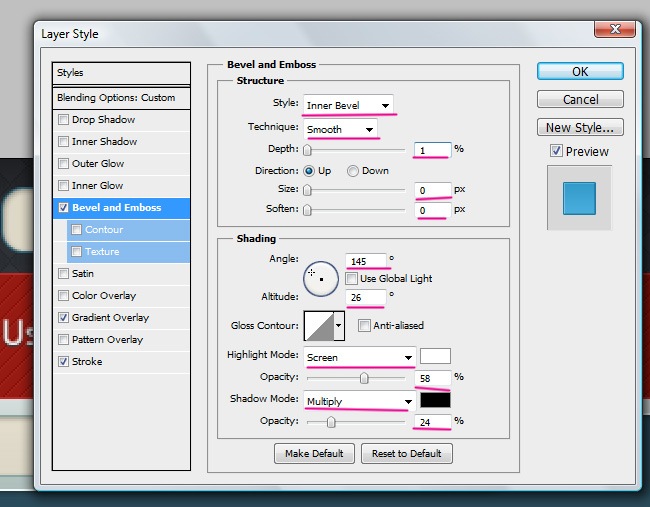
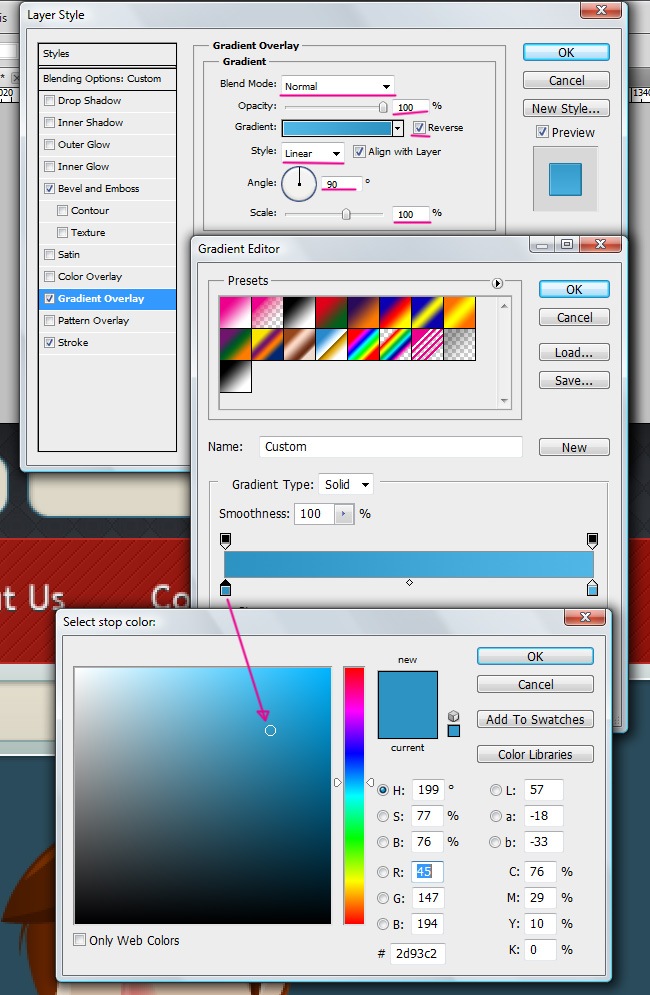
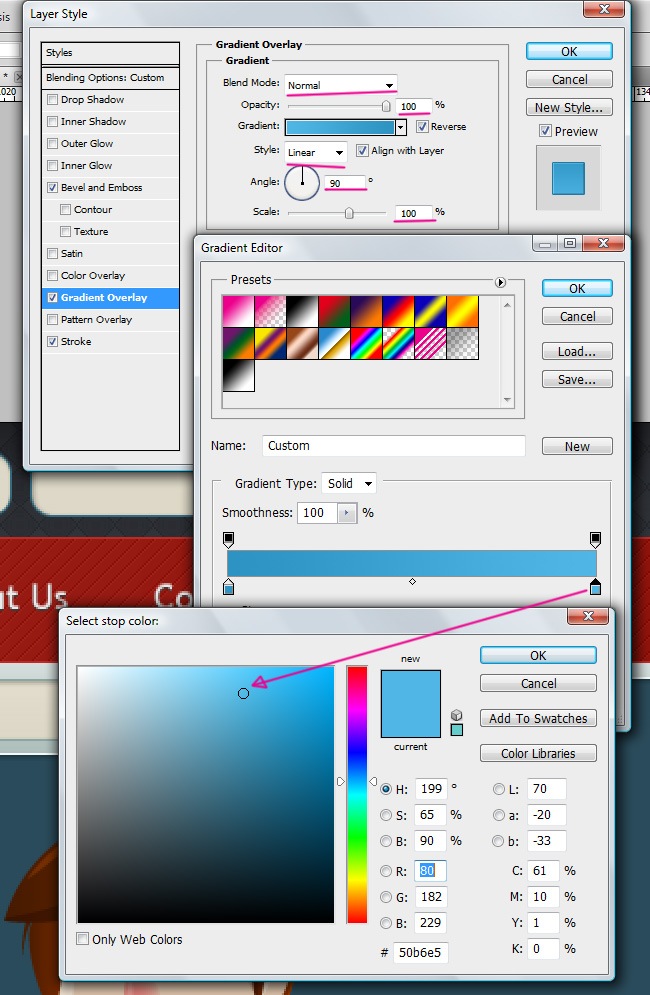
Then we begin adding effects, on this case they’re going to be Drop Shadow, Bevel and Emboss, Color Overlay, Pattern Overlay and Stroke. Coming up next, the values that you need to input on each effect.
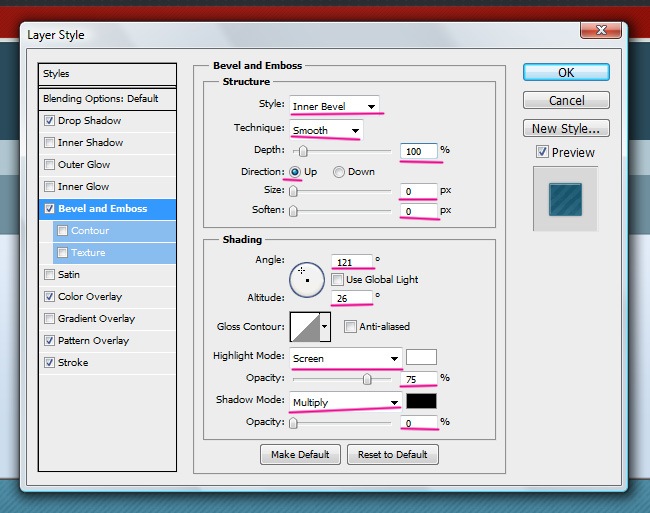
For the Pattern Overlay we did one more custom texture with the assistance of our design crew.
And this part is ready, let’s take a look to it:

Next is a small ellipse on top of the content’s flap.
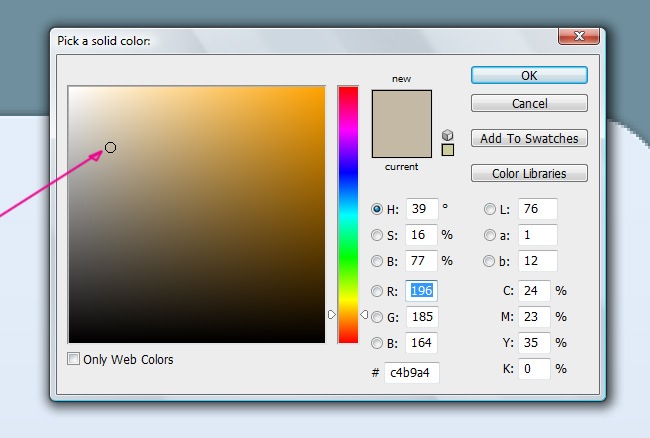
Fill the ellipse with the following solid color:

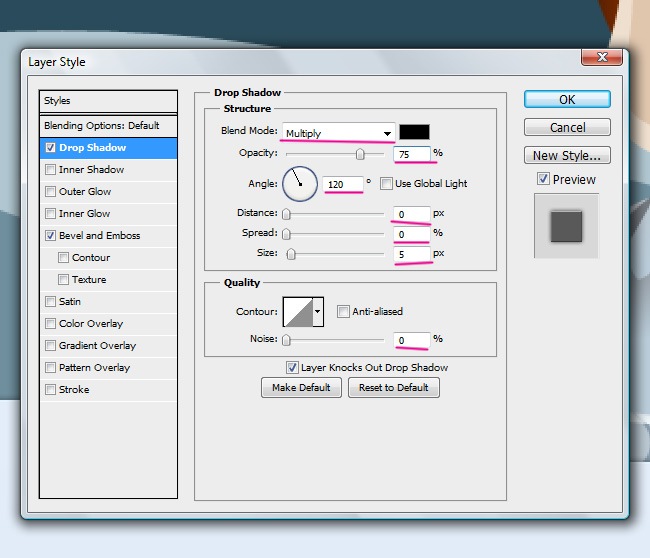
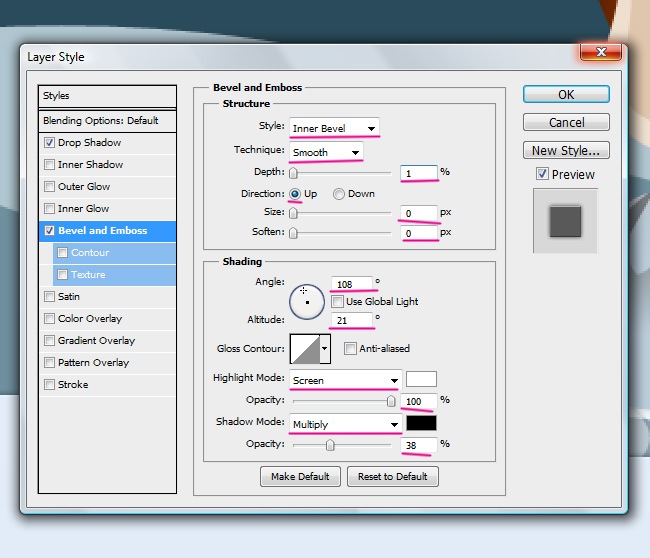
As for the effects, we’re about to use Drop Shadow and Bevel and Emboss.
And these are the parameters to follow on these two cases:
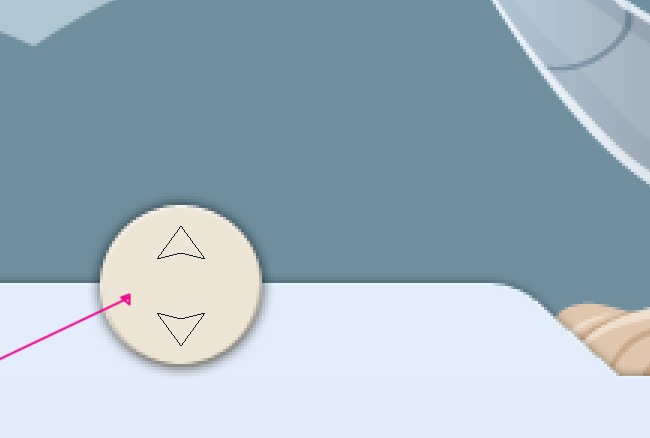
That’s all you need to make this fancy button that holds the flap.

And now we use the pen tool to make the two arrows that are going on top of the button.

Then we fill the arrows utilizing a solid color fill.
Then we add an Inner Shadow effect to our arrows.
The parameters for this effect are the following:
And well, they certainly look good, let’s take a look to our arrows:

Now comes a divisor line between the arrows, trace it using your rectangle tool.

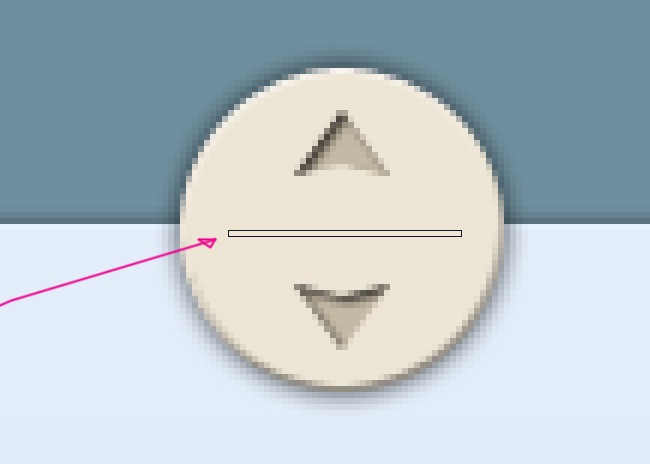
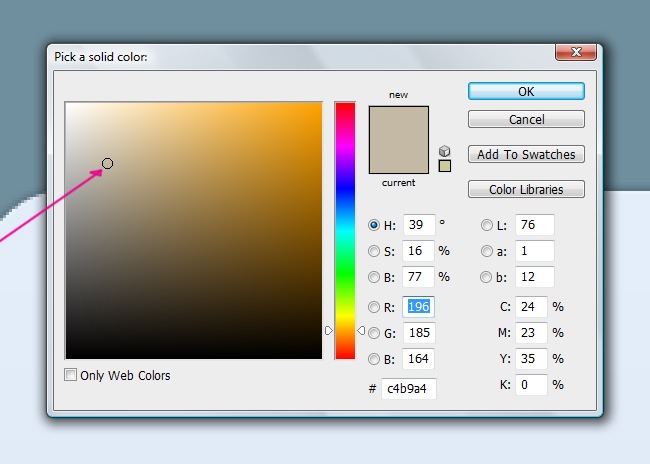
Choose a solid color to fill the rectangle that we just did.


Select the pen tool in order to begin with the next element.

This is the object that you need to trace:

Now fill it using the following solid color:
Having our object filled, we can continue with the next part, which corresponds to the effects.

This object has tons of effects: Drop Shadow, Color Overlay, Gradient Overlay, Pattern Overlay and Stroke, pay attention to these following screenshots to see the corresponding parameters for each one of the effects.

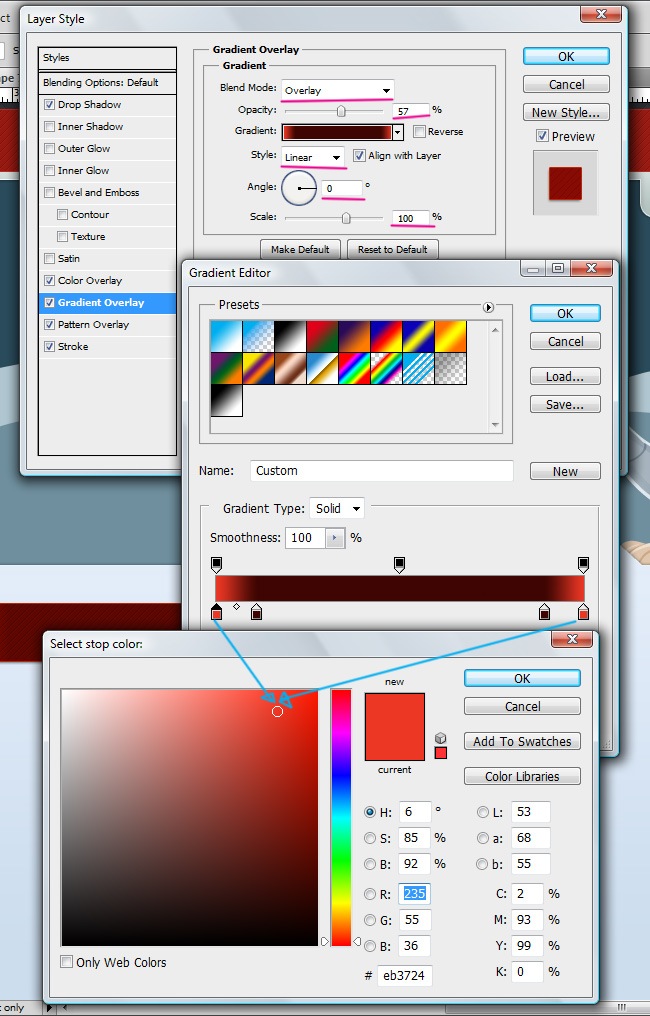
We also did a custom pattern to implement on this case.
And after completing all these effects, this is how our object is looking now:
Now it’s time for the next shape, grab your pen tool and trace it.

Then choose a solid color and simply fill the object.
For the next shape you may want to utilize the Rounded Rectangle Tool.
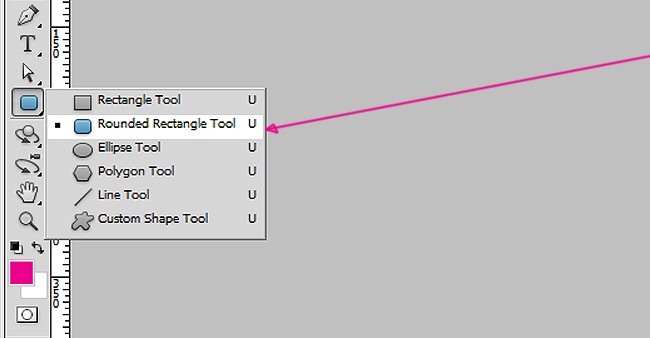
Because the next object will have precisely that form.

Fill the object with this next solid color:

Then proceed by adding a Drop Shadow effect and a Gradient Overlay.
After that, our object is set.
Grab the rectangle tool in order to create the next figure.

For start, let’s fill the shape using a solid color.

The effects’ list for this object consists of Color Overlay, Gradient Overlay, Pattern Overlay and Stroke, now let us show you the screenshots that will guide you whilst filling the parameters:
On this effect, we repeat the same custom pattern that we used before.
And finally the Stroke effect.
With these effects implemented, our object is ready.
We have to use again the Rounded Rectangle Tool in order to draw the next shape.
And then we fill it with this next solid color:

Then we need to add these two effects: Bevel and Emboss and Stroke.
With these next screenshots you will be able to duplicate the parameters that we utilized on these effects.
That’s all we need to complete these two objects.
OK, now we need you to duplicate this layer two times, just drag the layer to the Add New Layer button or right click and select Duplicate Layer.
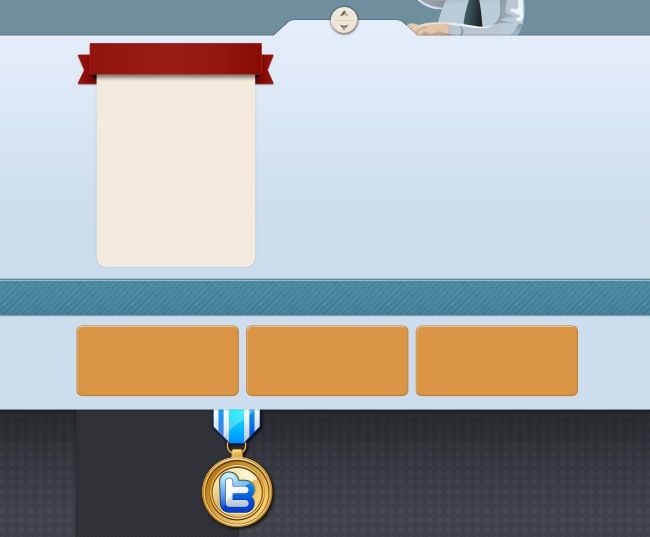
Using the rectangle tool, create a very light and large object.


And fill this object with a solid color.
With the rectangle tool we’re now about to create the following object:

And the solid color comes again to help us fill this rectangle.


This object comes with a Drop Shadow and Stroke effects.
And our object is now set.

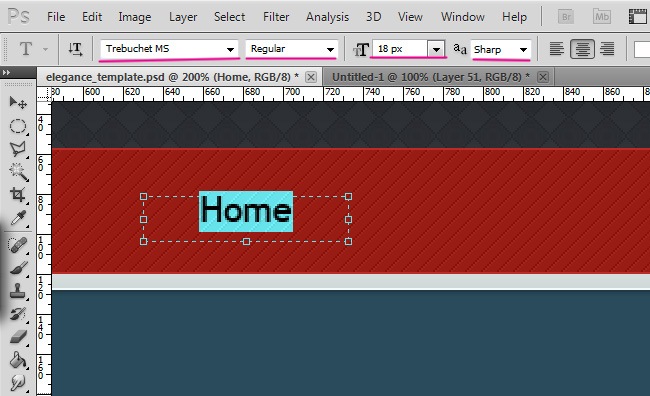
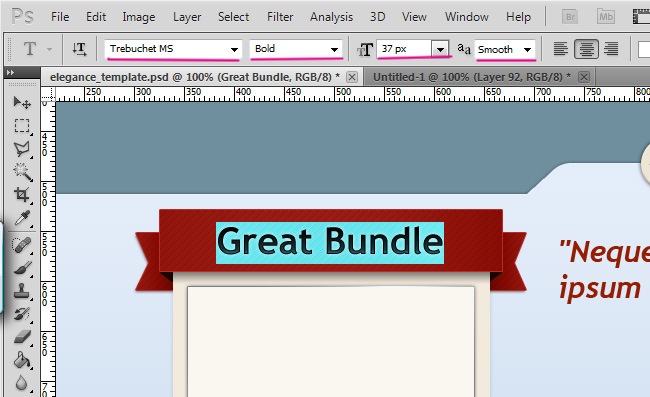
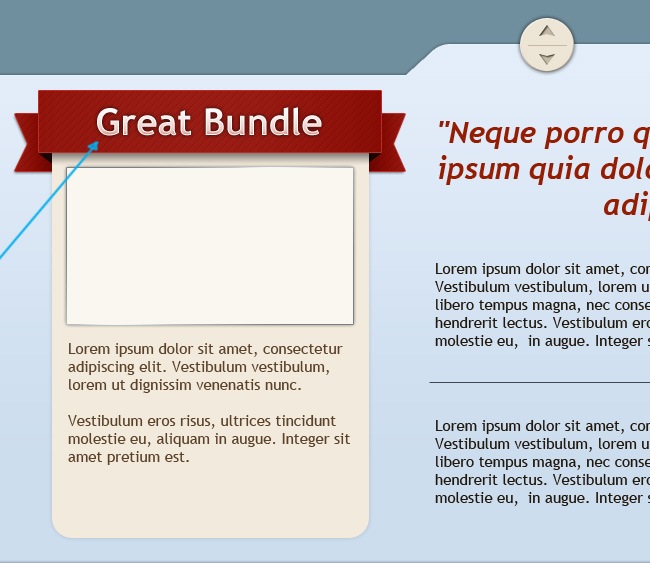
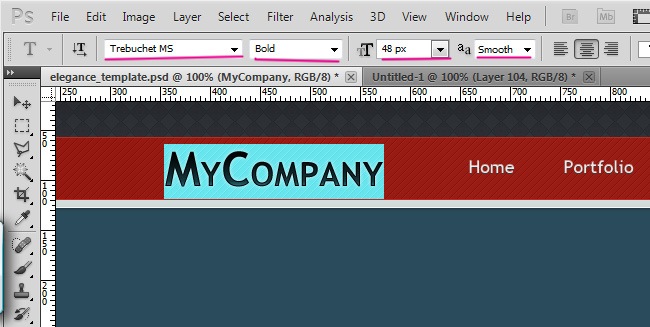
6. Working with text
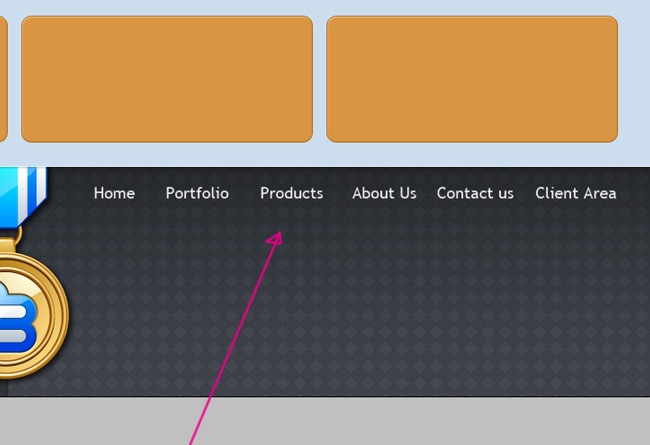
It’s time to add some text to our menu, we used a Trebuchet font for it.
Let’s add three different effects to our text: Drop Shadow, Inner Shadow and Color Overlay.
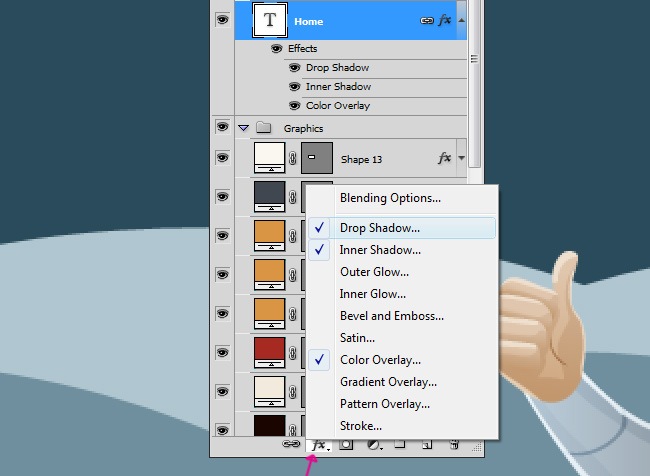
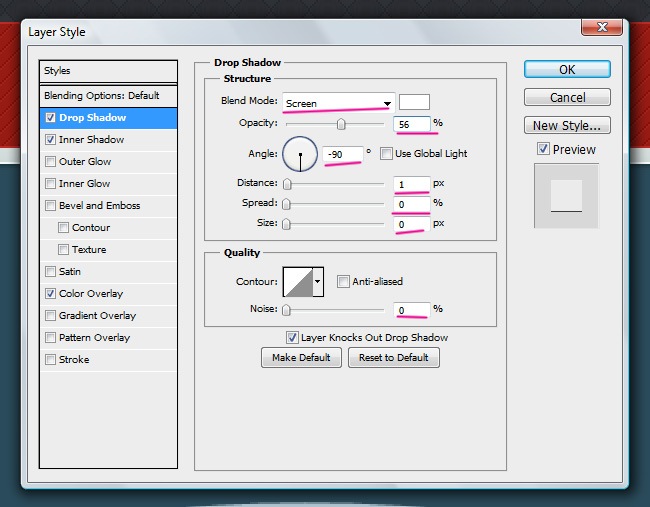
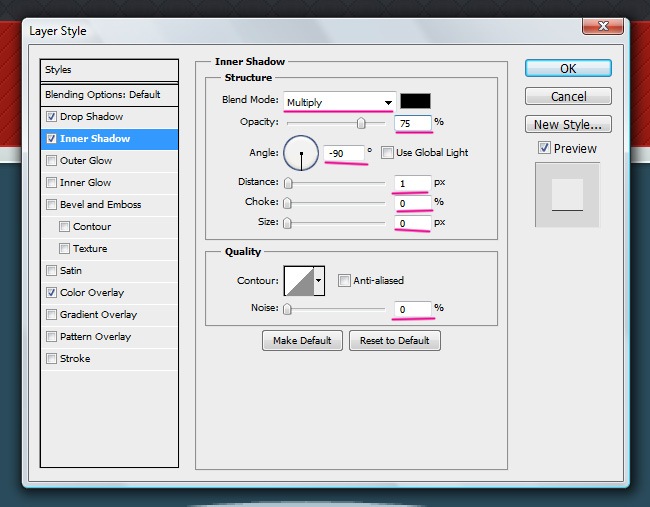
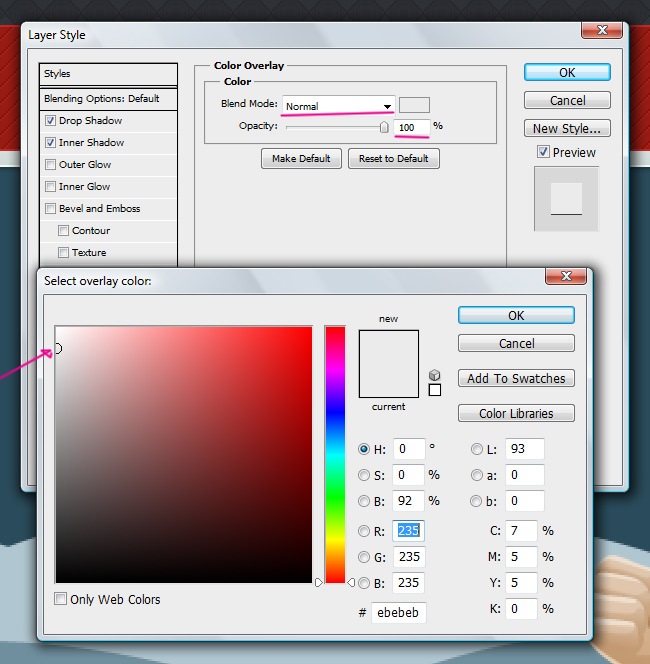
With these effects our text looks way more awesome than by just using a plain color.

Then duplicate the text several times and replace the text until you complete the menu.

And now you have to duplicate all the text and place them on the footer.
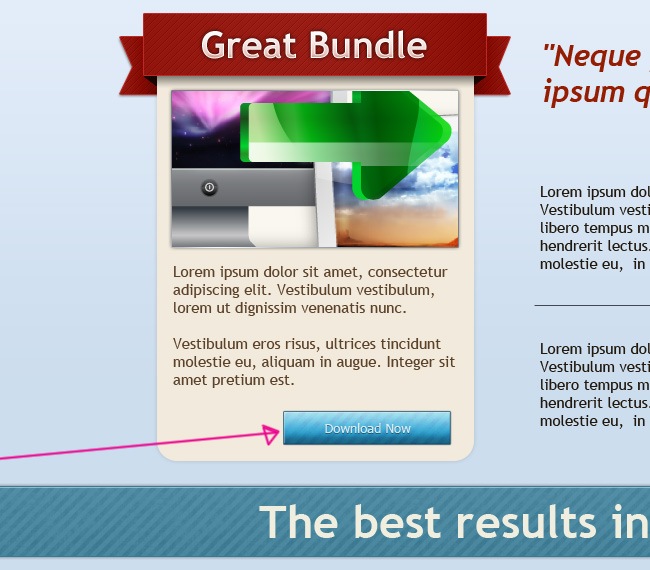
It’s time to call back the Rounded Rectangle Tool to create what actually works as the search bar.

Then fill it with a solid color.


And finally apply an Inner Shadow effect followed by Stroke.
With that our search bar is now looking pretty cool.
Now using the Rounded Rectangle Tool, create these two following objects.


Then fill with a solid color.
After doing this, you’ll have to implement two different effects: Inner Shadow and Stroke.
And with that we have completed these two elements.
Next to these two there’s going to be another object that you will have to make using the Rounded Rectangle Tool.
Fill the shape utilizing a solid color.
Then comes the effects’ turn, on this case let’s implement Bevel and Emboss, Gradient Overlay and Stroke.
Now our object has been completed.
It’s time to add all the texts, we utilized Trebuchet for almost everything, on the next screenshot you will see all the texts that we inserted without effects.

And now the ones with effects on them, let’s start with the Login text.

And simply add a Drop Shadow effect to it.
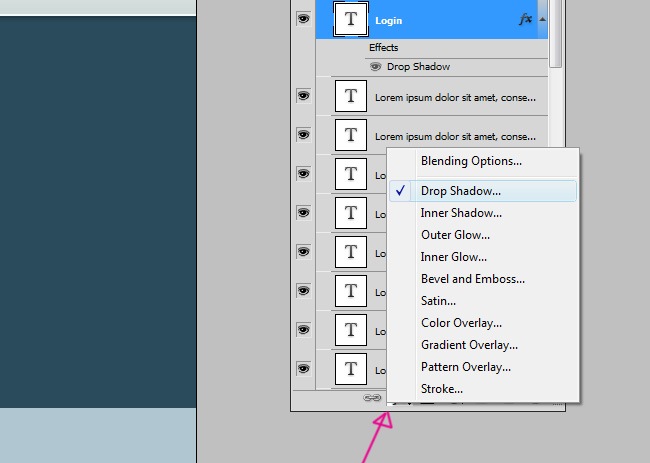
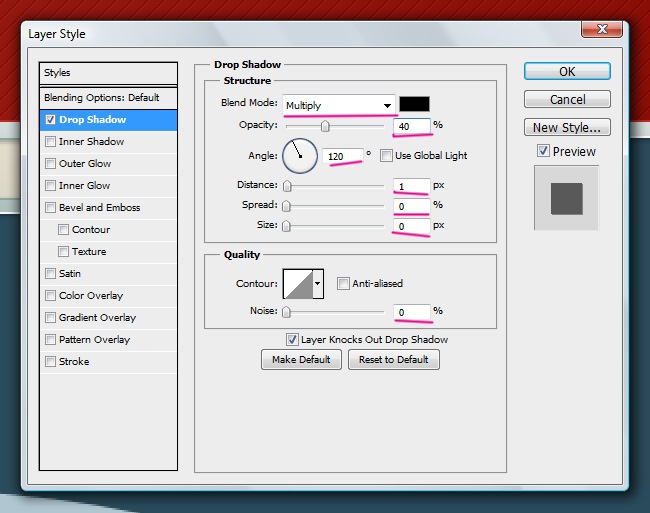
That’s all it takes for making the login text.

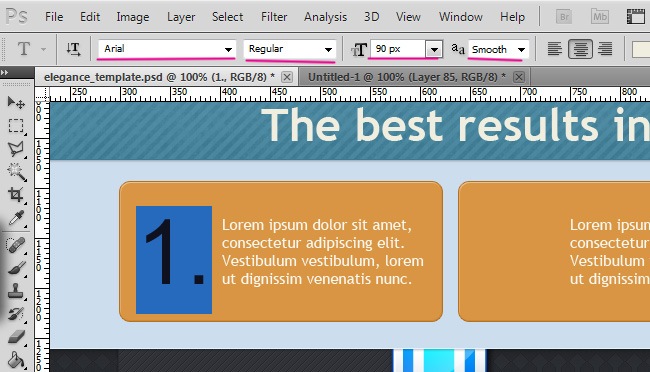
The next text is actually a number, type it using an Arial font, which no matter what is still one of the prettiest fonts around.
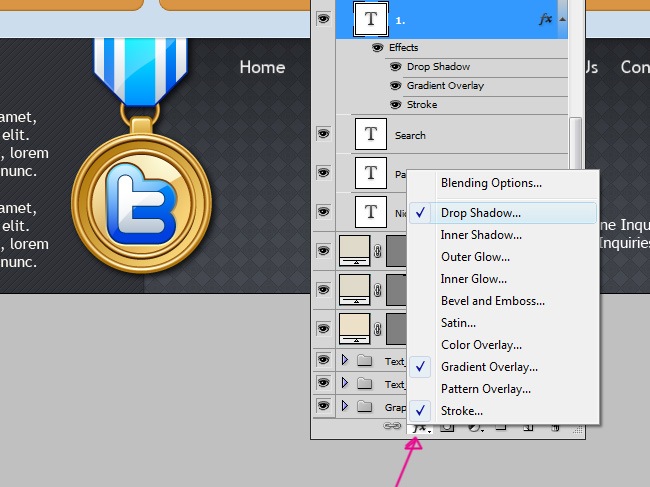
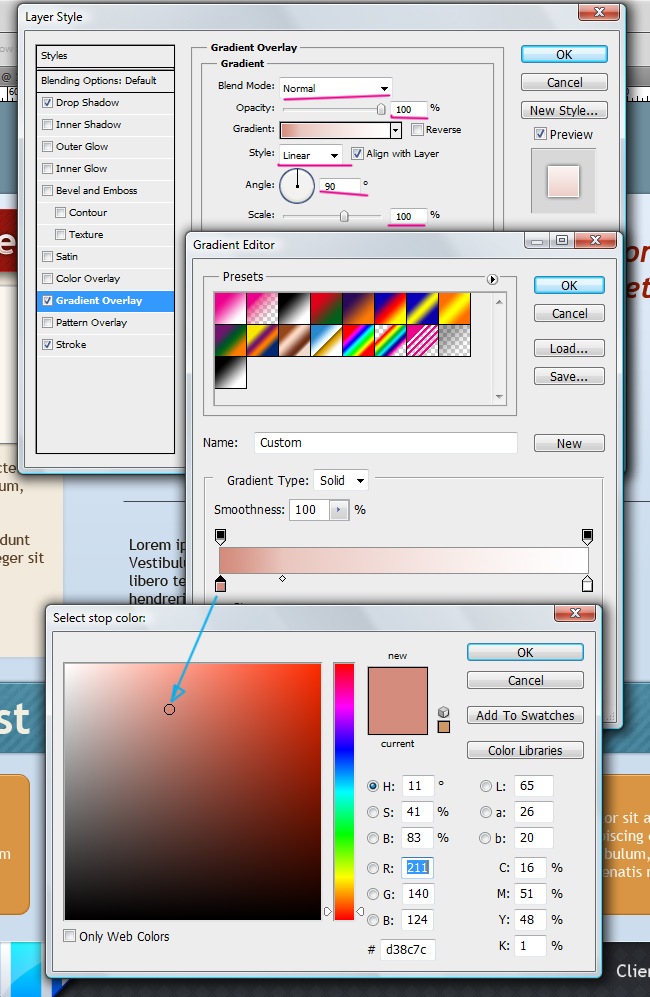
Regarding the style, let’s add the following effects: Drop Shadow, Gradient Overlay and Stroke.

Now duplicate the object twice and change the text for 2 and 3 respectively.
Once again, duplicate this text and place it where the next screenshot shows, then adjust the text properties.
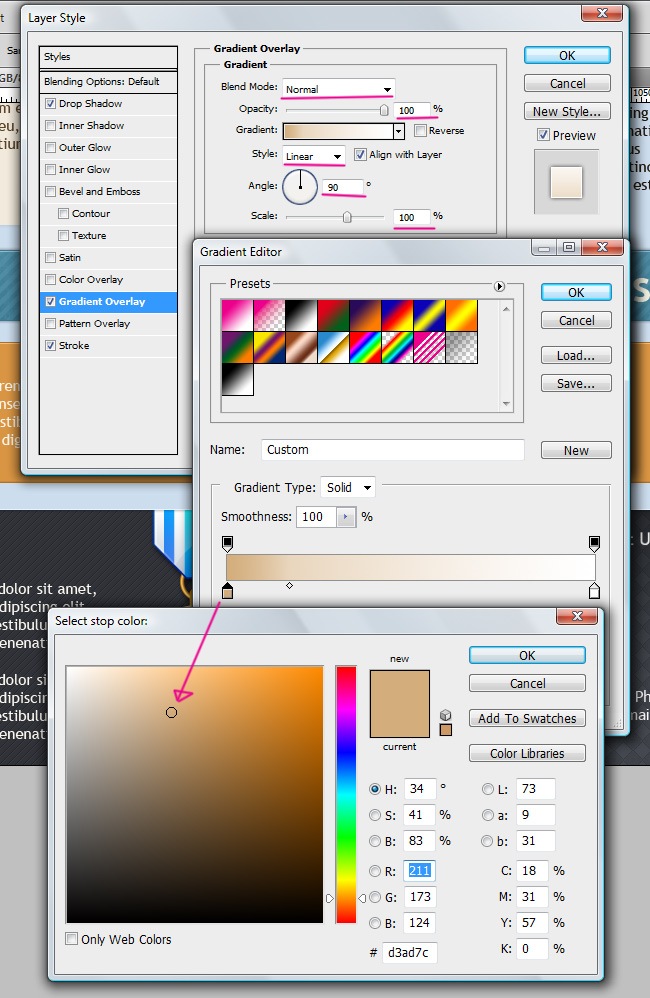
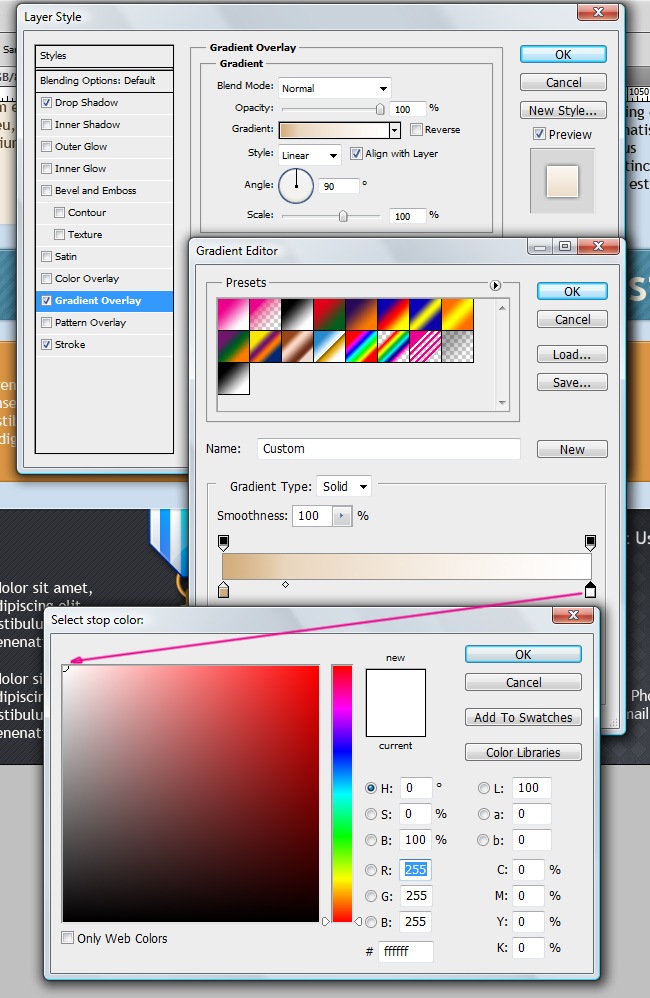
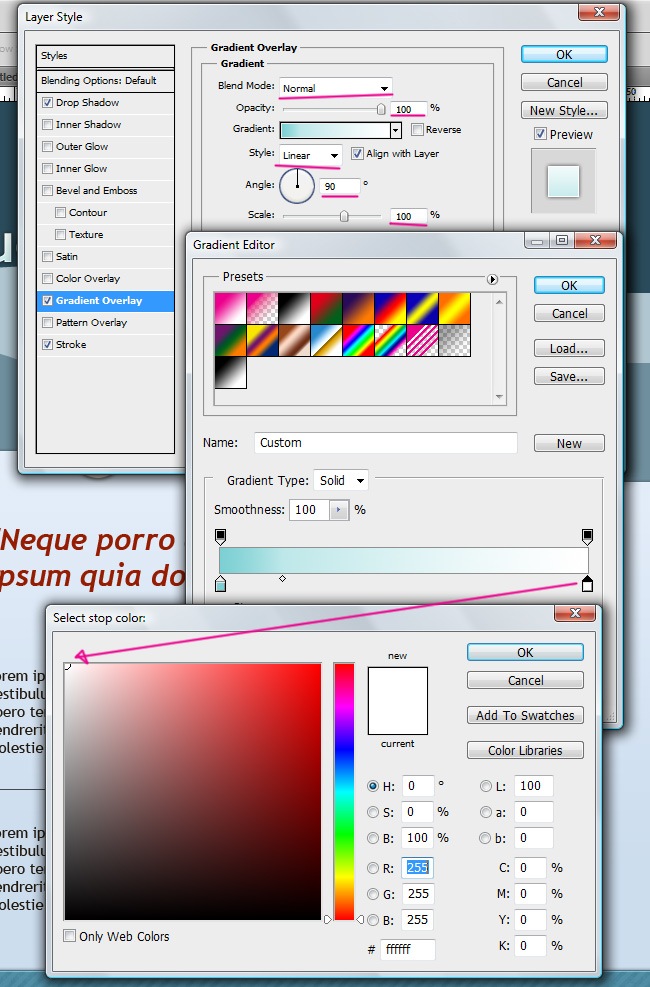
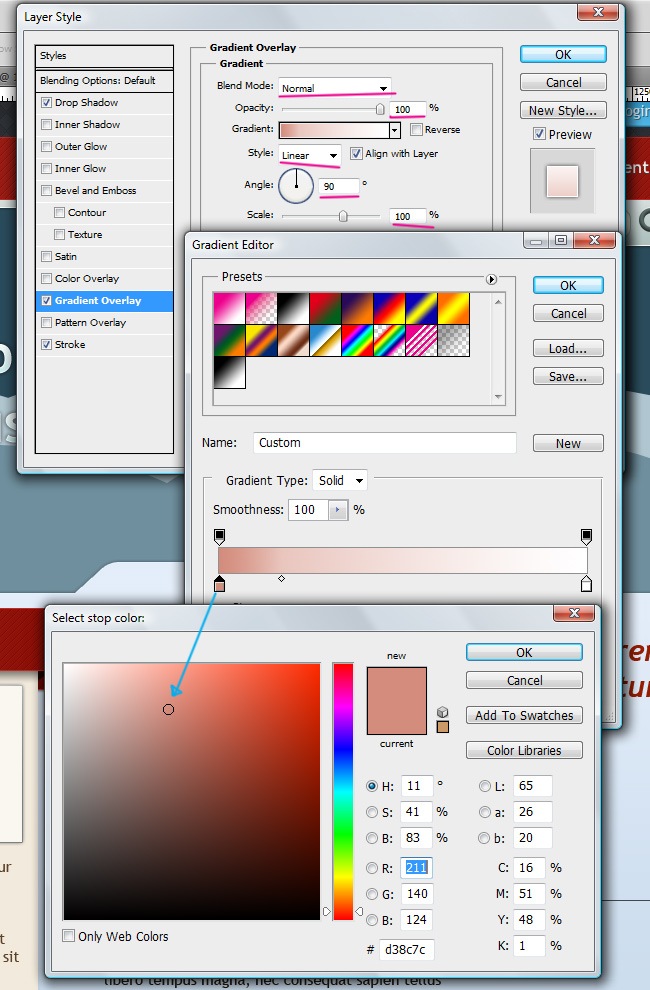
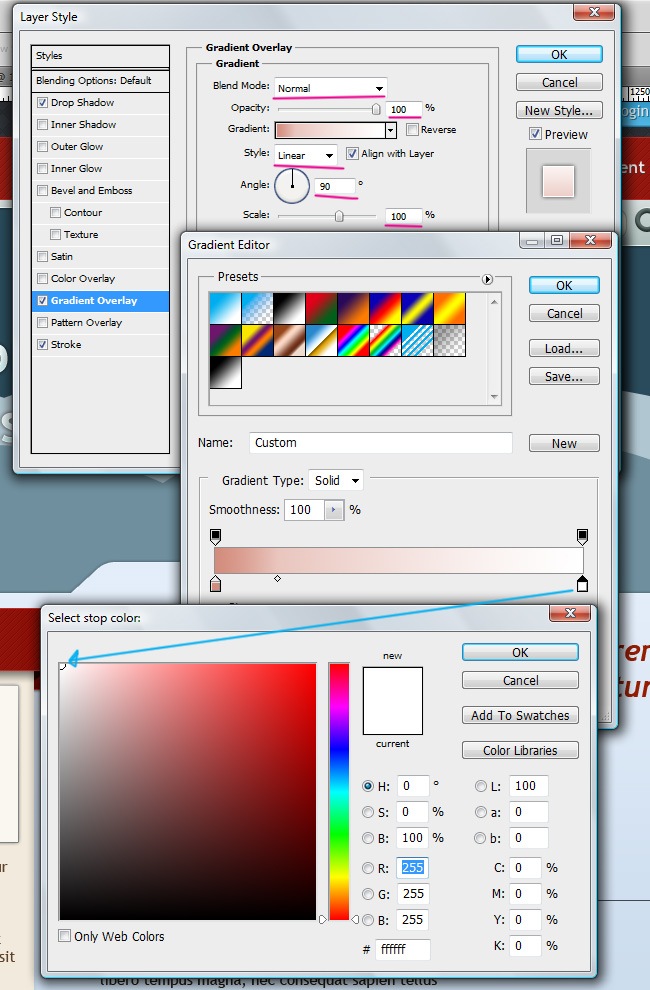
And the only thing that you need to change is the Gradient Overlay properties, so pay attention to these next couple of screenshots.
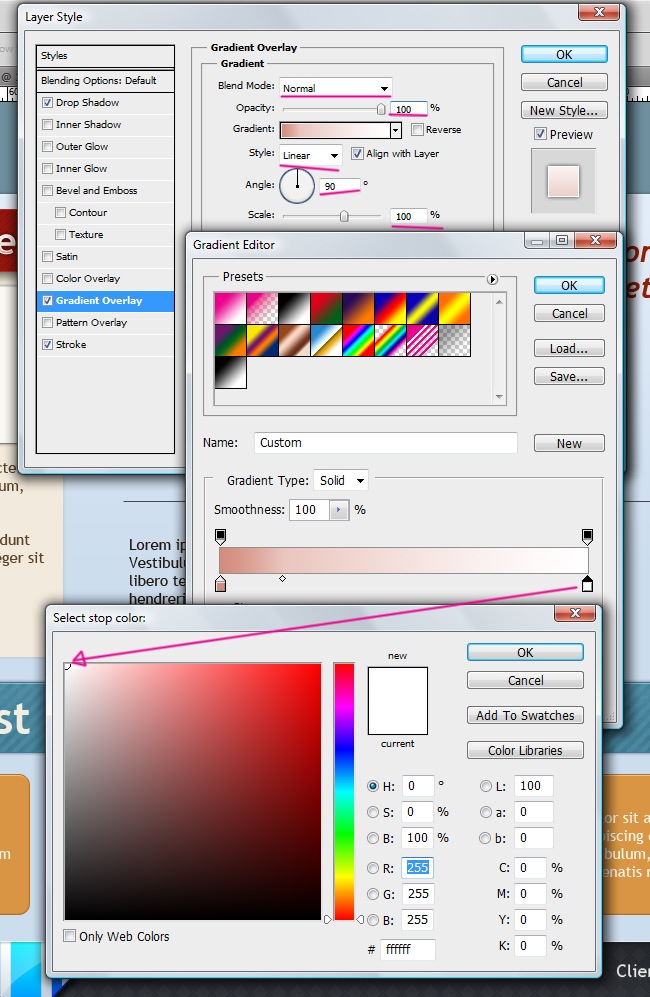
And the text looks awesome after making this adjustment.
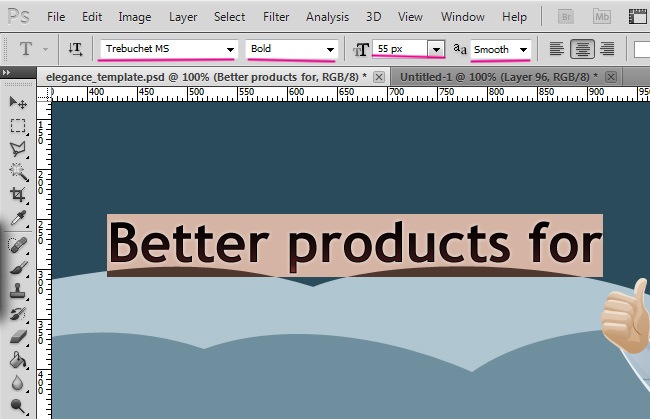
Again, duplicate this text and place it on the header, then adjust the font size.
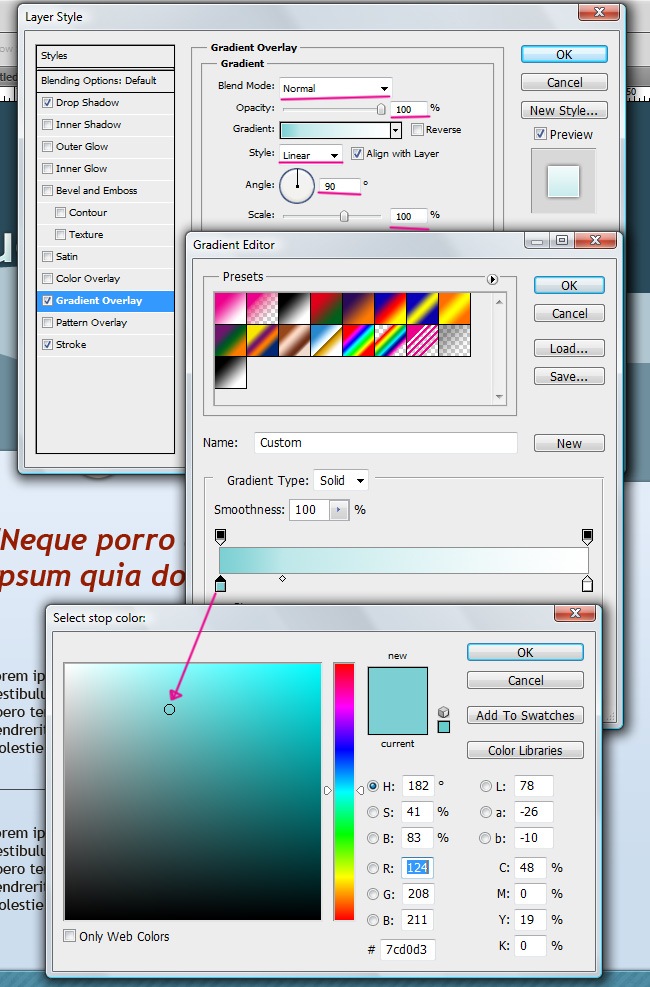
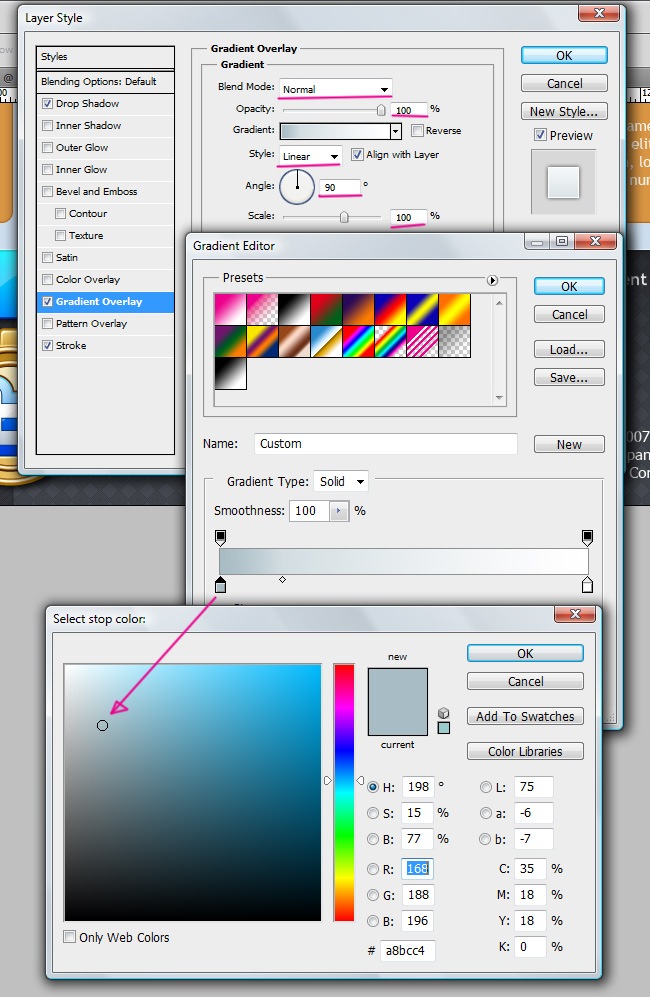
And as we did before, you need to adjust the Gradient Overlay properties.
Then duplicate the text and change its words, now you will have this:

One final duplicate and then we’re done with the texts, this replica goes on the Twitter section, after placing it, adjust the typeface properties.

And then let’s switch the Gradient Overlay parameters.
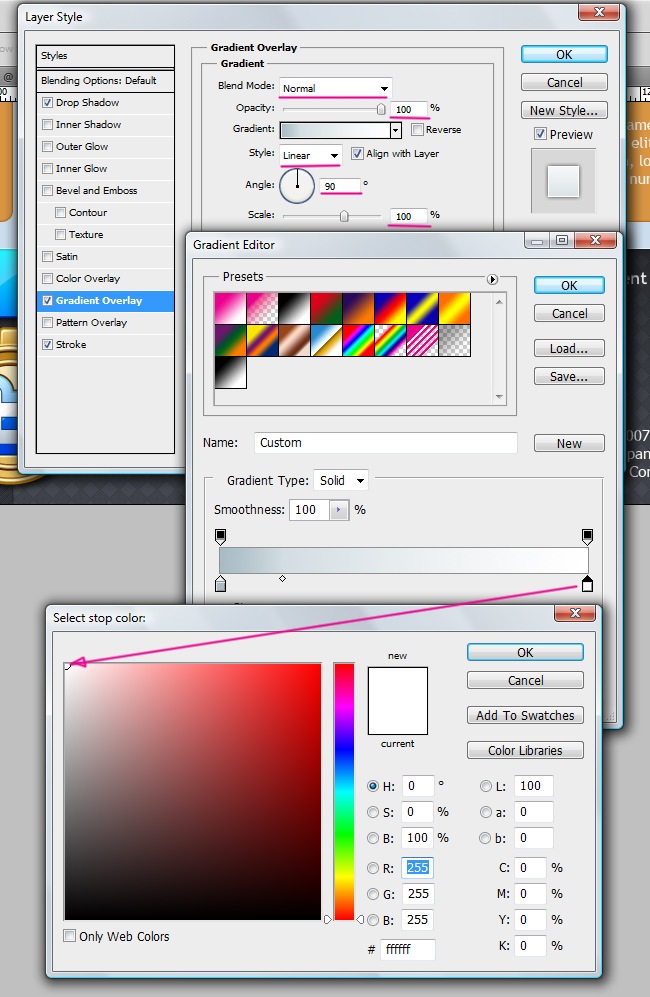
Awesome, we’re done with this text, let’s take a look at it.
And the final text is going to be the company’s name, just duplicate the latest text and then place it on top of the site.
Then as you might be thinking, we need to adjust the Gradient Overlay parameters.
7. Final details
We’re almost done with our template, there are basically 4 objects to work on before we finish, we’re now going to insert three different bitmap images from our library, you can copy paste the element if you’re currently working on it on a different program or go to File>Place and import it more professionally.
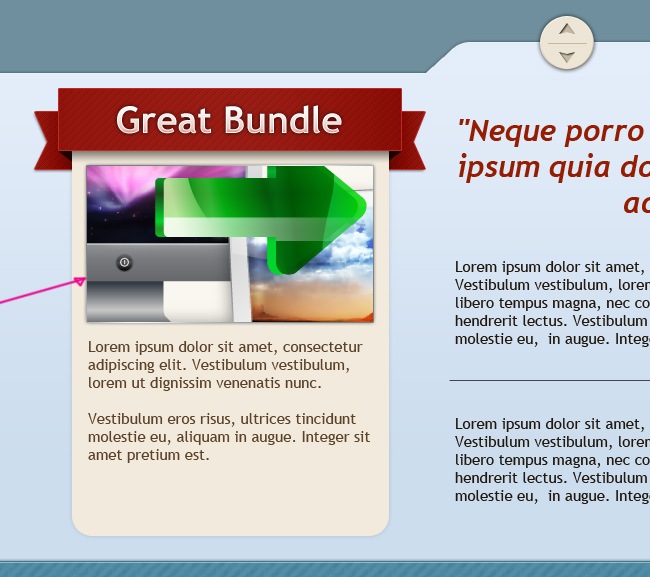
The first element that we’re about to insert is a nice mesh graphic from our archives.
Now a random picture inside the main box.
Now a nice house beach icon below the mesh that we previously inserted.

The last one is a smart object that we took from Illustrator, though you can easily make it in Photoshop following the tips that we have already provided to you across this entire tutorial.
And now our web template is officially set, let’s take a look to the fantastic job that we have accomplished while you pick up all those bags of chips that you probably ate during the process.
OK friends, now our tutorial has been completed, you have mastered your Photoshop skills both on the technical side and velocity, probably you spent much more time on previous tutorials and of course that the next tut that we’ll release will be a piece of cake for you. Don’t forget to visit us on Twitter to find our latest news and releases, thanks for visiting Tutorialshock, see you on our next post.